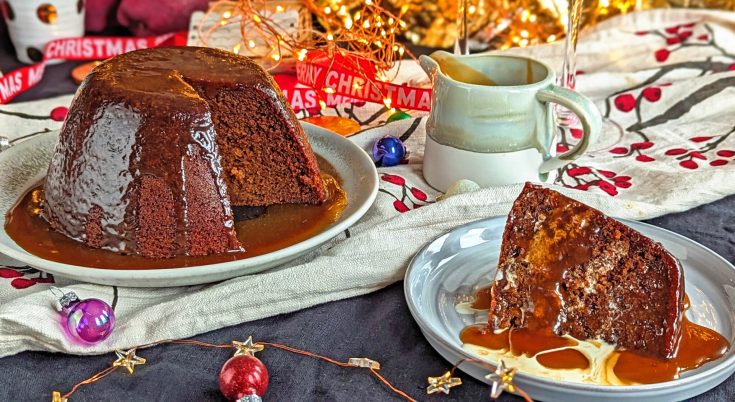
You NEED to try this gluten free sticky toffee Christmas pudding, it is sensational! The festive child of my original sticky toffee pudding recipe, baked into a Christmas pudding form and smothered with luscious toffee sauce.
I recently got chatting to a lovely lady called Angela, who told me they have this as her family’s dessert every Christmas. As someone who doesn’t like Christmas pudding, I thought it was a wonderful idea! And as Angela’s is not gluten free, I set about adapting my own recipe to fit the bill.

Pop a sprig of holly (with some foil wrapped around the stem) on top of your sticky toffee Christmas pudding, to really finish it off beautifully! I couldn’t find any in my garden this time, but next year I’ll be ready with the foliage :).
Can I Make This Ahead of Time?
It’s beautiful when freshly baked from the oven, but it does also reheat well. I was microwaving slices for a few days after baking this!
You could microwave the entire pud, to rewarm it slightly, or simply serve it as a cake them pour hot toffee sauce over the top.
The sauce can easily be made in advance, then stored in the fridge until needed. Simply microwave or heat in a pan to warm it up again.

What Should I Serve with This Sticky Toffee Christmas Pudding?
Vanilla ice cream, cream or custard would all be glorious additions to this pudding. Whichever you prefer!

Can I Make a Dairy Free Version?
I haven’t tried it, but I think it would work fine if you replaced the butter, milk and cream with plant based alternatives.
What Size Pudding Basin Do I Need?
A 900ml-1 litre earthenware or stoneware pudding is perfect for this. I have this one, which worked a treat, with no sticking.

Gluten Free Sticky Toffee Christmas Pudding Recipe
This recipe makes a lovely little sticky toffee Christmas pudding, which would serve about 6-8 people in one sitting. If you have any leftovers, simply rewarm them and enjoy in the days after Christmas.
As usual, you will find lots of step by step photos underneath the recipe, in case you need a visual guide. For any other help along the way or if you have questions, please do message me on social media (@myglutenfreeguide) or email me at laura@mygfguide.com.
If you enjoy this gluten free sticky toffee Christmas pudding recipe, please leave a review on the recipe card below and spread the word! It makes a world of difference to me :).
Thank you so much! Laura xxx
Sticky Toffee Christmas Pudding (GF)
A sensational and comforting alternative to traditional Christmas pudding. A soft gluten free date sponge, smothered with luscious toffee sauce.
Ingredients
- 130g pitted dates
- 60g unsalted butter, at room temperature
- 100g light brown sugar
- 2 medium eggs
- 35g treacle (or molasses)
- 140g gluten free self raising flour (I used FREEE by Doves Farm)
- 0.5 tsp xanthan gum
- 0.5 tsp bicarbonate of soda
- 0.5 tsp baking powder
- 0.5 tsp ginger
- 100ml semi-skimmed milk
- Pinch of fine salt
For the sticky toffee sauce
- 75g salted butter
- 50g dark brown sugar
- 50g caster sugar
- 50ml golden syrup
- 125ml double cream
Instructions


For more delicious desserts, why not try some of my other gluten free recipes:
Enjoy! Laura xxx