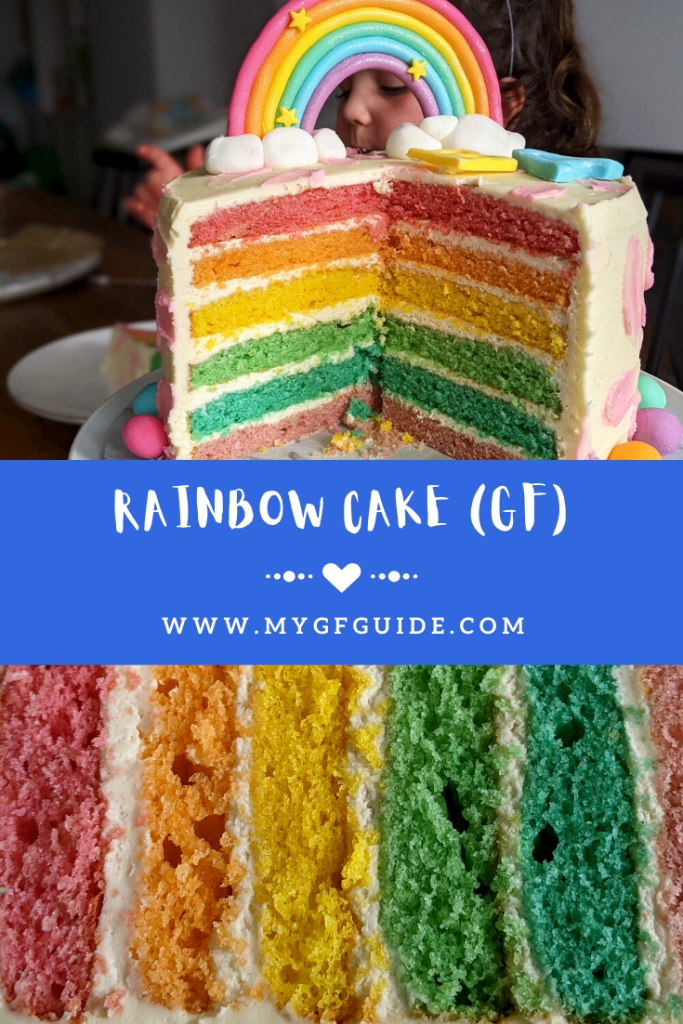
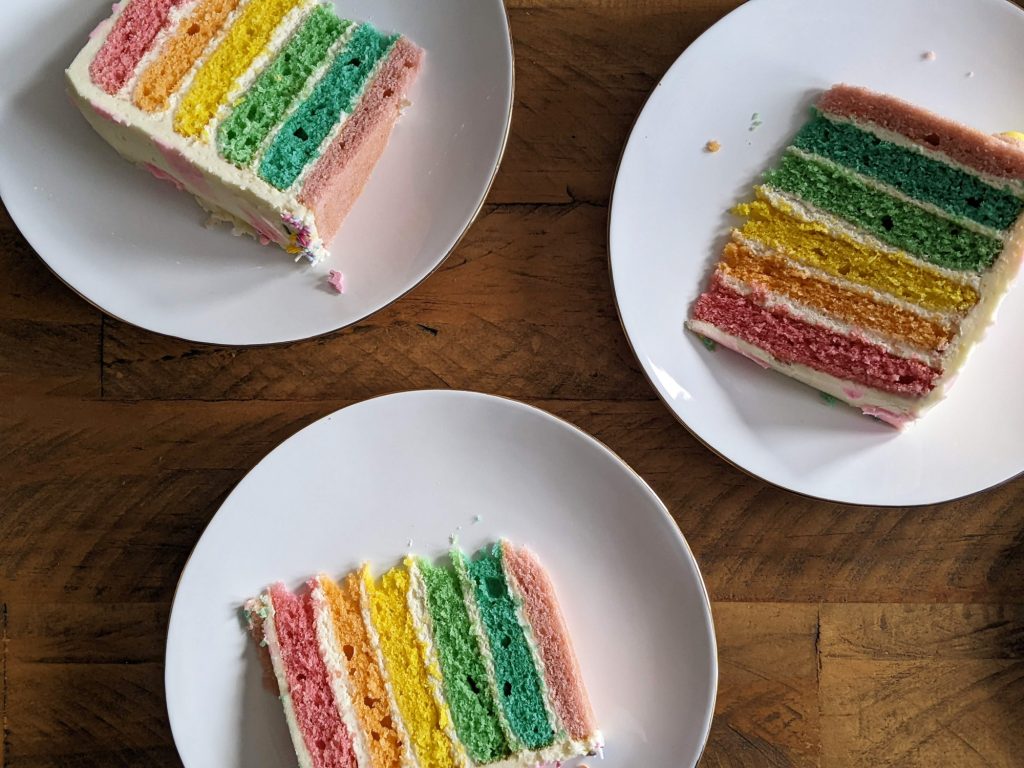
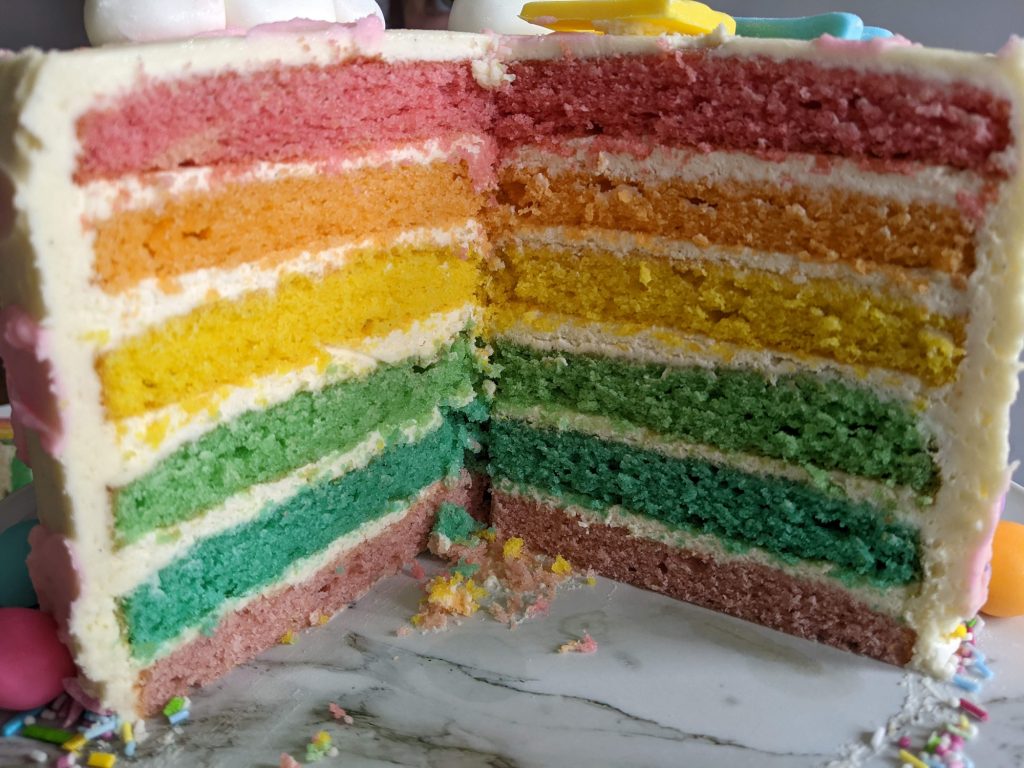
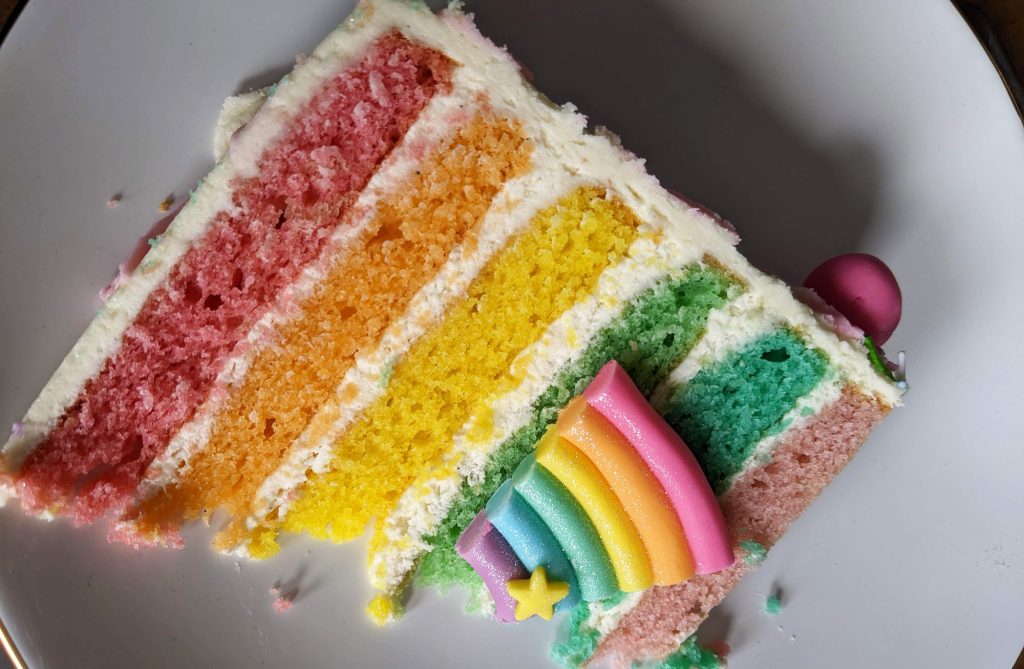
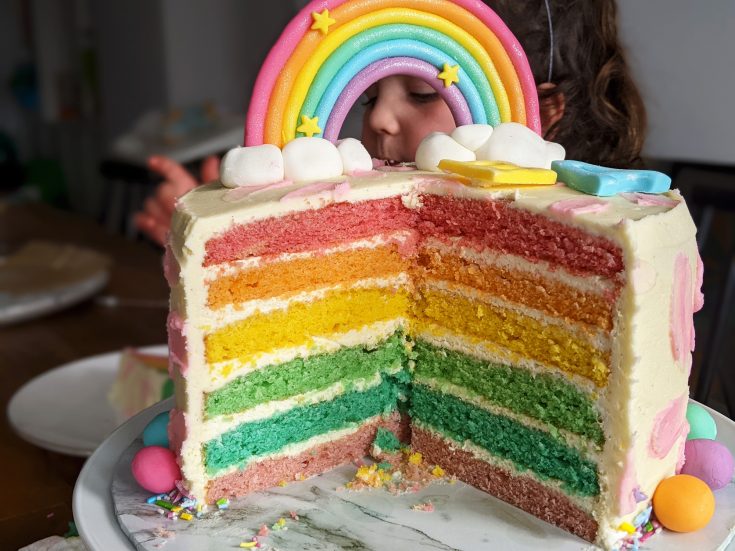
This gluten free rainbow cake is probably the best celebration cake I’ve made! Not only does it look beautiful, but it is gorgeous to eat. With pretty layers of soft gluten free sponge, sandwiched by vanilla bean buttercream.
My daughter is currently in a rainbow-loving phase, so I’ve been working on getting my rainbow cake just right. I’ve finally cracked it and this is a recipe I’ll personally be using for years to come.
And it’s such a lovely, soft cake that you can serve it to everyone. They will never guess that it’s gluten free, they’ll just know it’s one delicious-tasting, epic-looking party cake!
Top Tips For A Successful Bake
Stick closely to the baking times. The thin sponges bake quickly, and you want them to be perfectly baked rather than overdone. If you bake for too long, the sponge is more likely to be dry and crumbly, rather than soft and tender as they should be.
Then once fully cooled, wrap them up in clingfilm and store in an airtight contained until needed. This helps lock in the moisture and will prevent them from drying out.
How Should I Decorate It?
In this recipe I’ve detailed how to make the sponges and vanilla bean buttercream, as well as details on how to assemble the cake. Basically the perfect base for your decorations.
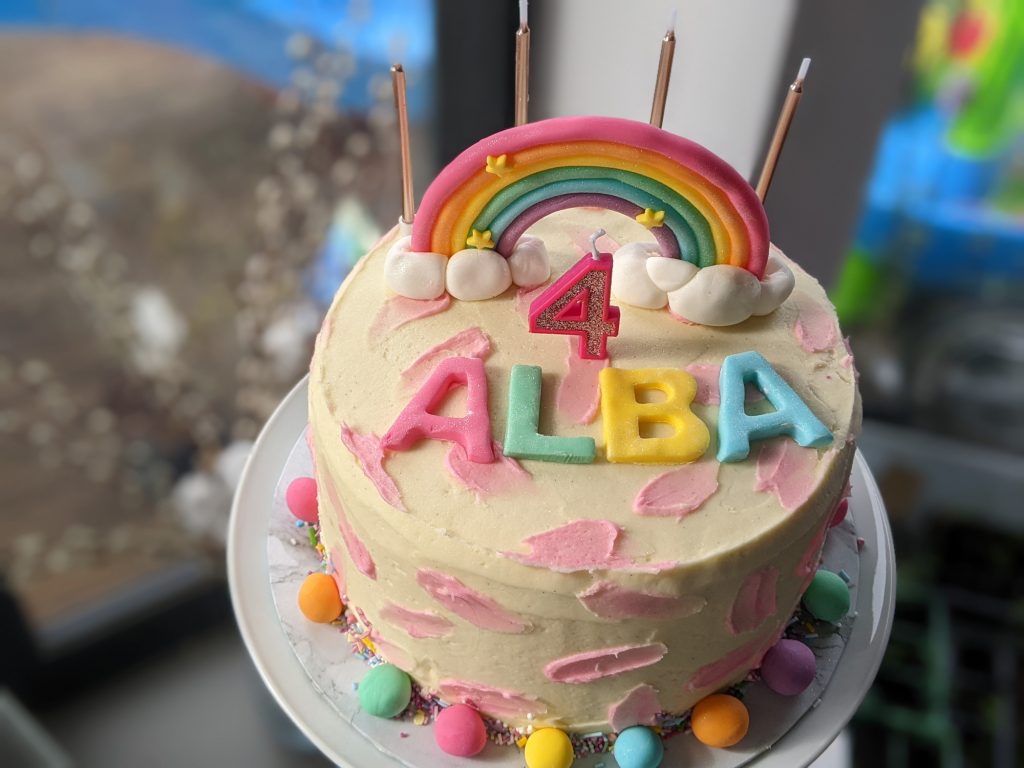
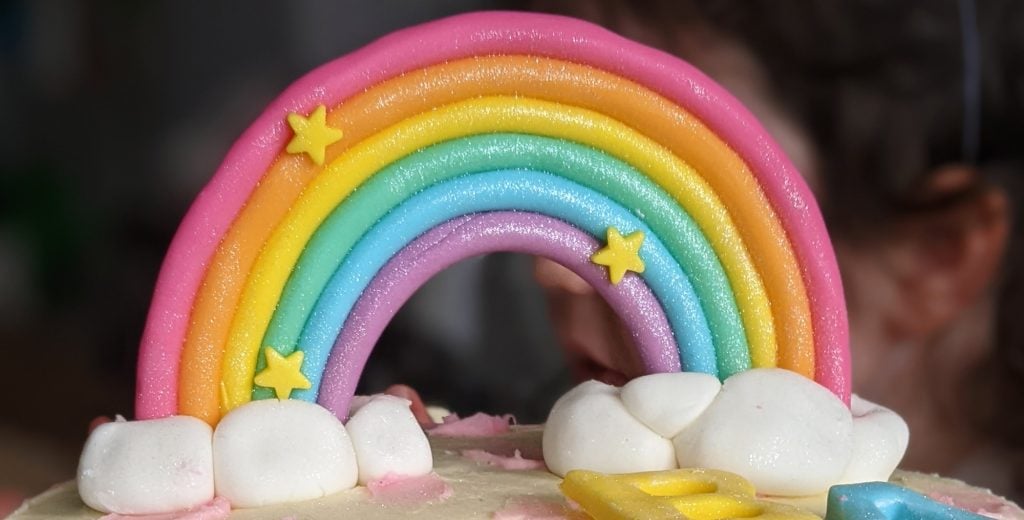
I made a fondant rainbow topper for my cake. It was actually surprisingly easy to do, following this Youtube tutorial video by Sharon Wee Creations. I used shop-bought fondant from Tesco and coloured it using the same food dyes as the base cake, to create a consistent colour palette.
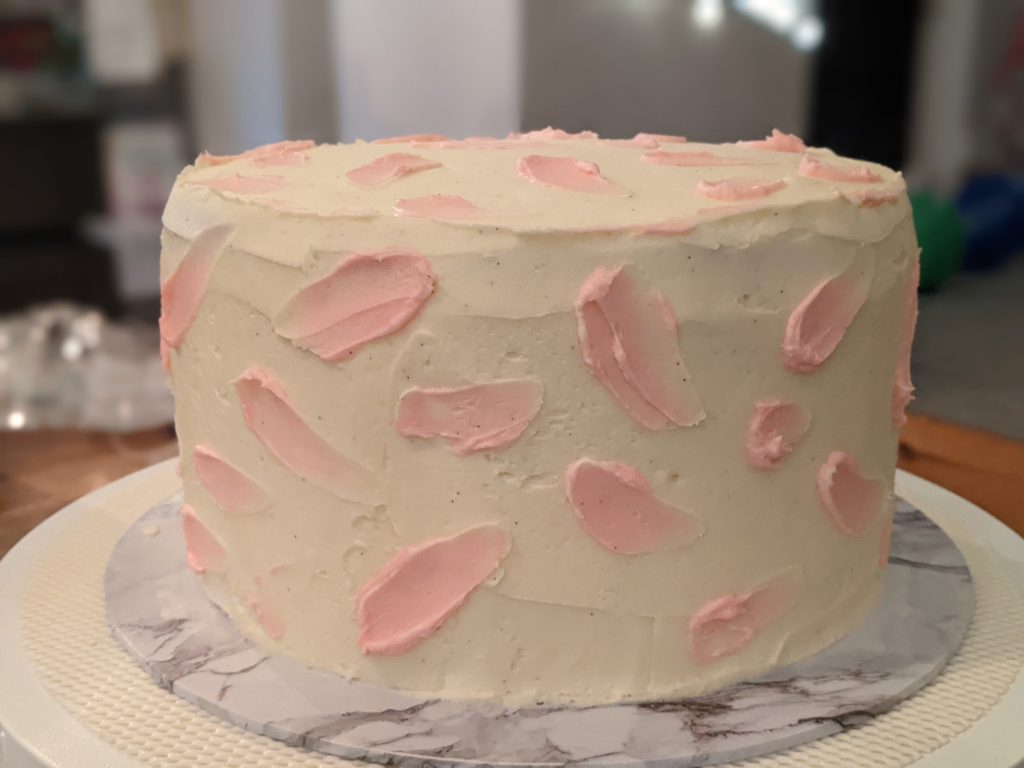
I use leftover rainbow fondant to make letters and the balls around the base of the cake. I also added sprinkles (be sure to use a gluten free variety) and some pink buttercream splats.
Which Food Colourings Should I Use?
Any are fine, just be sure to get a nice rainbow palette. The Dr Oetker ones, which you can buy in most supermarkets, gives a nice finish. I used this set from Amazon for my colours.
Can I Make It Ahead of Time?
Yes I made mine the day before. Follow the tips and tricks in my method to ensure your sponges stay perfect, then baking before is no problem.
I baked the sponges in the morning, decorated while the kids were in bed, then we all enjoyed it early afternoon the next day.
Ideally you can store it in the fridge, but I didn’t have space, so I covered it with a box (none of my cake tubs were big enough!) and placed in a cool room overnight.
Can I Make This Rainbow Cake Dairy Free?
Yes I have actually tried the sponge using the Stork Baking Block (which is dairy free) and it worked a treat. Then use a drop of plant based milk instead of cows milk.
As for the buttercream, use the same subs. The buttercream will be slightly softer so will not need to add any milk to thin it.
Gluten Free Rainbow Cake Recipe
This mega cake will serve about 12 people, but you can stretch it a bit further if you need. Simply cut thinner slices, as they are still tall so everyone will have a decent chunk of cake.
You will find the recipe for my gluten free rainbow cake below. Plus I’ve also added lots of photos underneath the recipe, to help make the method extra easy to follow.
If you need any help along the way or have questions, please do message me on social media (@myglutenfreeguide) or email me at laura@mygfguide.com.
Also, if you do enjoy this recipe please leave a review on the recipe card below – it makes a world of difference to me :). And/or send me photos of your finished bakes, I LOVE seeing your creations!
Happy baking!
Laura xxx
Gluten Free Rainbow Cake
A pretty rainbow cake that tastes as good as it looks, with soft gluten free sponge and vanilla bean buttercream. Perfect for parties and celebrations, this large cake serves approximately 12 people. Plus, it's so good that no one will ever guess that is it gluten free!
Ingredients
For the sponges:
- 450g Stork/softened butter
- 375g caster sugar
- 6 large eggs
- 1.5 tsp vanilla bean paste (you can sub vanilla extract)
- 1 tsp xanthan gum
- 3 tsp baking powder
- 350g gluten free self raising flour
- 100g ground almonds
- 2 tbsp milk
- 6 x different food colourings (the set I used is linked above)
For the vanilla bean buttercream:
- 400g unsalted butter (not Stork)
- 800g icing sugar
- 2 tsp vanilla bean paste
- 1-2 tsp milk
To decorate:
- Decorations of your choice. I made a fondant icing rainbow (tutorial linked above) and letters, some pink buttercream (extracted from the main batch of buttercream) and added sprinkles to mine.
Instructions
Making the Sponges (Can be done 24 hours before serving)
- Preheat the oven to 180C (fan). Grease two 20cm/8 inch non-stick cake pans with a little butter and line the bases with non-stick baking paper (if you have more than two tins then feel free to use more, I simply use two tins on rotation to make all six sponges).
- Cream the Stork/butter and sugar together using an electric hand whisk or stand mixer (or wooden spoon), for a couple of minutes until pale and smooth.
- Add the vanilla and then the eggs one at a time, working them into the mixture after each addition. If the batter looks like it has split, don't worry, once the flours have been added it'll revert to a nice smooth batter.
- Sift the flour, xanthan gum and baking powder into the bowl and tip in the ground almonds. Whisk or stir to combine until you have a smooth cake batter. Add the milk and remix to loosen the batter slightly.
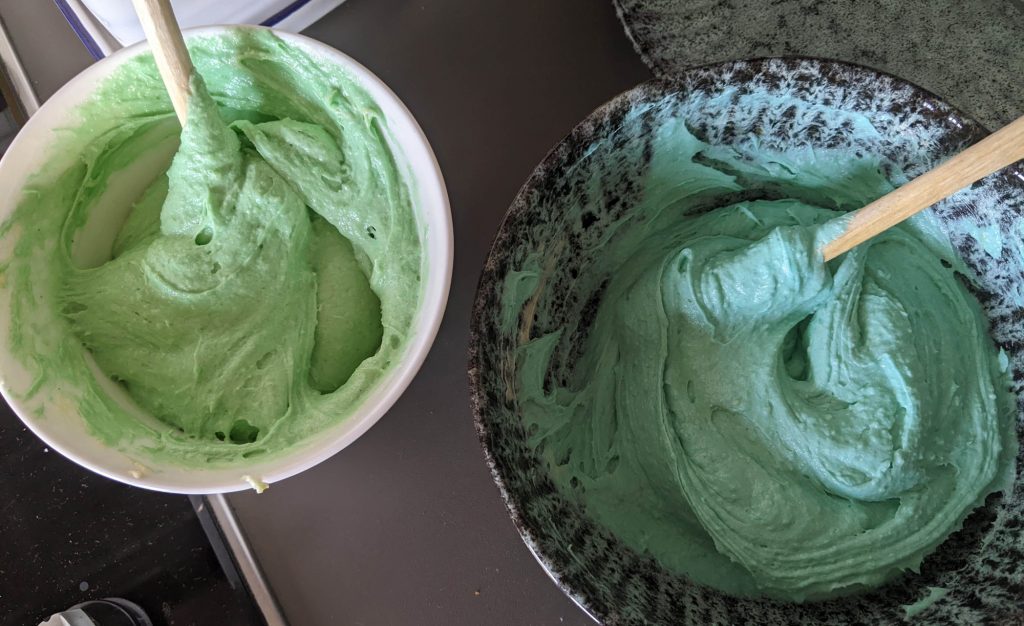
- Now we are going to divide up the batter, so we can create a different colour for each layer. Scoop approx 250-270g cake batter into a small bowl and add a couple of drops of food colouring. Stir and keep adding until you are happy with the colour. I find the colours develop during baking, so err on the lighter side if you want pastel sponges.
- Repeat this process with a second different colour.
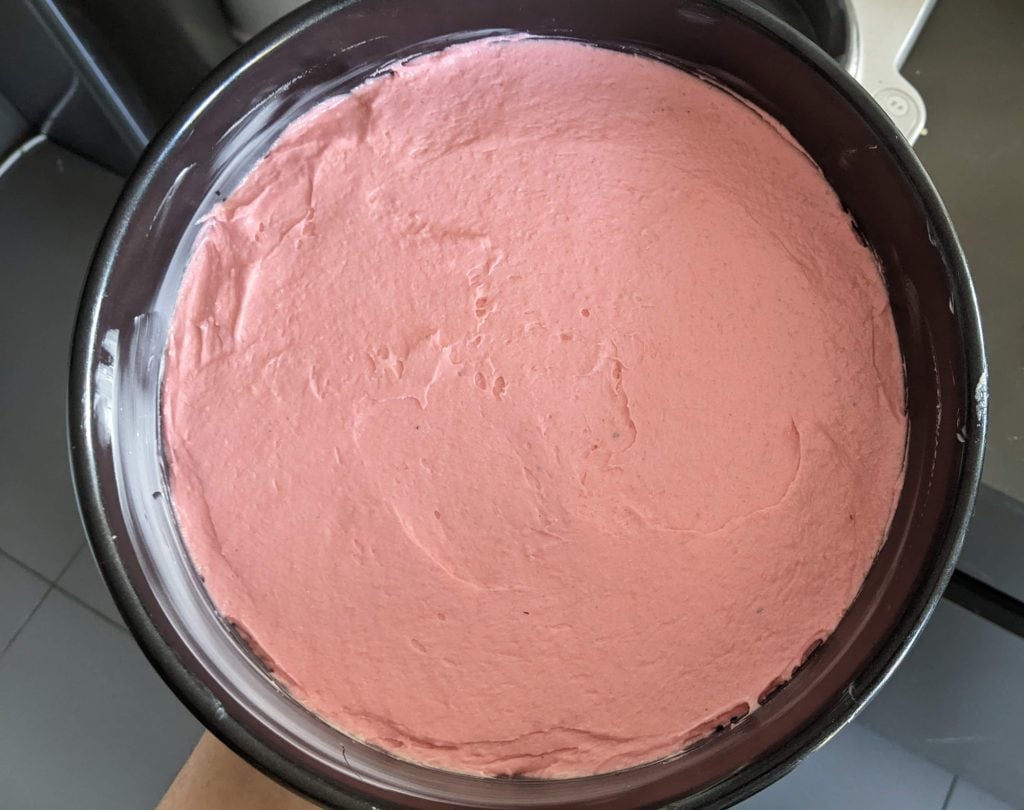
- Pour each coloured batter into a prepared cake tin. Use a small angled palette knife to spread the batter to the edges of the tin and smooth the top so they are fairly level.
- Transfer the tins to the oven on the middle shelf and bake for approximately 12-14 minutes, until your cake tester comes out clean from the centre of the cakes.
- While they are baking, you can repeat step 5 and prepare two more coloured batters.
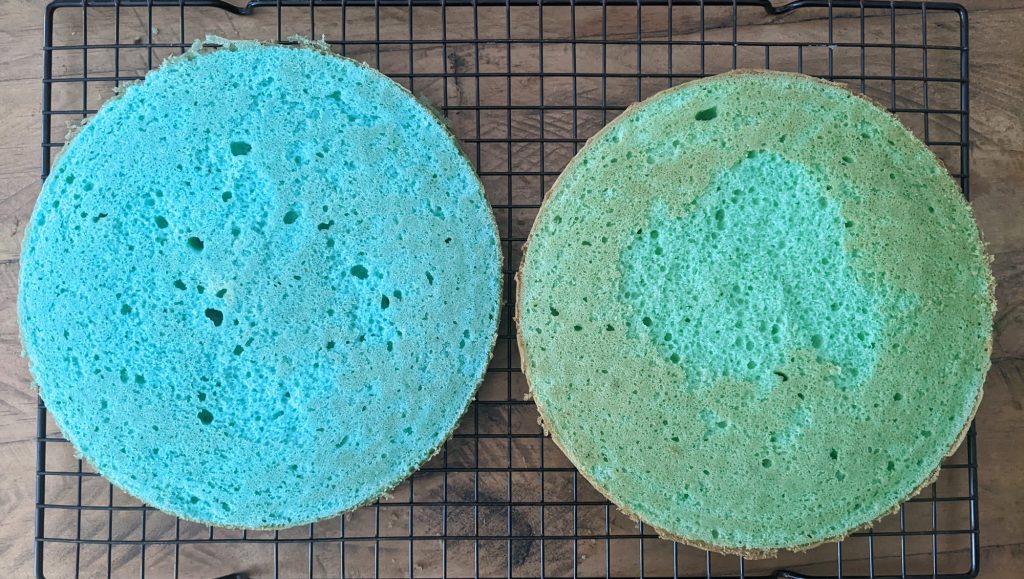
- Once the cakes are baking, ease a palette knife gently round the edge of the tin to loosen the edges, then carefully flip the cakes out on a wire rack to cool. Peel off the baking paper if it is still attached to the cake. Set the cakes aside to cool fully. Then onto the next sponges!
- If reusing the tins, give them a quick cool and wipe under a cold tap (ensure any crumbs are removed). Then regrease, add fresh circles of baking paper and add the two new coloured cake batters. Bake as before.
- Repeat the process for the final two layers, and you will end up with six lovely rainbow sponges. Leave to cool fully, then wrap each in cling film and place into an airtight tin until needed.
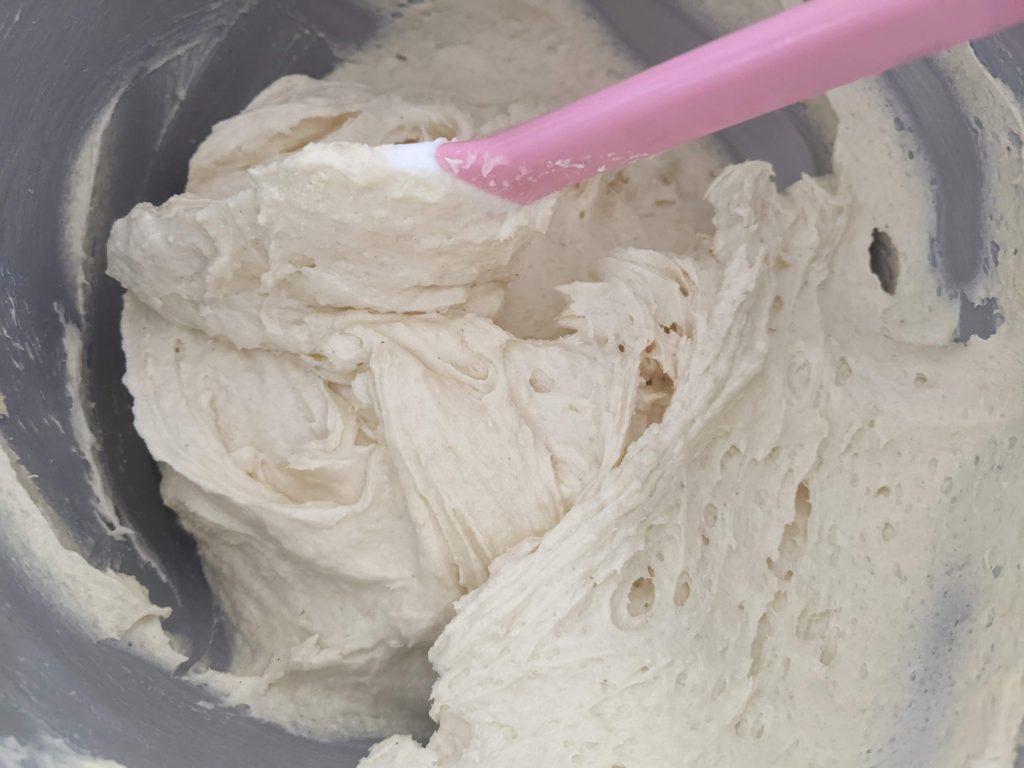
Making the Buttercream
- A stand mixer is ideal for this, but an electric whisk is also okay. Add the butter to a bowl and beat for a 5 minutes until it has turned from yellow to a paler, almost white colour.
- Add the sifted icing sugar and vanilla bean paste to the bowl. Mix well until smooth and creamy.
- If needed, add the milk to softened the consistency and beat again. This will make it easier to spread.
Icing the Cake
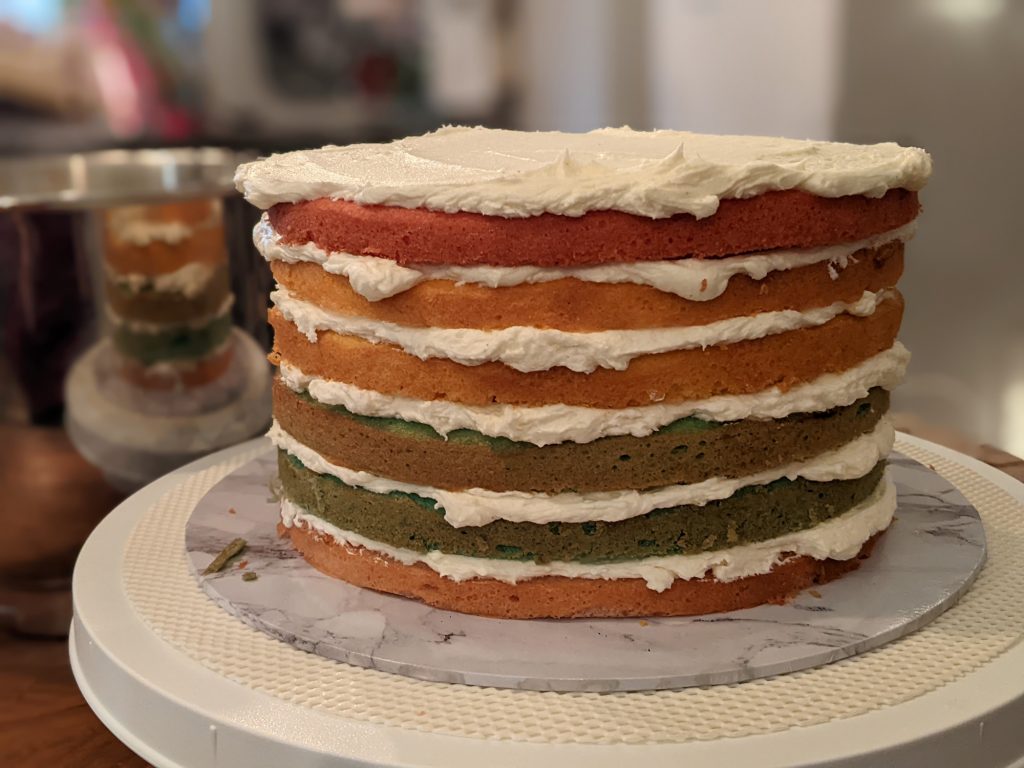
- Take your cake board and place a small dollop on icing in the centre, to help anchor the base sponge. Decide on the order of your sponges and place the first sponge on the board.
- Smooth a layer of buttercream on top of the sponge, then place the second sponge on top. Repeat until you have a stack of six sponges.
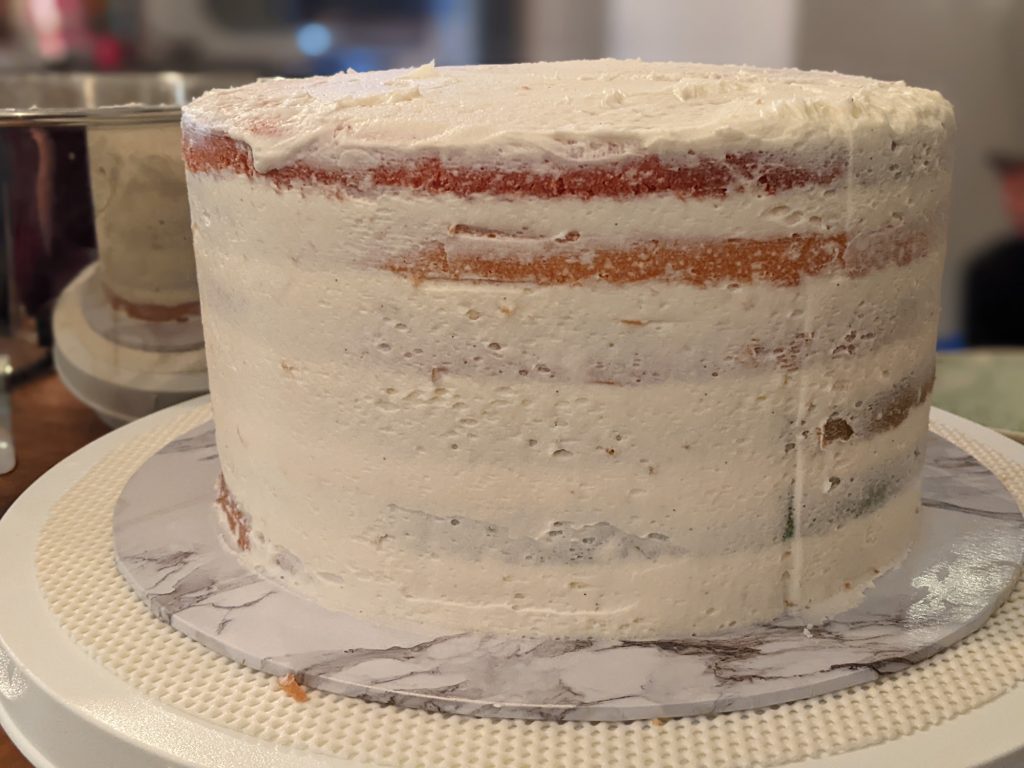
- I like to crumb coat the cake before adding the final icing. This helps to ensure you don't have any loose crumbs or bits of cake on the outside of the icing. To do this, spread a thin layer of icing all over the cake, top and sides with a palette knife.
- If you have a turntable and cake scraper, these are handy tools to use now, but don't fret it not, simply turn your board manually and use something with a long flat edge (such as the palette knife). Hold your cake scrape so it is just touching the edge of the sponge and rotate the turntable, scraping off the excess icing as you go. You're not looking to remove all the buttercream, you are simply giving it a nice even coating.
- Do the same with the top of the cake, to create a nice flat surface. Then pop the cake into the fridge to chill for at least 30 minutes.
- Once chilled, you can ice and decorate the cake, hooray the fun bit! Slather the cake with that lovely buttercream, or pipe if you prefer, to create your desired finish. Add toppers, sprinkles and other decorations until you have created your rainbow dream cake :D.
You can set the cake aside overnight now (in the fridge or in a cool place), or serve straight away. Enjoy!


For more celebration cake ideas, why not try some of my other gluten free bakes for size:
- Chocolate Celebration Cake
- Red Velvet Cake
- Epic Carrot Cake
- Vanilla Sheet Cake
- Double Chocolate Fudge Traybake Cake
Happy Baking! Laura xxx