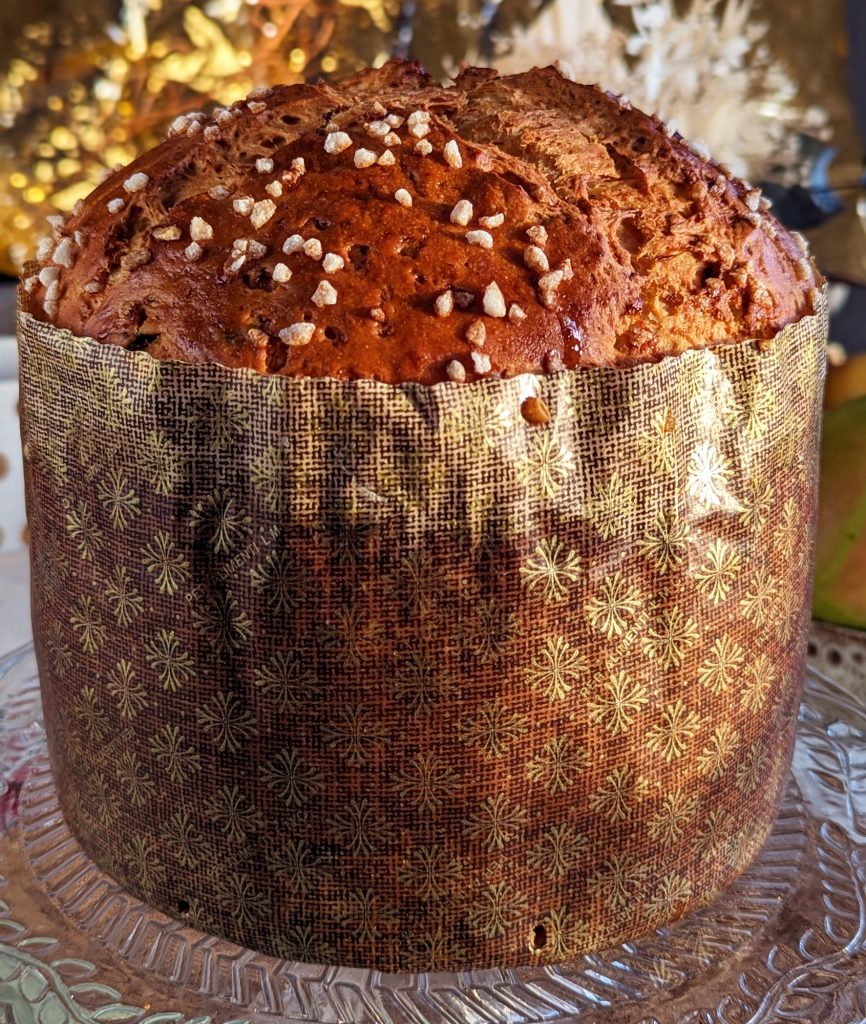
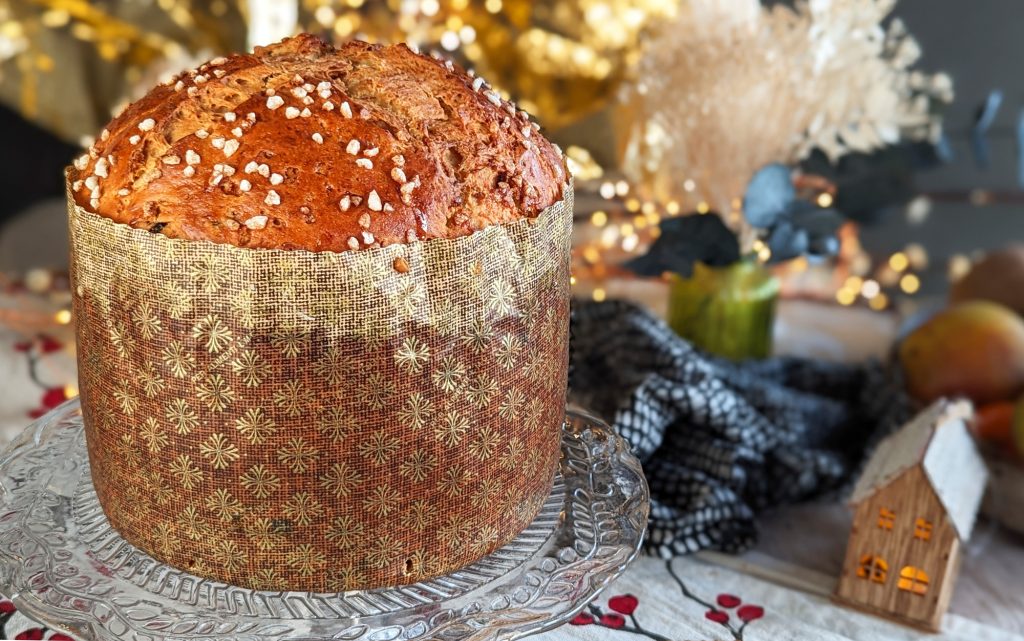
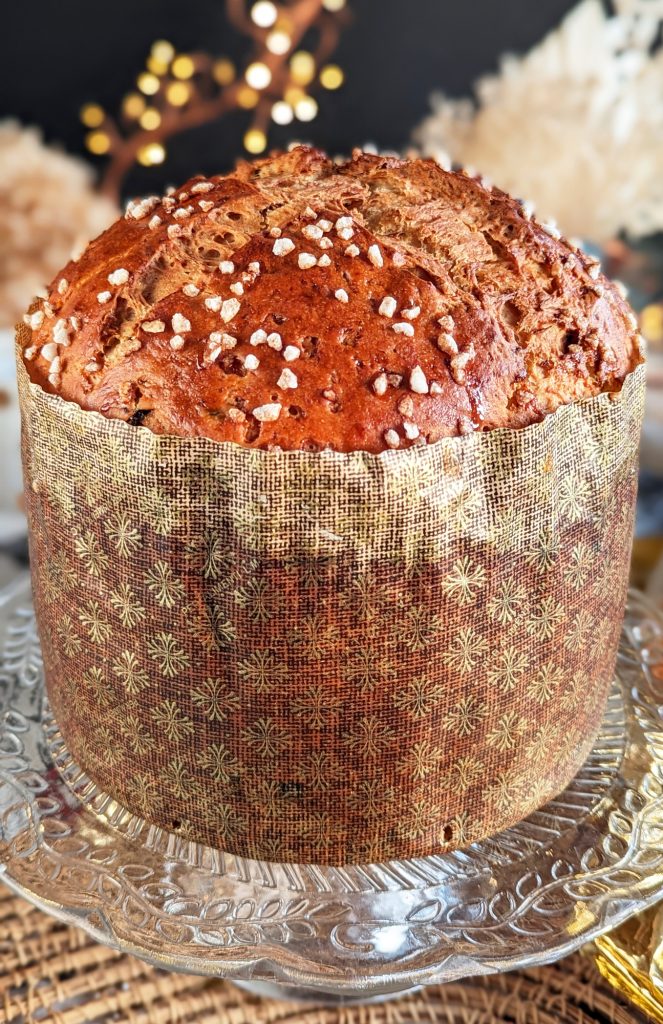
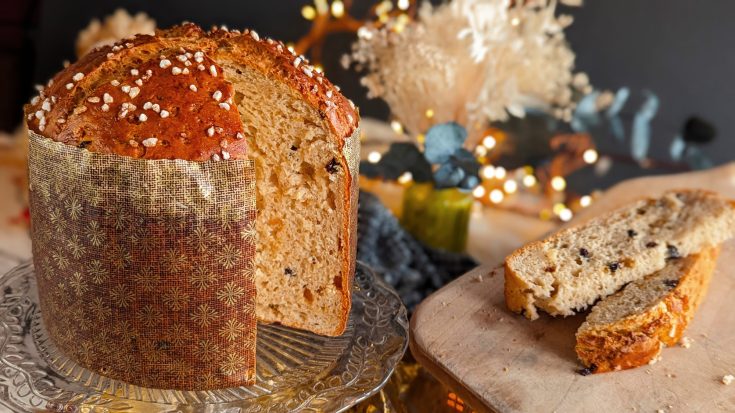
This gluten free panettone is an absolute joy to eat! Soft and fluffy inside with a golden crust outside, topped with sugar pearls. It is by far the best gluten free panettone I have ever eaten, and I was delighted to be able to bake this wonderful festive treat at home.
Panettone is the Italian equivalent to Christmas cake and is widely enjoyed during the winter months. In the UK it has also become increasingly popular and I always have constant coeliac FOMO when I see friends and family tucking into them.
While you can buy some gluten free panettone varieties in the shops, they are very expensive and small, and not always the best quality. The Schar and Carluccio’s ones are the best of the bunch, if you would prefer a shop-bought option. However, this homemade gluten free panettone is next level.
This gluten free panettone is one of the most delicious sweet breads I have had in an age (probably since I created my chocolate babka recipe!) and is worth the time investment it takes to make it.
While traditional panettone takes days to make, this is my speedy version. It has minimal hands on time, a couple of hours of proving and couple of hours for baking and cooling.
Do I Need Any Special Ingredients to Bake This Gluten Free Panettone?
Yes, you will need a couple of special ingredients. Although, those of you who bake my recipes regularly will probably already have these in your kitchen cupboards. And they are so handy to have.
If you are new to my recipes, know that I never use ingredients unnecessarily. And substitutions or omissions of ingredients will lead to very different results. So please stick to the recipe!
Mulino Caputo Fioreglut Gluten Free Flour
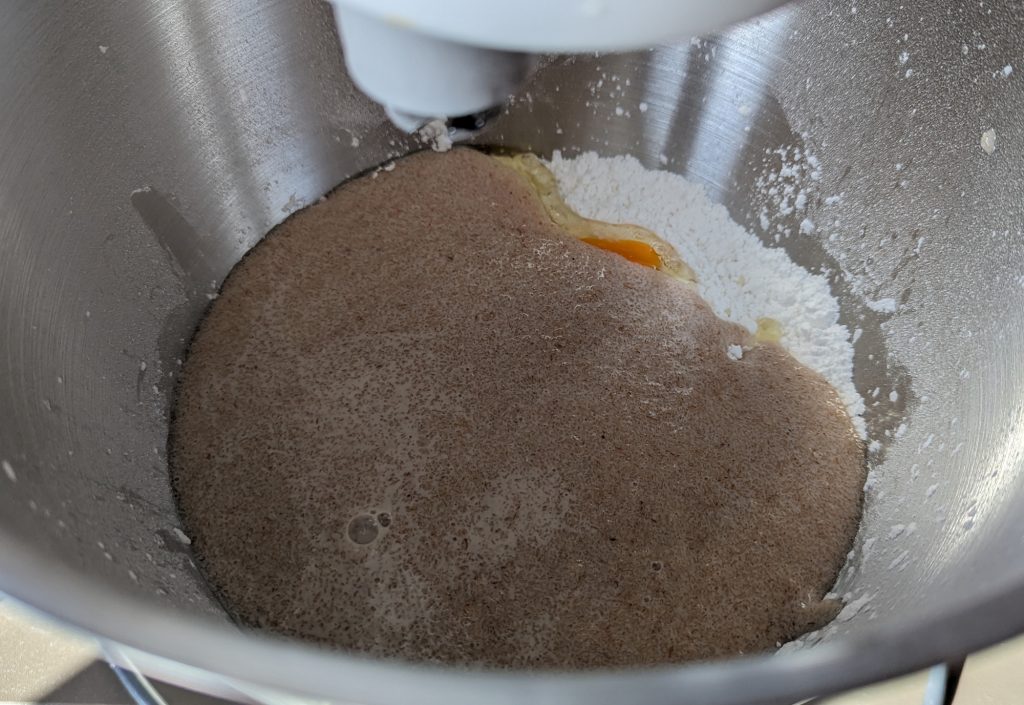
We are using Mulino Caputo Fioreglut gluten free flour as our base blend – it is an Italian gluten free flour, which is, quite frankly, magic when it comes to making gluten free bread. Gluten free pizza chefs across Italy use it, and I’ve developed a number of recipes using it now. Having discovered it’s wonderful properties.
Once you have this flour, you’ll find quite a range of recipes on my website that you can make: wraps, bread rolls, cinnamon buns, flatbread, pizza, a breadmaker loaf and chocolate babka.
One of the ingredients in this flour blend is codex wheat starch, also called deglutinated wheat starch. It is completely safe for coeliacs like me, as the gluten has been removed from it, and fully certified as gluten free. It’s actually one of the ingredients in the Juvela range too, which is prescribed by the NHS, so hopefully that serves as extra reassurance.
Wheat allergy sufferers, please note this flour is not suitable for you, as you cannot have codex wheat starch. This is suitable for coeliacs – read this article from Coeliac UK for more information.
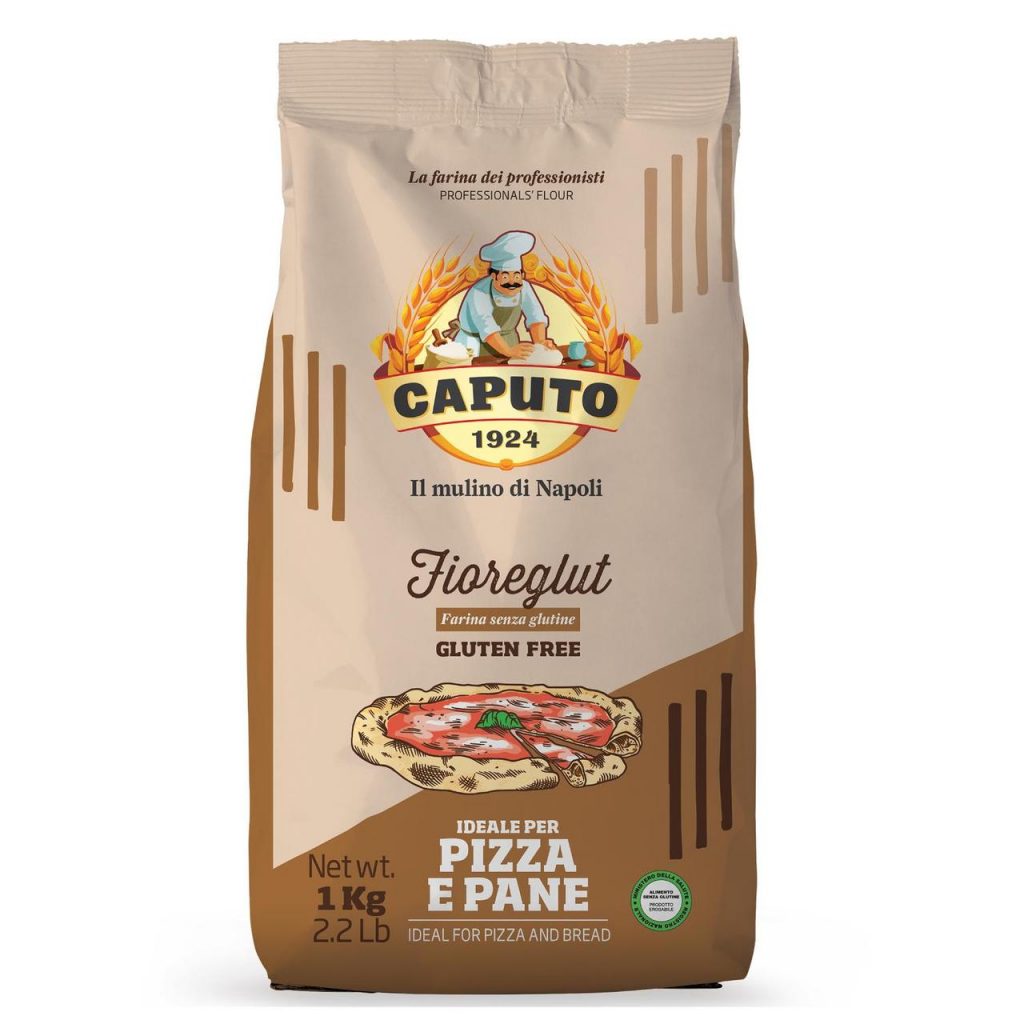
You can buy Mulino Caputo Fioreglut online from various retailers, I’ve linked Fifo, who I’ve found it cheapest with and who I generally buy from. If you want to buy a single bag, Ocado have also recently begun stocking it.
International readers, many of you have told me you’re able to purchase this online too. Search “mulino caputo fioreglut gluten free” on Google and your local stockists should pop up.
Psyllium Husk
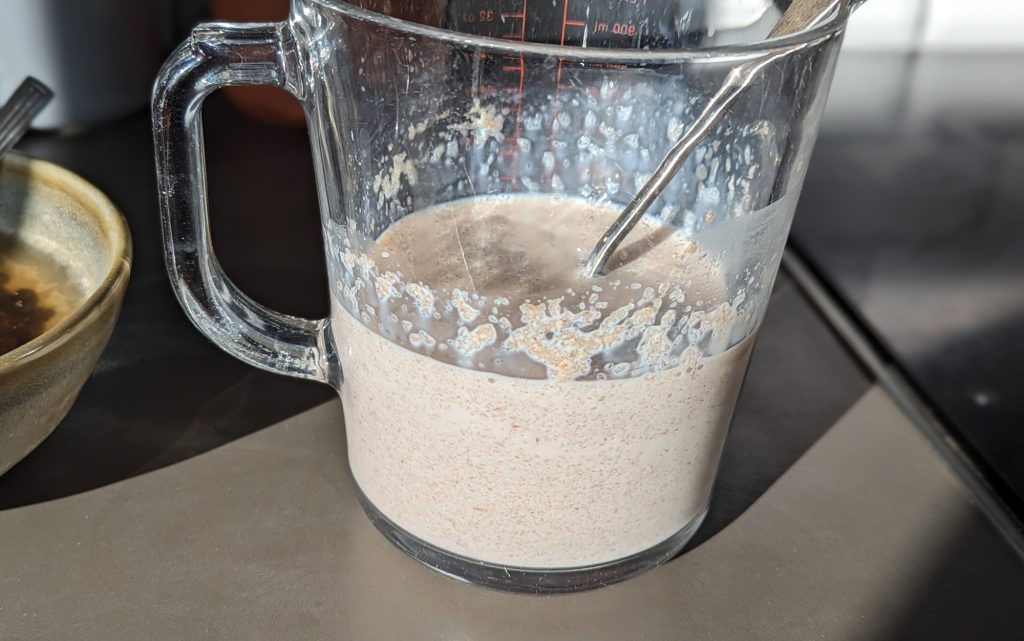
Then psyllium husk is another key ingredient, ensuring the dough stays really nice and hydrated and giving us beautiful softness and spring.
It is a naturally-dervived fibre and it helps to give flexibility to gluten free bread, acting as a binder and improving the final texture of your bake.
It’s a real magic ingredient for making gluten free bread. In my book Eat & Enjoy Gluten Free you’ll find a whole host a brilliant recipes using psyllium husk, including sourdough bread, crusty baguette and chewy bagels.
You can buy it online – this is my favourite brand (from a small coeliac-owned business). You need to buy whole psyllium husk, rather than the powdered variety.
Other Ingredients
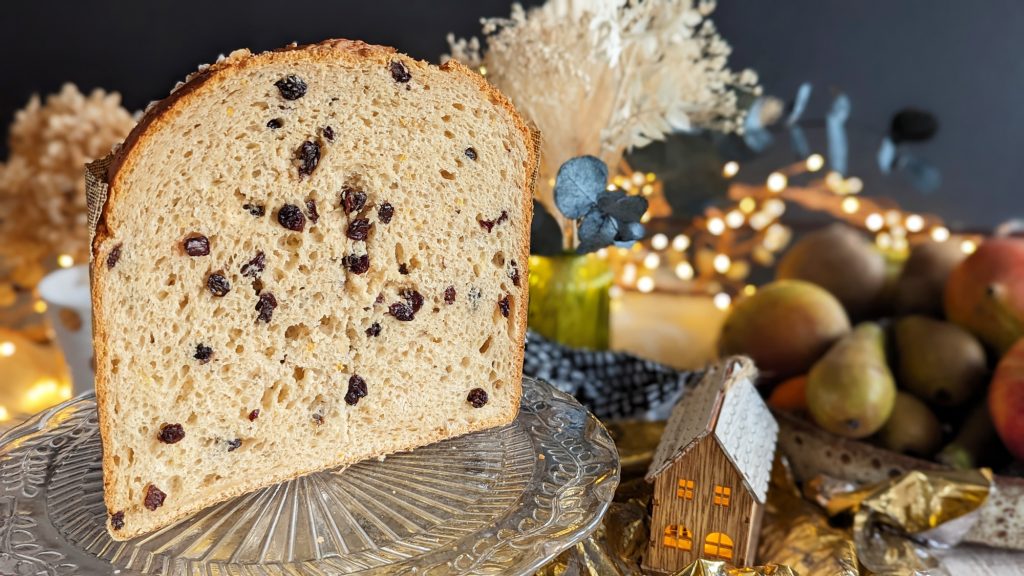
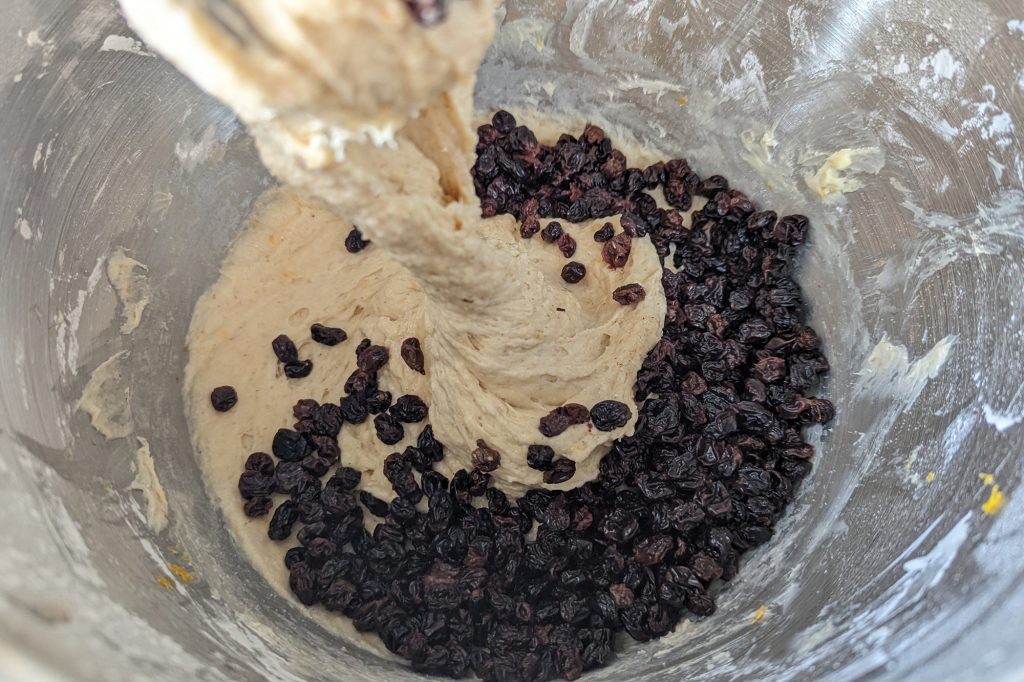
The other ingredients are commonplace baking ingredients: eggs, butter, sugar, salt and dried active yeast. Plus the addition of either vanilla/zest/fruit/candied peel or chocolate chips, depending on your preferred filling. You can also keep it plain if you prefer.
Do I Need a Panettone Tin?
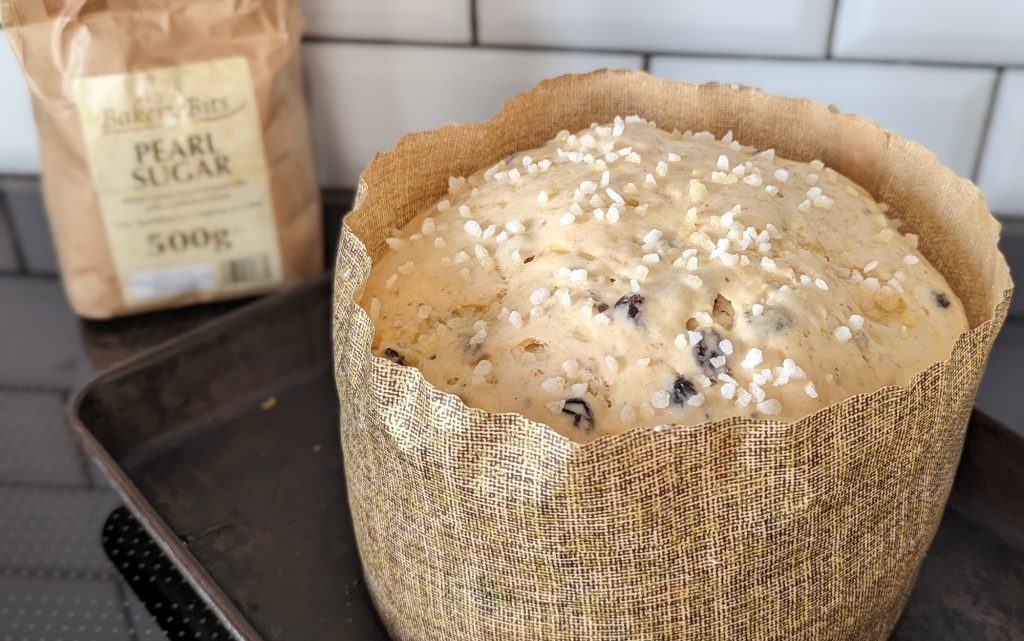
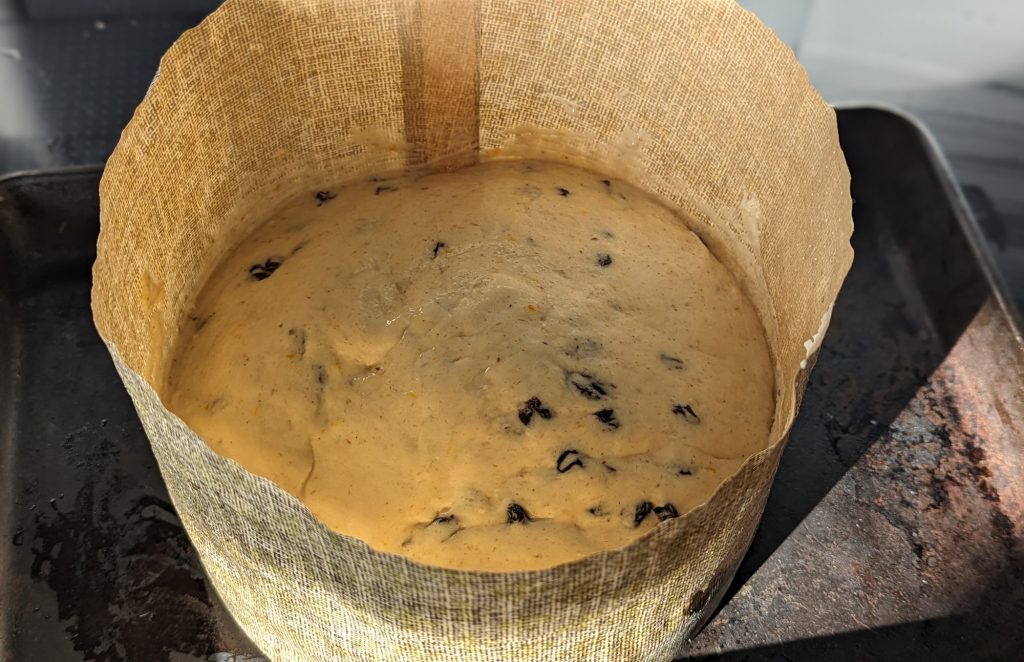
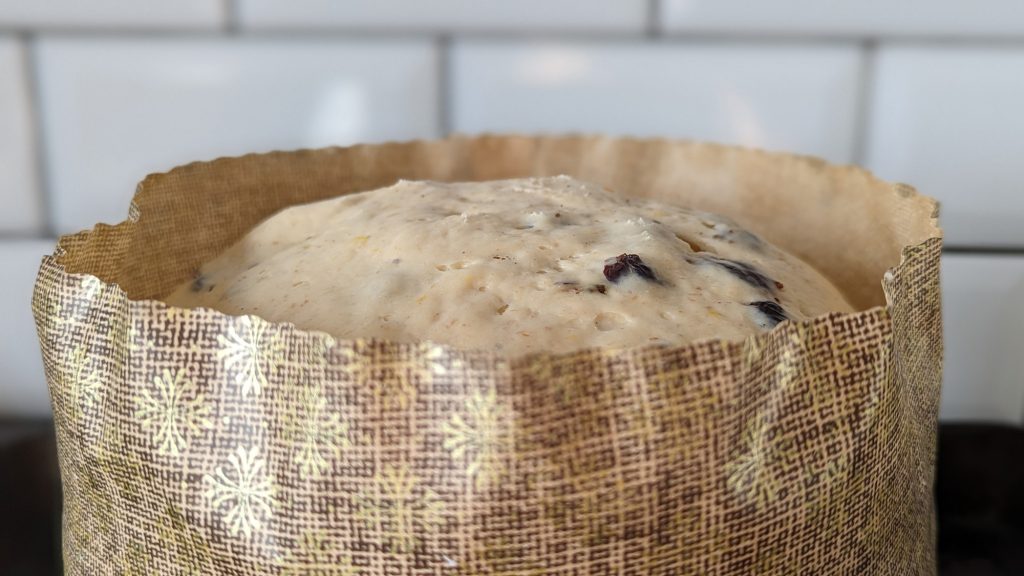
If you have a panettone tin, then feel free to use it, but I’ve simply used 1kg panettone cases. These are widely available online or in shops like Lakeland. I ordered mine from Bakery Bits, which I found really good value.
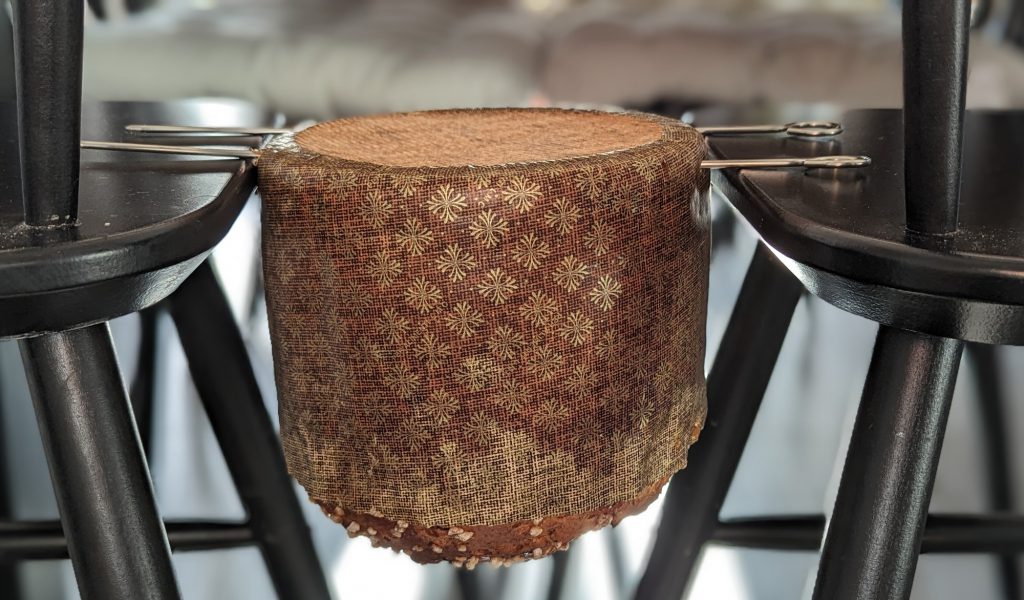
Alternatively, you can use an 18cm cake tin (if you only have 20cm that’s okay, your panettone just won’t end up as tall) and line the base and sides to 12.5cm with non stick baking paper. Ensure you construct it well so the gluten free panettone doesn’t try to escape during baking! There are various online tutorials showing you how to do this.

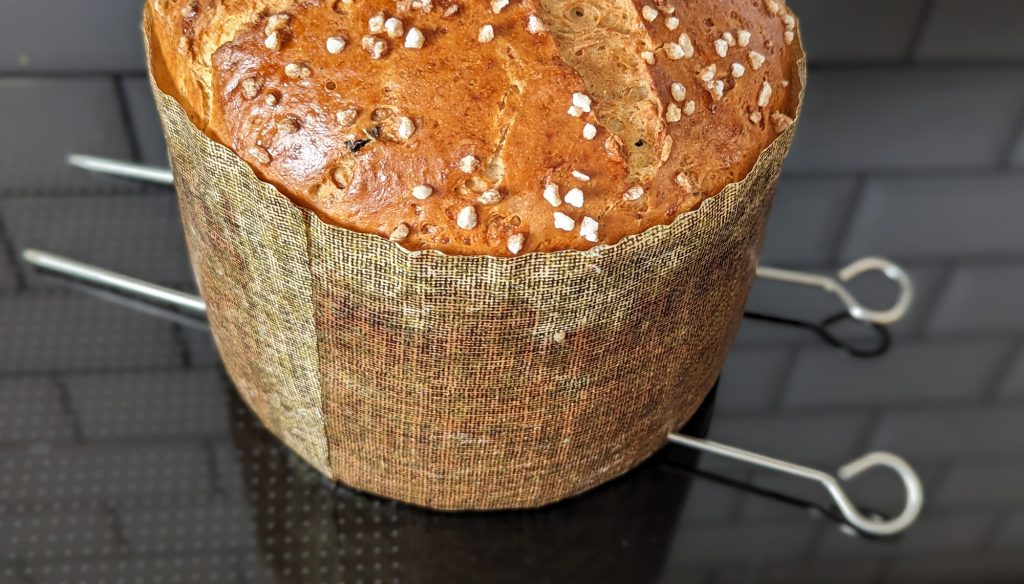
What is Pearl Sugar?
This is completely optional, but it’s the traditional finish for panettone. Sugar in little pearl-like ball shapes, also sometimes called Panettone Sugar or Nibbed Sugar. I bought mine from Bakery Bits, when I ordered my panettone cases. It is absolutely fine to omit this is you do not have it.
It works well on the top of panettone, as its large size (compared to standard sugar grains) means it doesn’t melt during baking.
Can I Bake This Panettone in Advance?
Like all bread, it is really best when it is fresh. But it will keep nicely for a few days, as the psyllium husk and caputo flour help it to maintain some softness, and you can either toast it or microwave for 30 seconds to refresh a slice.
You can also freeze this panettone (either sliced or whole, depending on how you want to enjoy it). I preslice it before freezing and then microwave/toast to defrost it when I want a slice. If you were freezing the whole thing, defrost at room temperature then slice and enjoy.
Can I Adapt This Recipe to Make Smaller Gluten Free Panettone?
Yes I am certain this would work in minature form. I’ll be trying this out next week so will add details here as soon as I have tested it. Watch this space (I’ll also notify everyone via my newsletter, which you can subscribe to here).
Gluten Free Panettone Recipe
Wheat allergy sufferers, please note this recipe is not suitable for you, as you cannot have codex wheat starch (contained in Mulino Caputo Fiorglut flour). This is suitable for coeliacs – read this article from Coeliac UK for more information.
Time to make a panettone! This recipe makes an approximately 1kg gluten free panettone, which would serve about 8 people in one sitting (a nice big slice each). I tend to bake one for my family of four to enjoy across a couple of days – storing in an airtight container and slicing and toasting for breakfast (delish!).
As usual, you will find lots of step by step photos underneath the recipe, in case you need a visual guide. For any other help along the way or if you have questions, please do message me on social media (@myglutenfreeguide) or email me at laura@mygfguide.com.
If you enjoy this gluten free panettone recipe, please leave a review on the recipe card below and spread the word! It makes a world of difference to me :).
Thank you so much! Laura xxx
Gluten Free Panettone
This incredible gluten free panettone will bring you a big, delicious dose of festive joy! And it knocks the socks off the shop-bought versions. Panettone is a classic Italian Christmas treat, enriched sweet bread studded with fruit (or chocolate chips if you prefer) and topped with pearl sugar.
Ingredients
- 10g dried active yeast (I use Allinson's)
- 400ml semi skimmed milk (approx 2% fat milk) + 1 tsp for the egg wash
- 1 tsp runny honey (or caster sugar)
- 80g caster sugar
- 18g whole psyllium husk
- 500g Mulino Caputo Fioreglut gluten free flour (note: this flour contains gluten free codex wheat starch, and is not suitable for wheat allergy sufferers)
- 0.5 tsp fine salt
- 3 large eggs + 1 egg for the egg wash
- 120g unsalted butter, softened and cut into cubes
- 1 tsp vanilla bean paste (or vanilla extract) (omit if making the chocolate chip variety)
- Zest of 1 orange and zest of half a lemon OR 30g mixed candied peel (optional: for a traditional fruited panettone - omit if making the chocolate chip variety)
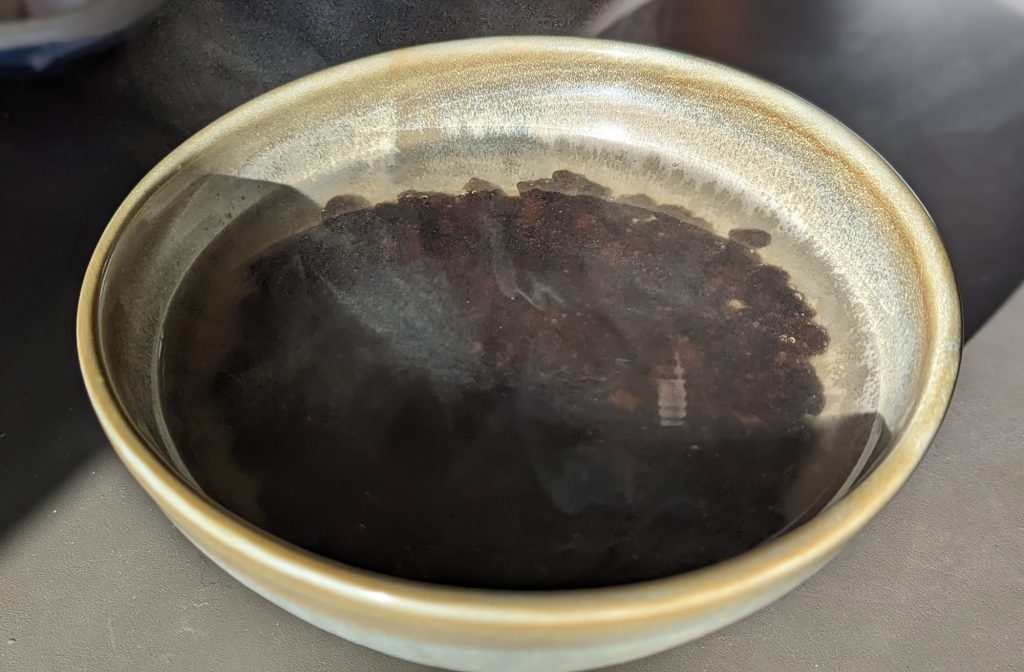
- 120g sultanas/raisins (for traditional fruited) OR 150g choc chips, plus 20g pearl sugar (optional)
Instructions


I hope you love this gluten free panettone recipe as much as I do! While you are here, why not check out some of my other festive gluten free recipes:
Happy baking! Laura xxx