")
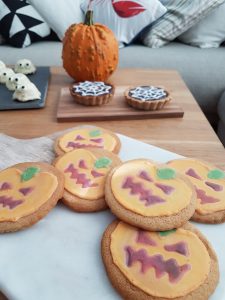
Another Halloween special recipe! I wanted to create a simple cookie with warming flavours for these pumpkin-decorated biscuits and eventually I hit on gingerbread as my winning option. The gentle spice of ginger pairs beautifully with lime-tinged icing for a treat that will delight children and adults alike. The icing takes some practice and I am sure some of you icing pros will do a much better job than me. Nevertheless, the pictures here show what you can achieve with basic icing skills…I was pretty please with my attempt.
These gluten free Halloween cookies are best eaten fresh as they lose their crunch after a couple of days. However, if you like a softer cookie (like my husband) they are still very tasty a few days later.

Pumpkin Gingerbread Cookies
Ingredients
For the cookies
- 80g butter
- 4 tbsp golden syrup
- 50g light brown sugar
- 175g gluten free plain flour
- 1/2 tsp xanthan gum
- 1/4 tsp bicarbonate of soda
- 2 tsp ground ginger
- 1/4 tsp nutmeg
For the icing
- 300g royal icing sugar
- Lime juice
- Orange food colouring
- Green food colouring
- Black food colouring
Method
Making the cookies
- Preheat your oven to 180C (fan assisted oven).
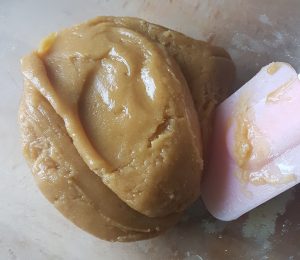
- Take a small pan and, over a low heat, melt the butter, golden syrup and light brown sugar together. Stir gently until the sugar has dissolved (the mix will have become smooth instead of grainy), which usually takes about 10 minutes. Remember to use a low heat only, you don’t want the mixture to bubble.
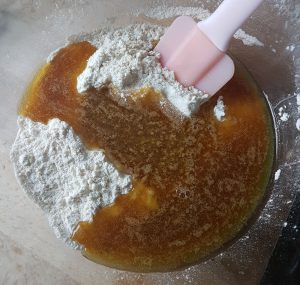
- Take a large mixing bowl and combine the plain flour, bicarb, xanthan gum, ginger and nutmeg. Stir them together and make a well in the centre.

- Pour the butter and sugar mix into the well in the mixing bowl and using a wooden spoon to mix and combine the ingredients until you have a fairly-firm cookie dough. You might have to get your hands in there if mixing with a spoon isn’t doing the job.

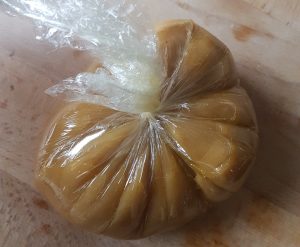
- Pop the cookie dough onto a piece of cling film, wrap and then chill in the fridge for at least 30 minutes, up to 1 hour (or if you need to leave it for longer, just allow it to warm up slightly before use and rework it with your hands to avoid any crumbling).

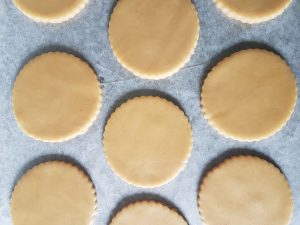
- Once chilled, roll the dough out until it is the thickness of a £1 coin (3-4mm). This will give you crisp, thin cookies.
- Line a baking tray with greaseproof baking paper. Then take a circular cookie cutter (10-15cm diameter is ideal) and cut out as many cookies are you can, placing each cookie on the baking tray as you go. Leave a little space between the cookies as they will grow slightly during baking. To make the most of the dough, recombe and reroll the dough scraps each time you run out of space for cookie cutting.

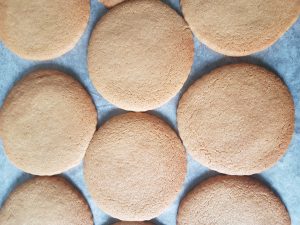
- Into the oven they go! Allow the cookies to bake for 10-12 minutes, until lighly golden. They will still be soft when you take them out, so allow them to harden on the tray for 5 minutes. After that, you should be able to carefully transfer them to a wire cooling rack.

Icing time
As soon as your cookies have cooled, it’s time to get icing.
**Disclaimer :)** I can’t profess to be anything close to an icing expert, lots of other websites have excellent icing guides from experience cookie makers so please do take a look at those for much for scientific instructions! Here is what worked for me…
- I used lime juice in place of water in my icing recipe, in order to give it zingy flavour to complement the ginger. Sift 200g icing sugar into a bowl. Then add enough lime juice to give you a thick toothpaste-like consistency.
- Now add your orange food colouring until you reach a colour you are happy with (2 tsp worked for me) – go bold! The food colouring waters the icing down a little, but you might need to add a little extra lime juice to achieve a pipeable consistency.
- Use a plastic spatula to transfer your icing into an icing bottle (squeezy sauce bottles work really well).
- Very carefully pipe the outline of your pumpkin’s body with this thick icing. I left a little gap at the top for the green stalk (to be added later).
- Once you have outlined all the cookies, add 1 tsp of warm water to your icing and stir well in the bottle. This will make your icing smoother for filling in.
- Back to your cookies and time fill in the orange centres. Do this carefully, trying not to overrun the border you piped earlier. Now leave the icing to set fully.
- Once they have hardened, you can finish off the details. Sift 50g icing sugar into one bowl, then 50g icing sugar into a second bowl.
- As before, use lime juice or a little water to achieve a toothpaste consistency before you add your colouring. One bowl will take the green colouring and the other black colouring.
- Then as before, use the green icing to pipe a little stalk on top and the black to paint a face on your pumpkins!
Once set, store these in an airtight container to prevent them from softening up too much.