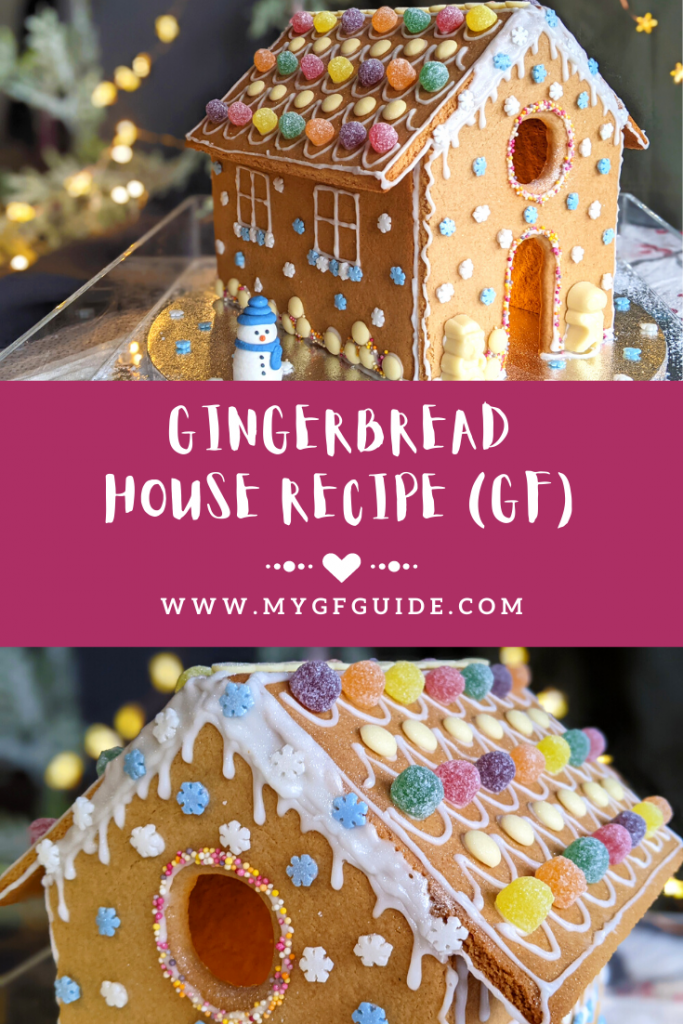
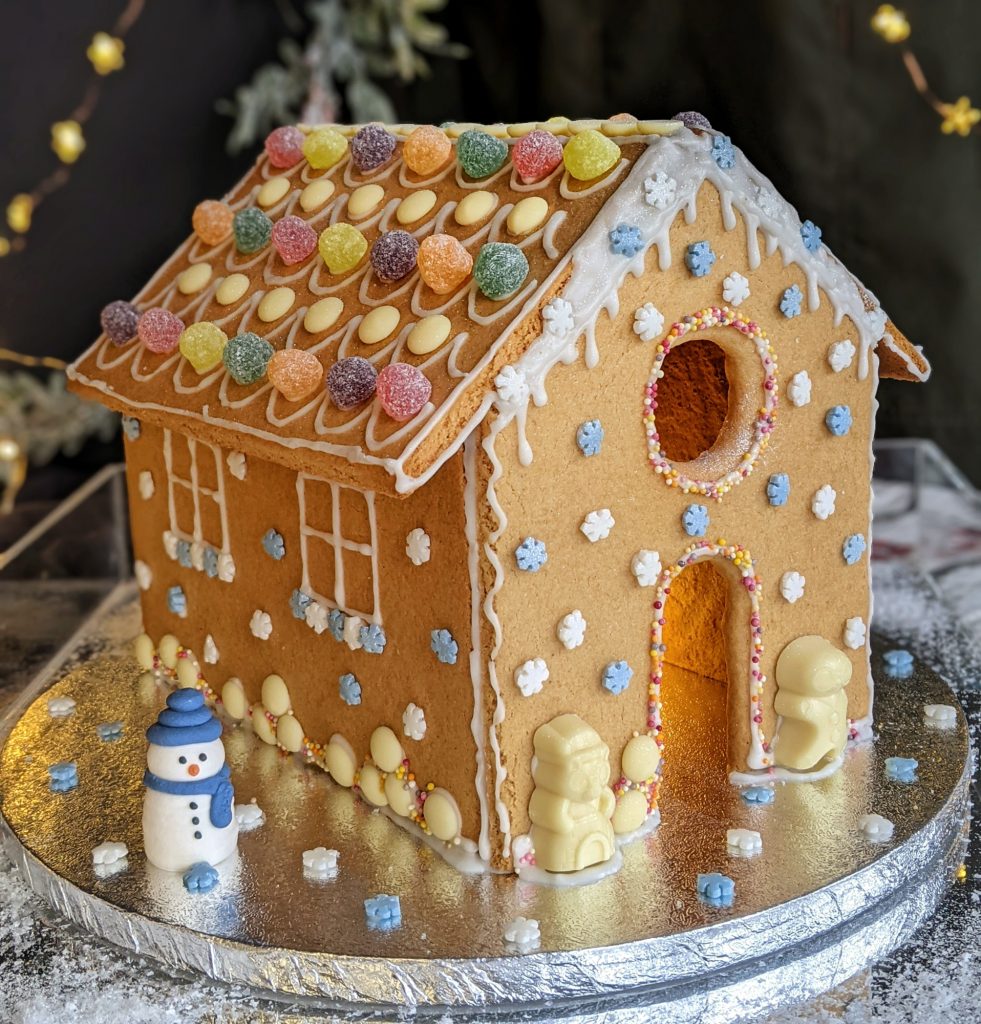
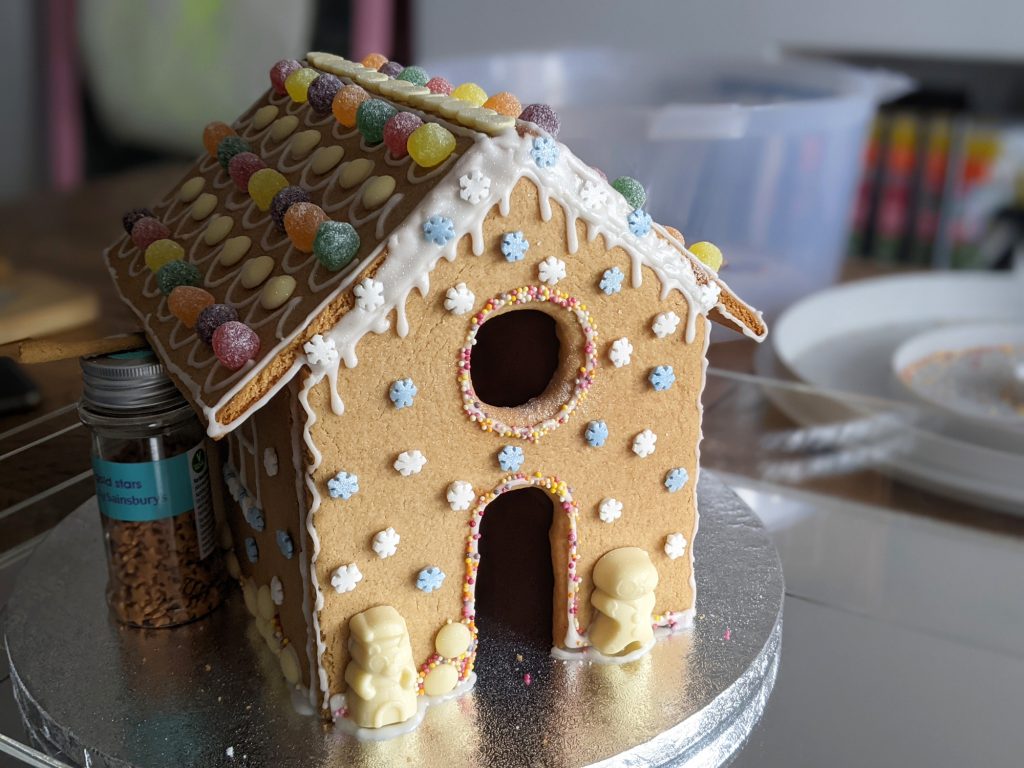
For a true showstopping festive centrepiece, it has to be a gingerbread house, and my gluten free version really takes the biscuit (see what I did there :D). Absolutely delicious gingerbread biscuit, with orange-flavoured icing, chocolate buttons, sprinkles and sweets.
When I first made this house the cries of “oh but it’s too pretty to eat” quickly turned into happy silent munching. The whole thing had been eaten before the day was out!
I loved making this gluten free gingerbread house. Not only was it beautiful to look at and DELICIOUS to eat, but making it was quite therapeutic and a fun way to unleash my creativity. Next time I’ll let my three year old get involved, as she was chomping at the bit to have a go with the icing bottle. This is a lovely activity for kids and adults alike.
My gluten free gingerbread recipe provided the perfect biscuit base for constructing the house. The biscuit is designed for eating and enjoying (flavoured with ginger and nutmeg), yet is strong and suitable for construction, without being dry.
How To Make Your Gingerbread House Template
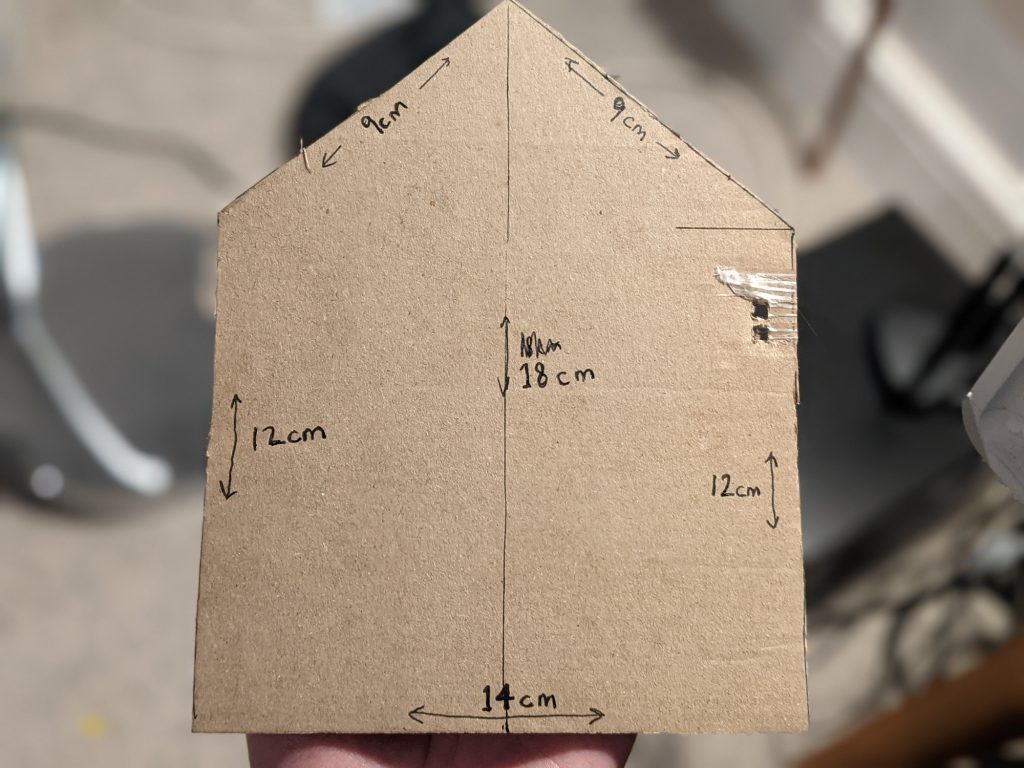
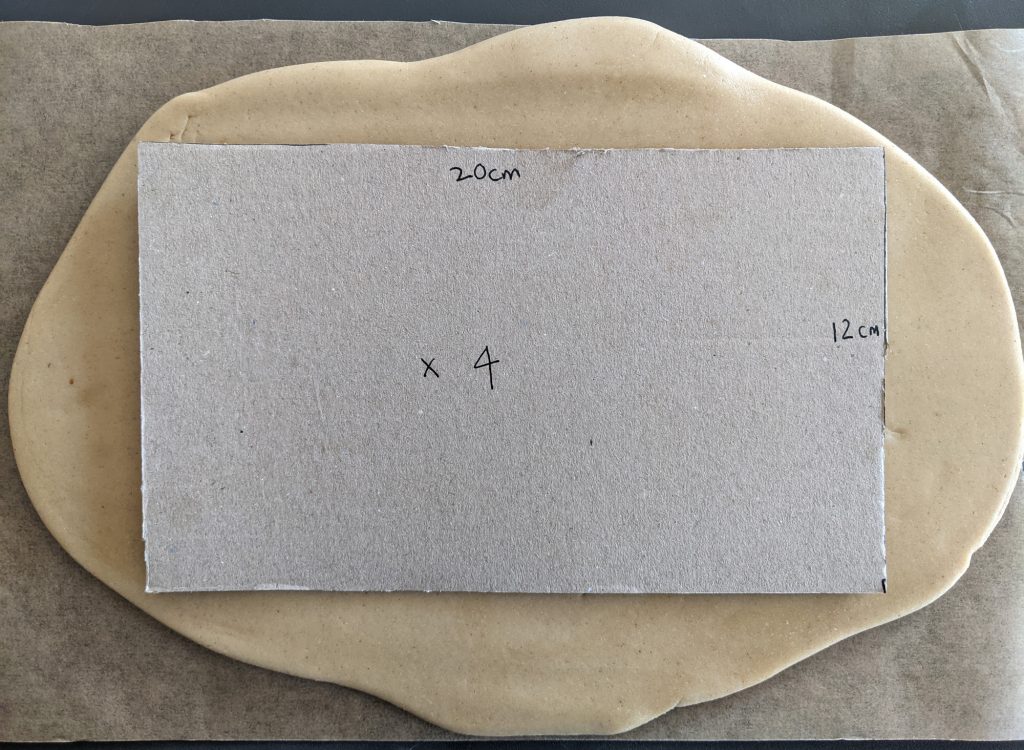
Obviously, when making a gingerbread house you need a template or cutters to create the shapes. You can buy cutters, but I saved money and made my own template at home out of card. Here are the dimensions you need if you want to give it a go:
- 2 x Roof panel: 12cm x 24cm rectangle
- 2 x Long side: 12cm x 20cm rectangle
- 2 x Short side: 14cm base, 12cm side, 18cm at centre point house shape (see image below with measurements)
You will need to cut two of each, giving you 6 gingerbread pieces in total in order to build the house.
Making the Icing “Glue”
I strongly recommend using Royal Icing Sugar as the glue for your house, not regular icing sugar. Royal icing sugar contains powdered egg white and has a strong, hard finish.
If you really can’t find it in the shops, you could try this recipe to make your own from scratch. If you only have normal icing sugar, you can give it a go but be sure to make it really thick as it will not be as strong and you will need a longer setting time.
I flavoured mine with orange essence, as it really is super yummy and works well with the gingerbread. However, if you want to keep it plain simply use a tsp of water in place of the essence.
What Decorations Should I Use?
Anything! Go with whatever looks pretty and taste good, as at the end of the day you want your gluten free gingerbread house to be delicious. I used:
- Sainsburys Snowflake Sprinkles
- Sainsburys 100s and 1000s
- Milkybar Festive Friends (they actually helped with the construction as they stablised the walls)
- Callebaut White Chocolate Drops
- Jelly Tots
Whatever you decide to use, always check the labels to ensure there are no sneaky gluten-containing ingredients or may contain warnings.
Do I Need Any Specialist Tools?
No you should have most bits in your kitchen and if not you can make do. As I mentioned above, you can buy cutters if you want, otherwise most of the kit can be found in your kitchen.
For the base I used a cake board, as the foil covering gave good grip. I used a pizza wheel as a nifty way of cutting out the shapes without dragging the dough, but a sharp knife would work well.
As for the icing, I would recommend a plastic squeezy bottle as it makes life easy. There are loads of varieties on Amazon and you will likely be able to pick them up in small local shops too.
Gluten Free Gingerbread House Recipe
Time for the recipe! You’ll find a full method below, plus lots of photos to guide you. Feel free to email me any questions or comments you might have.
You can contact me at laura@mygfguide.com or message me on Instagram/Facebook @myglutenfreeguide. I love seeing your home creations too so please do tag me on social media if you make these.
Lastly, if you enjoy this gluten free gingerbread house, I would be really grateful if you could leave a star rating or review on the recipe card below. Thank you!
Laura xxx
Gluten Free Gingerbread House
One of the most festive bakes you can make, this gluten free gingerbread house is fun is build and delicious to eat!
Ingredients
For the gingerbread:
- 200g unsalted butter
- 150ml golden syrup
- 125g light brown sugar
- 450g gluten free plain flour (I used FREEE by Doves Farm)
- 0.5 tsp bicarbonate of soda
- 1.5 tsp xanthan gum
- 1 tsp grated nutmeg
- 5 tsp ground ginger
For the icing:
- 1 tsp orange extract (optional, but it gives a beautiful flavour)
- 250g royal icing sugar
- 25-30ml cold water
To decorate:
- Sweets/sprinkles/chocolates (I used snowflake sprinkles, chocolate buttons and Jelly Tots)/edible glitter
Instructions
Making the gingerbread house shapes:
- First, we'll make the gingerbread dough. Add the butter, golden syrup and light brown sugar to a small pan. Place over a low heat for 10 minutes, allowing the butter to melt and the sugar to dissolve. Don't allow the mixture to come to the boil or bubble, as you'll risk it turning into toffee!
- Take a large mixing bowl (or stand mixer) and combine the plain flour, bicarb, xanthan gum, ginger and nutmeg. Stir them together and make a well in the centre.
- Pour the butter and sugar mix into the well in the mixing bowl and combine the ingredients until you have a fairly-firm cookie dough. If using a stand mixer this will take about a minute - if you are using a wooden spoon, a couple of minutes (you might have to get your hands in there to knead the dough if mixing with a spoon isn't doing the job).
- You should now have a lovely smooth, pliable cookie dough. It'll still be quite warm, so transfer it onto a piece of cling film, wrap and then chill in the fridge for at least 1 hour (or if you need to leave it for longer, just give it a knead with your hands before using it, to avoid any crumbling).
- While the dough is chilling make your gingerbread house template. You can buy kits online with cutters, but I made a simple one at home using some cardboard. See above (the introduction) for details of how to make my template.
- Once the dough has chilled and your template is ready, preheat your oven to 180C (fan). Roll the dough out with a rolling pin on a sheet of non-stick baking paper, until it is slightly thicker than a £1 coin (about 7mm).
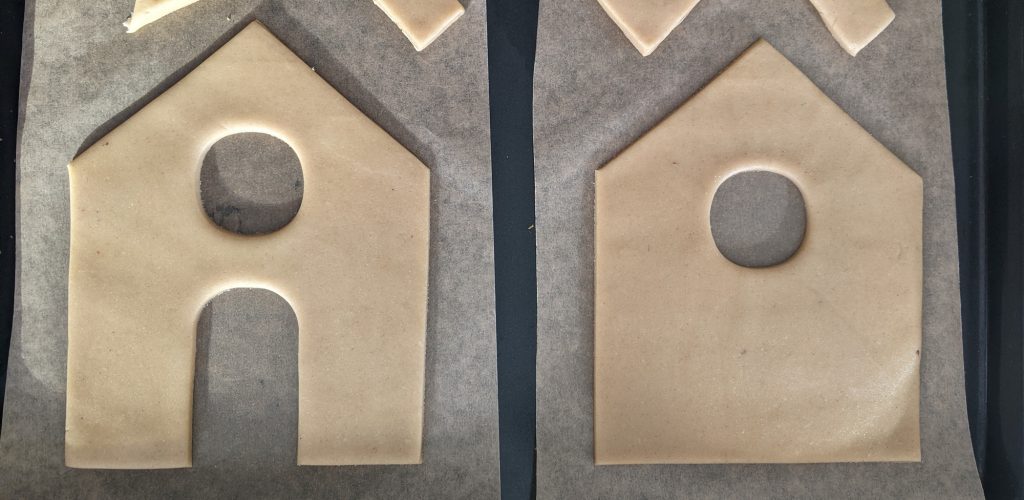
- Now use a pizza wheel cutter or sharp knife to cut out the shapes for your house. I start with the two long walls, lifting the excess dough off and placing it back in the bowl. Rather than trying to lift the shape onto the tray (which can bend it out of shape), I cut the baking paper and transfer it direct to the baking tray (see images below).
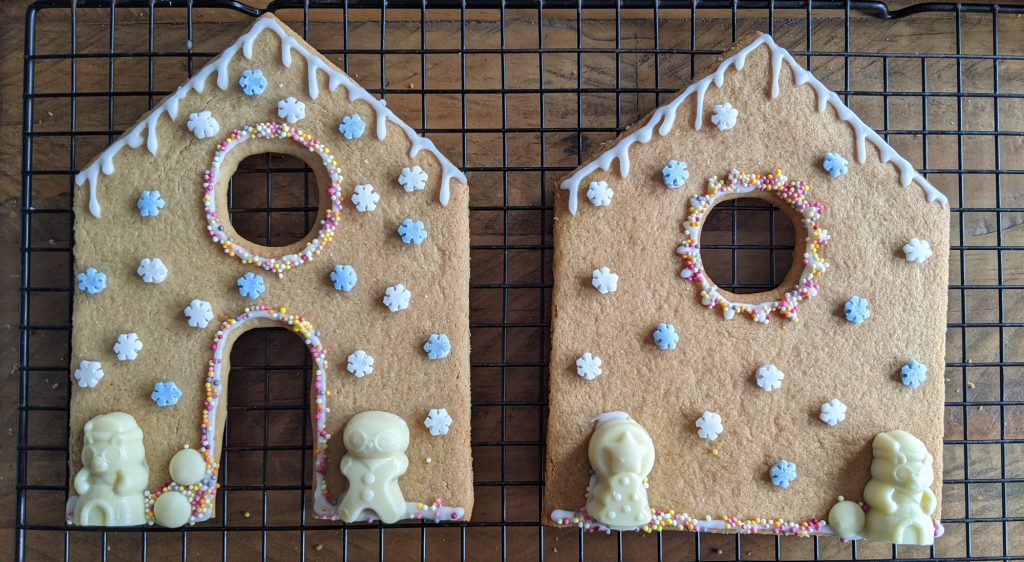
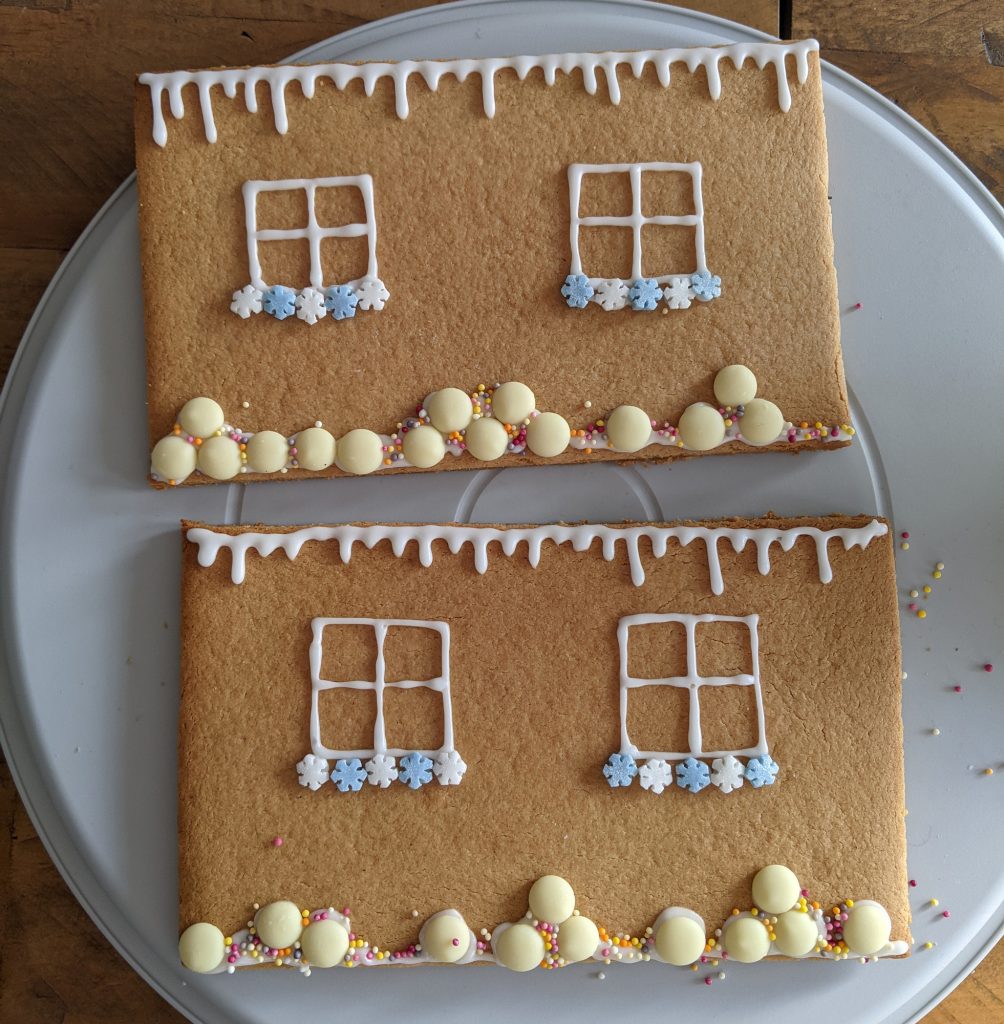
- Leave some space between the pieces of gingerbread as they will spread slightly during baking. After cutting, recombine and reroll the dough scraps, cut out more pieces and repeat until you've used all the dough. You should end up with two rectangular long walls, two rectangular roof pieces and two end walls that are house-shaped. Don't forget to cut out window and door shapes if you want (or you can always draw them on later with icing).
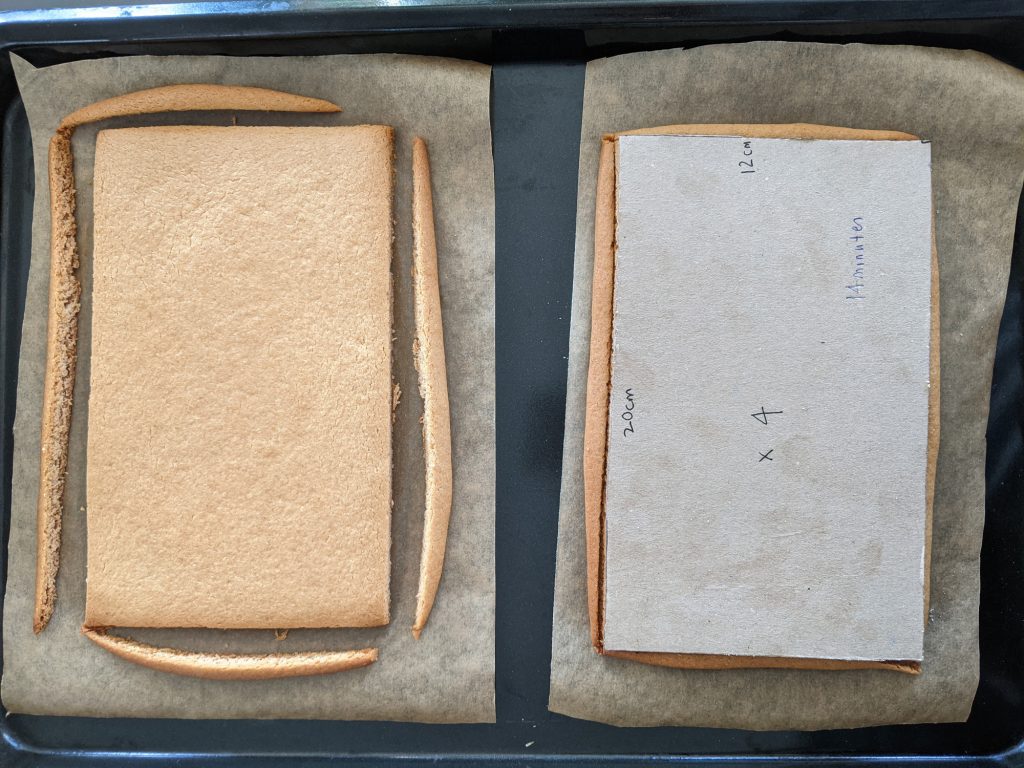
- I find it best to bake the pieces one tray at a time (each with two pieces of house), to get an even bake. Plus, you'll need to do some trimming after baking, which needs to be done while they are still warm. Into the oven they go! Allow the gingerbread to bake for 10-12 minutes, until lightly golden.
- They will still be soft when you take them out, so leave them on the tray and trim immediately before they harden. To do this, simply place your original template on top of each piece, and trim to return the gingerbread to your intended shape (see images below). Then leave to firm up for 10 minutes before you carefully transfer them to a wire cooling rack. Repeat until you have all 6 pieces of gingerbread baked and cooled completely.
Icing and assembling the gingerbread house:
I find it much easier to decorate the gingerbread walls and roof pieces before assembling the house, and I would recommend you do the same. I use an orange-flavoured royal icing as the icing decoration and "glue", and it is very easy to make.
- Sift the royal icing sugar into a bowl and add the orange extract and 25ml of the water. Stir to bring them together with a spoon. You may or may not need to add the extra 5ml water - you want a nice thick, smooth consistency, not too runny. Then whisk for about 5-8 minutes with a hand whisk or stand mixer until the icing is a nice pipeable consistency.
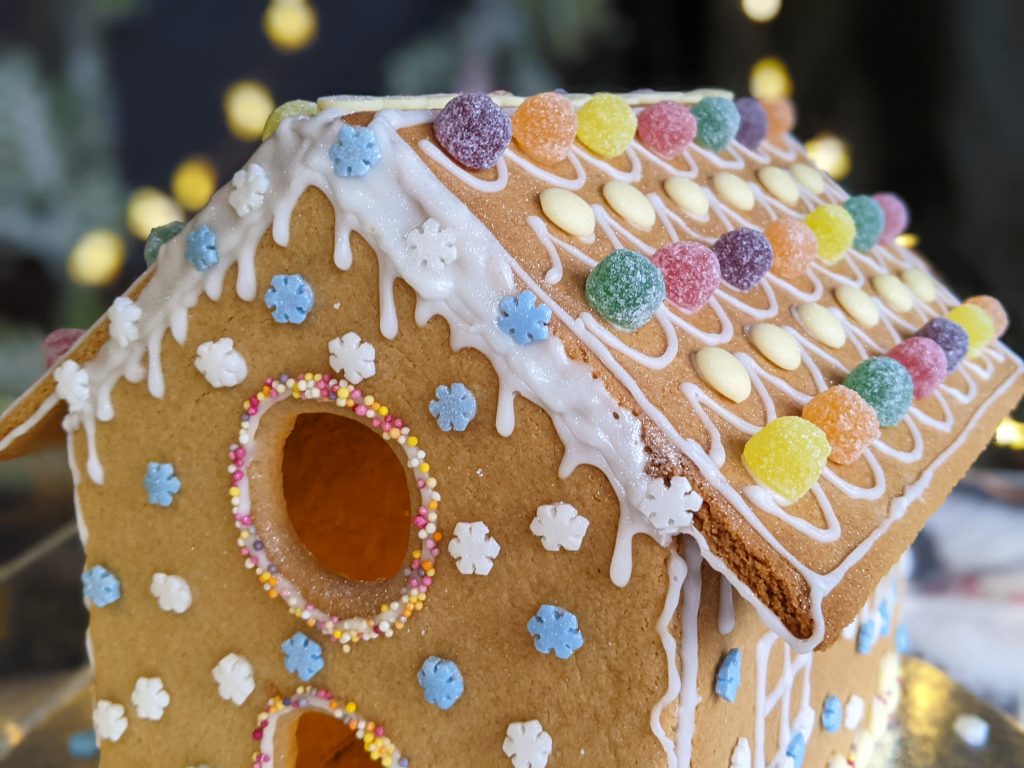
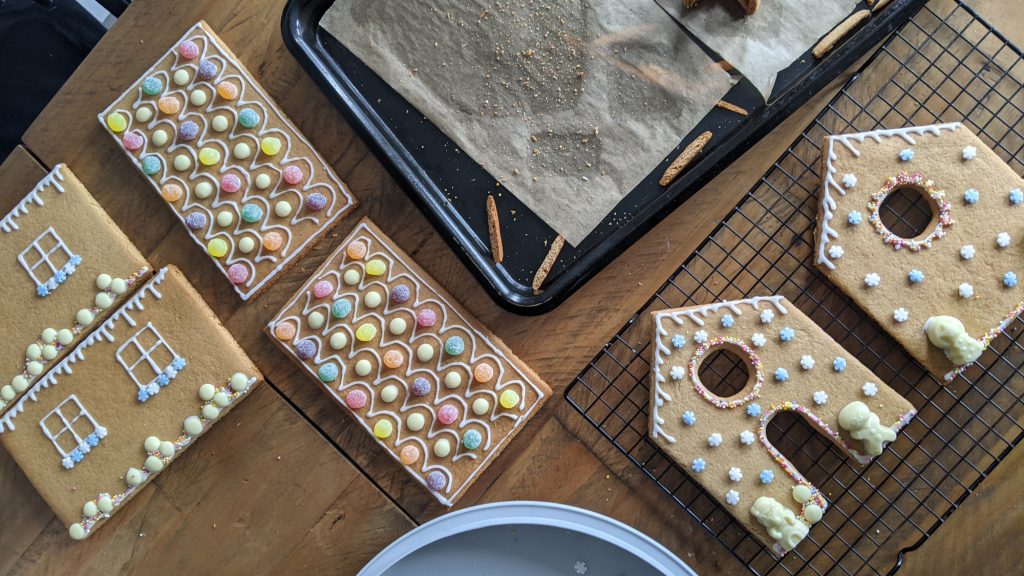
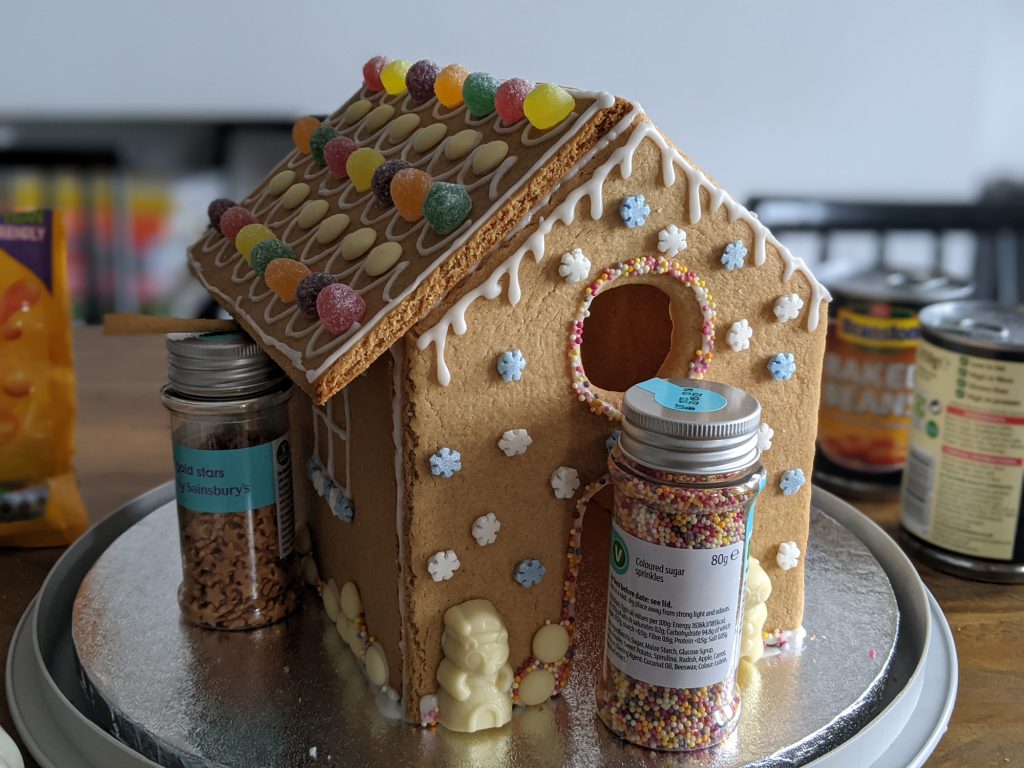
- Now for the fun part! Transfer the icing to a squeezy bottle (these make it mega easy to use the icing and very kid friendly) or piping bag, and decorate the gingerbread shapes with icing, sprinkles, sweets and chocolates. See my images below for some design ideas, or let your imagination run wild.
- Once iced, leave them for 30 minutes for the icing to firm up. Then you can assemble the house.
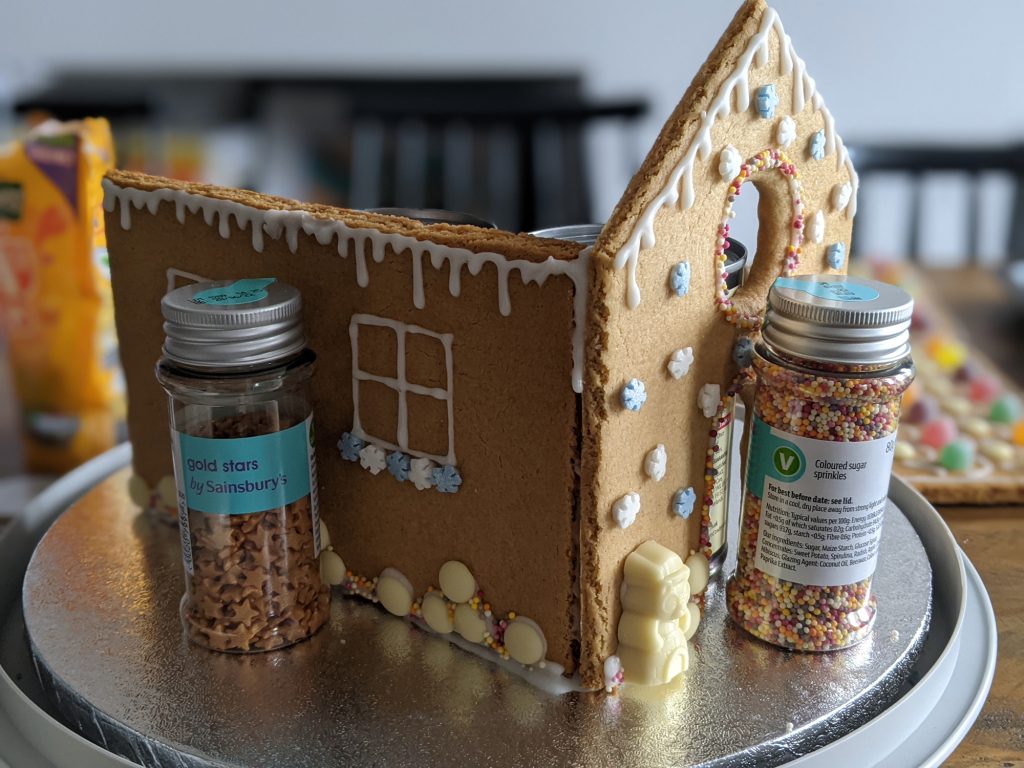
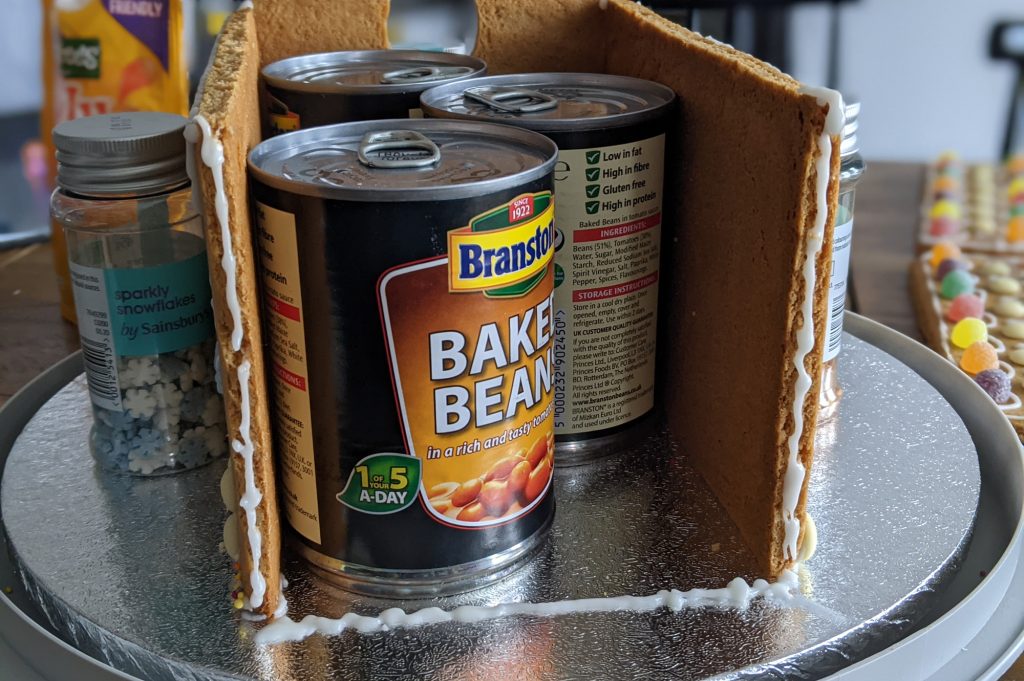
- Take a cake board or other serving platter (a slightly textured base is ideal for better grip). Draw an L shape in icing on the base to create the foundations for one long wall and one short wall. Also pipe icing along the edge of the walls where they will meet. Put the first two pieces in place - I use tin cans and other heavy pots to hold them in place. Pipe extra icing "glue" on the join, to ensure they are well stuck together.
- Now add the other two walls, one at a time, creating an icing foundation for each and cementing the joins together. The structure should be quite strong now, but leave for 30 minutes to firm up before you add the roof.
- Before you put the roof in place, remember to take the tin cans out of the centre void :). Then add a generous amount of icing cement to the tops of all the walls, where the roof pieces will be placed. Carefully put one roof panel on at a time - I found a sprinkles pot was the perfect height to support each roof panel while the icing hardened (see images below).
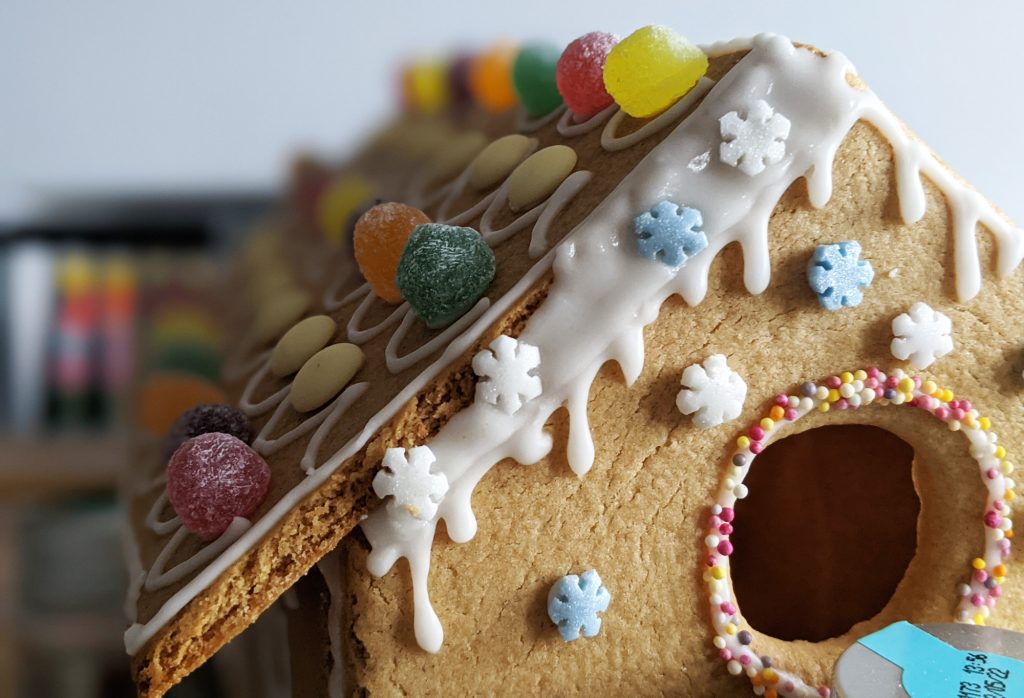
- Once both roof pieces are on, add icing between them and you can ice a snow effect to conceal any joins if you wish. I also placed a line of chocolate drops along the roof join to give it a nice finish.
- Leave your supports in place until the icing has firmed up, then tentatively remove them before serving your masterpiece! You might think it's too pretty to eat, but I assure you, it is absolutely delicious so go on, get stuck in :).
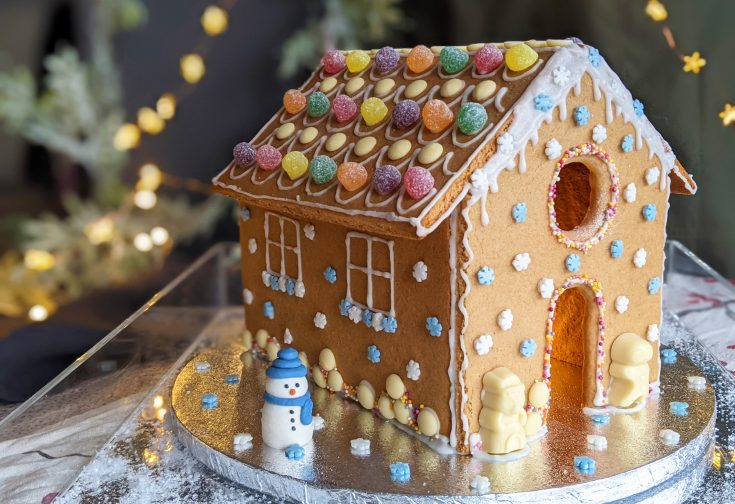
Tip: for extra sparkle, finish with a spritz of edible glitter and add some festive characters or extra decorations to your base board.


For more festive fun, why not try some of my other gluten free recipes:
Happy Baking! Laura xxx