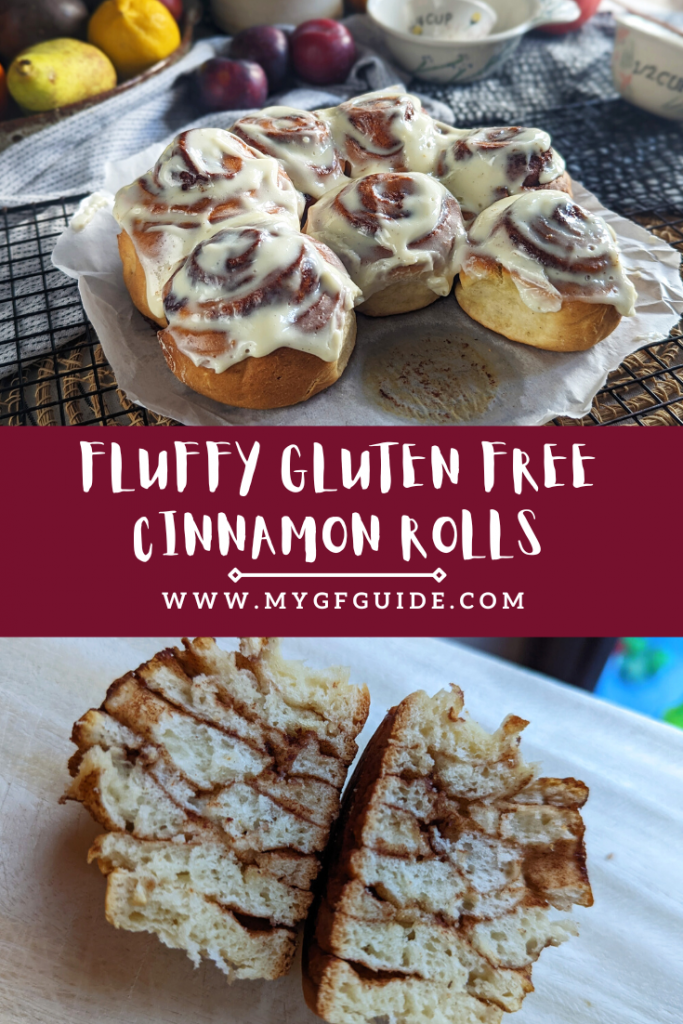
A lot of work went into this gluten free cinnamon rolls recipe. I must have baked more than a dozen different batches, in the quest for a soft, pillowy cinnamon bun. And I’m happy to say I finally did it!
Many gluten free cinnamon rolls end up being a bit dry, hard and cake-like (rather than an enriched bread). I created a brioche-style enriched dough, which is beautifully soft when freshly baked, filled with cinnamon sugar butter and topped with cream cheese frosting. They are rather heavenly.
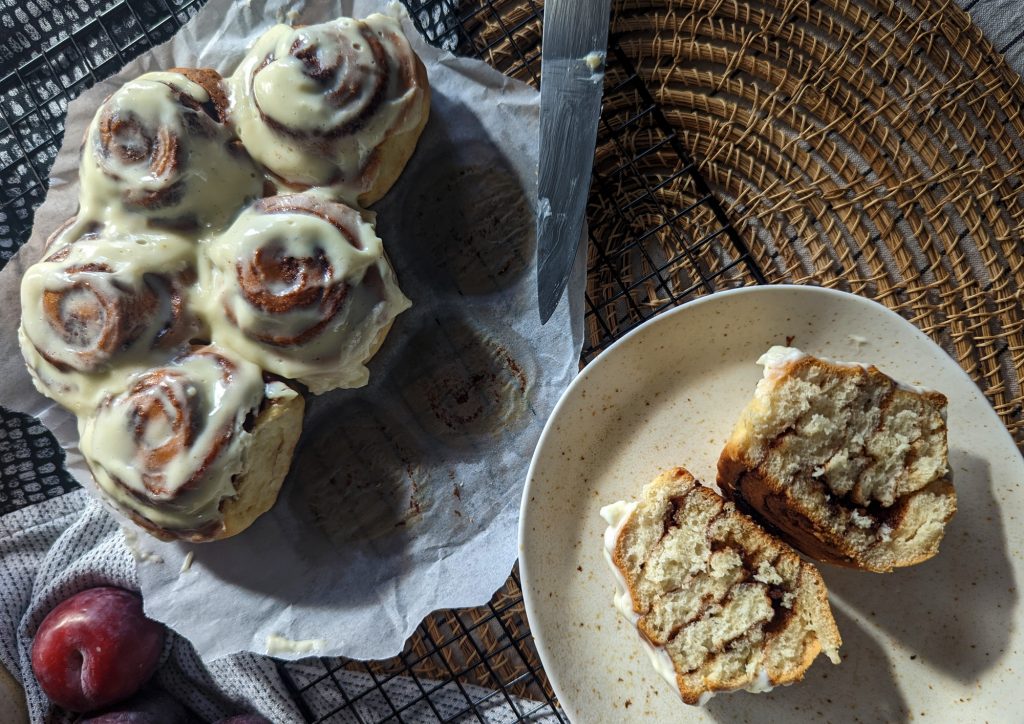
These are best enjoyed while still warm from the oven. However, they do stay quite soft once cooled. If you’ve any leftovers the following day, you can refresh them in the microwave (I’ve been having my leftover test bakes for breakfast – 30 seconds in the microwave per roll does the job nicely).
What Ingredients Do I Need For These Gluten Free Cinnamon Rolls?
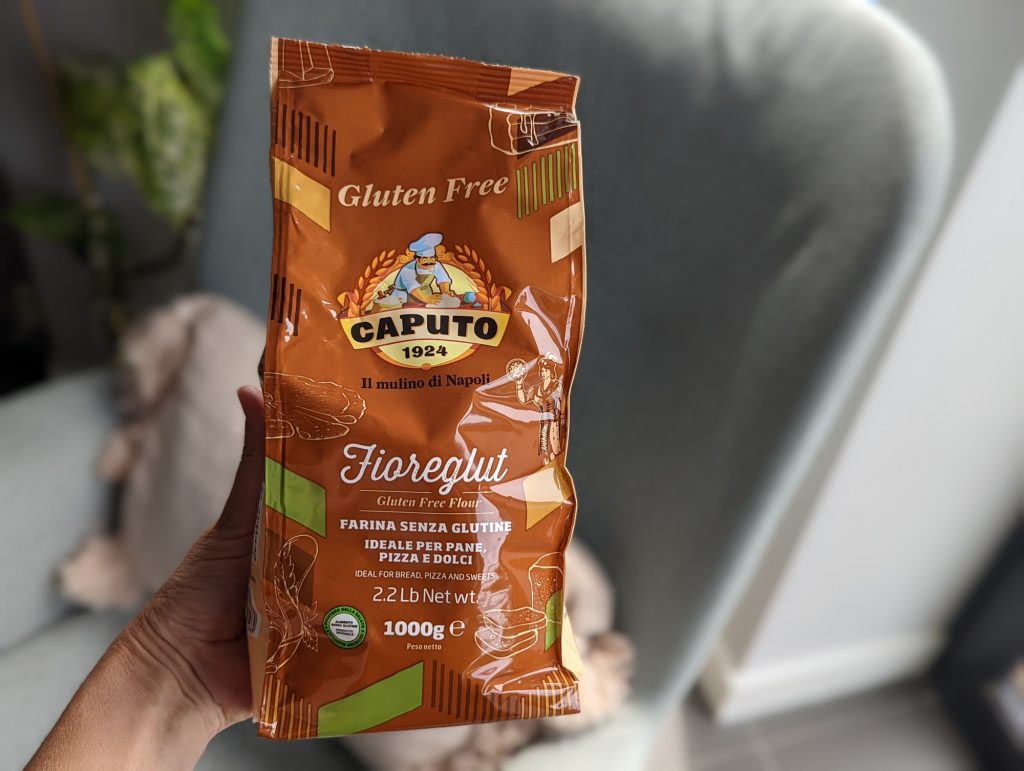
You will need Mulino Caputo Fioreglut gluten free flour, caster sugar, salt, baking powder, eggs, yeast, milk and butter for the base dough.
Then butter, light brown sugar and cinnamon for the filling.
Finally cream cheese, icing sugar, vanilla bean paste and milk for the frosting.
You can buy Mulino Caputo Fioreglut online from various retailers, I’ve linked Fifo, who I’ve found it cheapest with and who I generally buy from. If you want to stock up on some other gluten free goodies at the same time, try The Gluten Free Grocer. Amazon also sell it.
It’s more expensive than the mainstream gluten free flour brands, but is 100% worth it, in my opinion.
Wheat allergy sufferers, please note this flour is not suitable for you, as it contains codex wheat starch. This is suitable for coeliacs (as the gluten has been removed and it’s fully certified) – read this article from Coeliac UK for more information.
Can I Substitute a Different Flour?
Not for this particular recipe, however in my cookbook Eat & Enjoy Gluten Free I have developed a gluten and wheat free cinnamon rolls recipe. They are lovely and fluffy!
Gluten Free Cinnamon Rolls Recipe
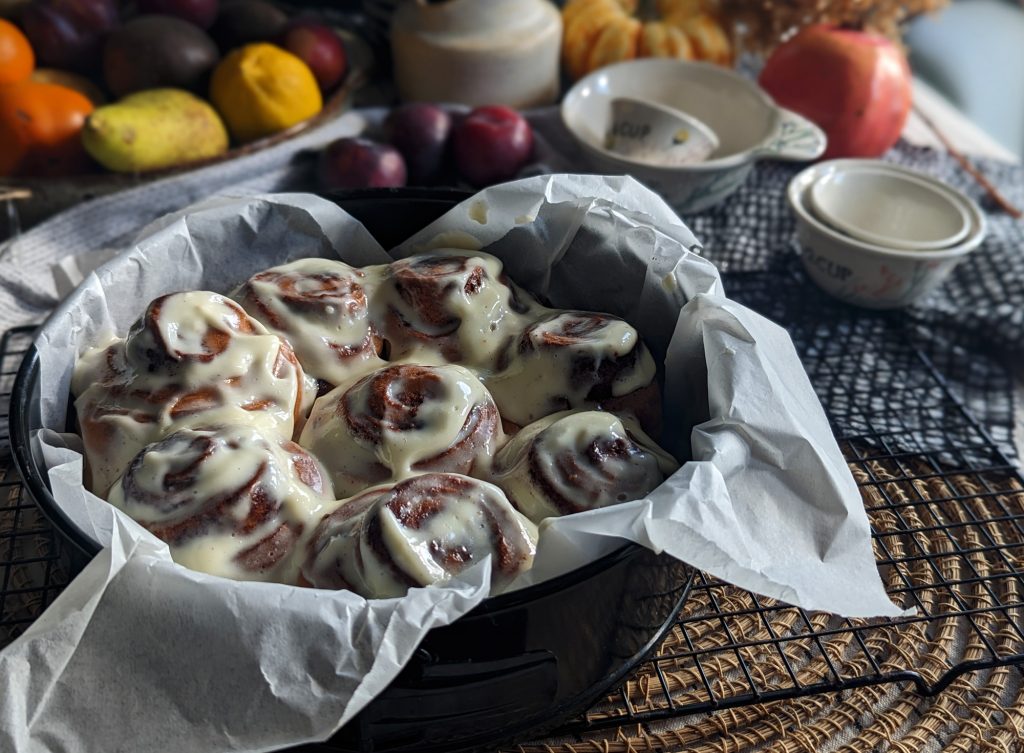
Okay let’s get to the recipeeee, I’ve been so excited to share this! I really hope you all like them. This recipe will make 8 cinnamon rolls, and they are best enjoyed fresh from the oven.
You will find a tonne of step by step photos underneath the recipe, to give you a visual guide. For any other help along the way or if you have questions, please do message me on social media (@myglutenfreeguide) or email me at laura@mygfguide.com.
If you enjoy these gluten free cinnamon buns, please leave a review on the recipe card below. It makes a world of difference to me :). And you can also share photos of your home creations in my Cooking Club on Facebook.
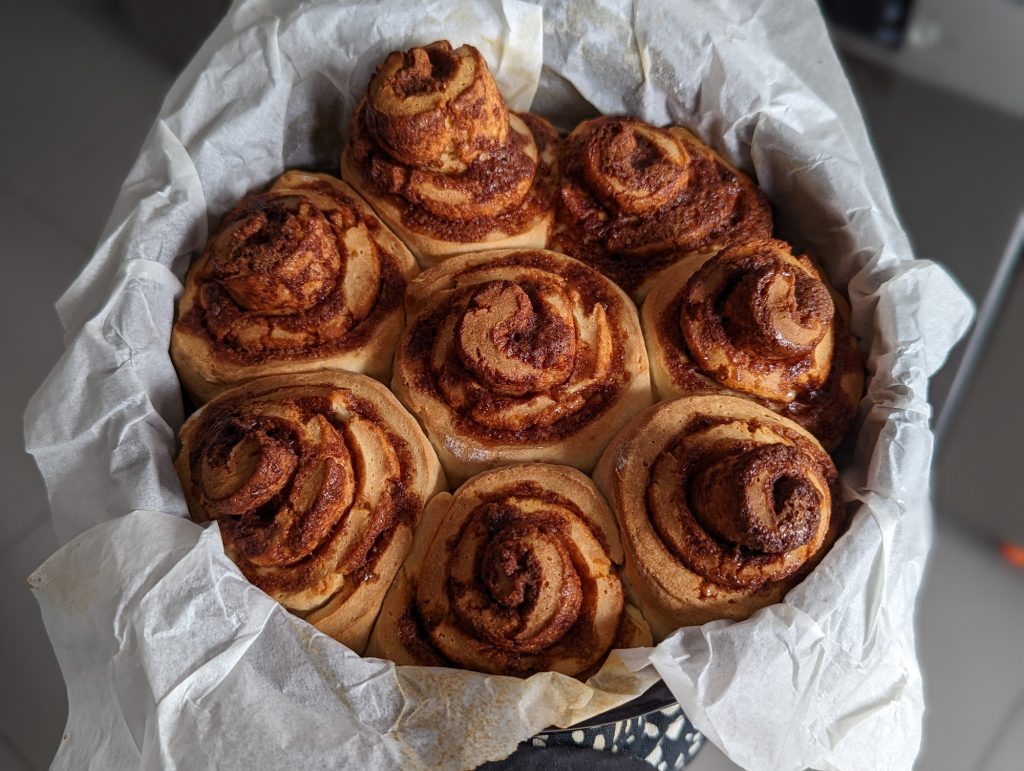
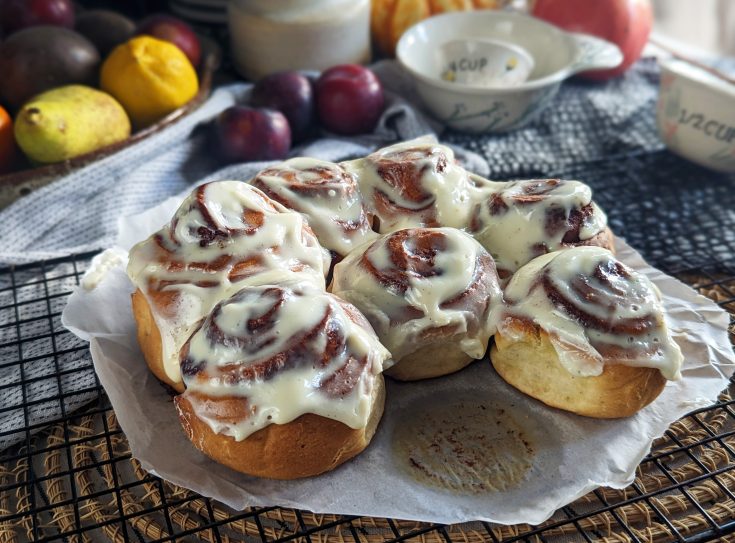
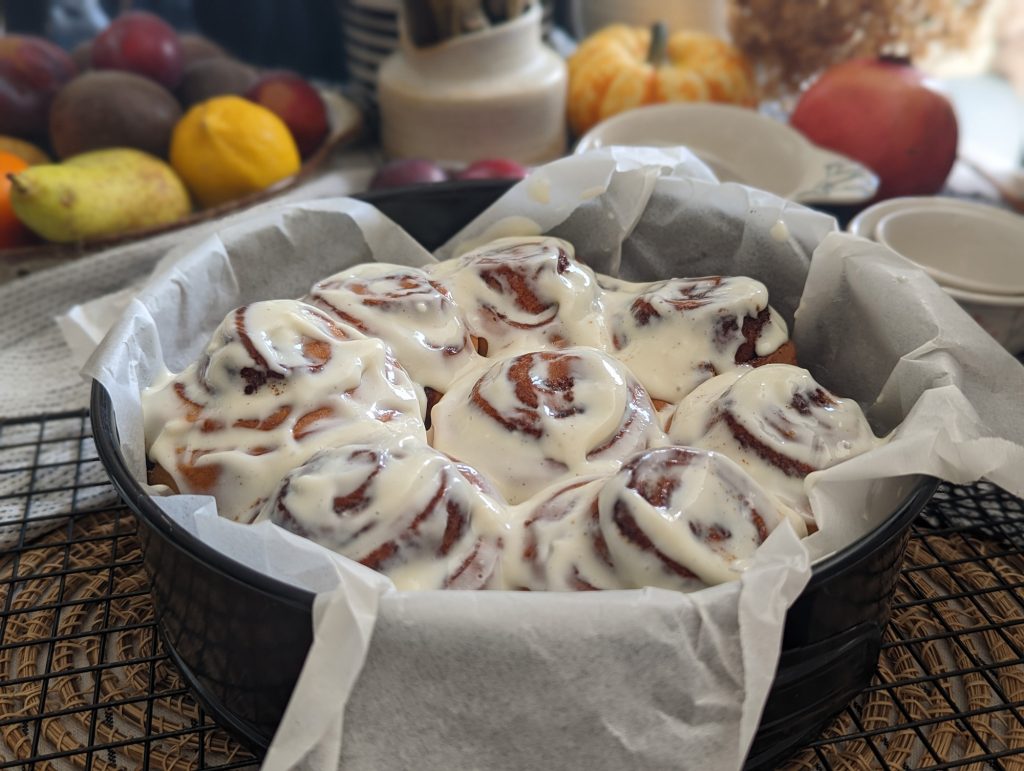
Proper, soft and fluffy gluten free cinnamon rolls filled with cinnamon sugar butter and topped with cream cheese frosting. Utterly delicious warm from the oven!
Ingredients
For the dough:
5g (0.2oz) dried active yeast (I used Allinson's)
100ml (3.5floz) whole milk
1 tsp (5g/0.2oz) + 20g (0.8oz) caster sugar
260g (9.2oz) Mulino Caputo Fioreglut gluten free flour (no substitutions please. else the rolls will not work)
Pinch of salt
1 tsp (5g/0.2oz) baking powder
2 large eggs (90ml/3.2 floz in total)
60g (2.1oz) softened unsalted butter
For the filling:
30g (1oz) softened unsalted butter
45g (1.5oz) light brown soft sugar
1 tbsp (1.5 US tbsp) cinnamon
For the frosting:
80g (2.8oz) cream cheese
40g (1.4oz) icing sugar
0.5 tsp (0.75 US tsp) vanilla bean paste (or other really good vanilla extract or seeds of a vanilla pod)
sp (2.5 US tsp) whole milk
Instructions
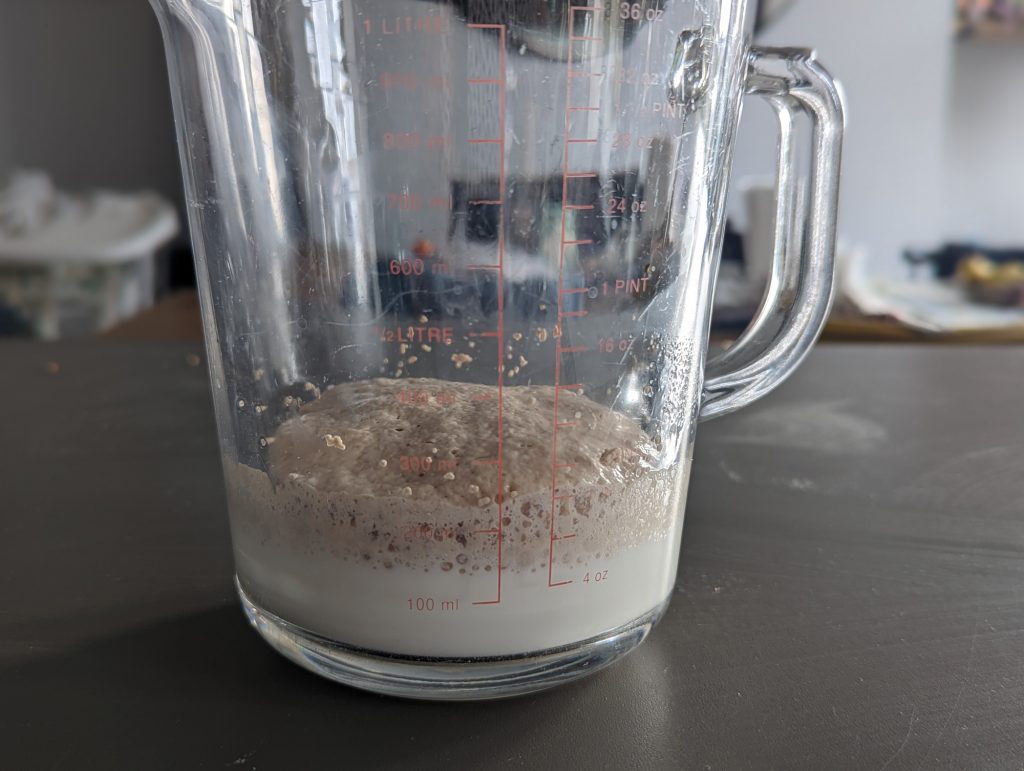
First we'll make the dough, starting by activating the yeast. This handy step will ensure we know our yeast is definitely active, and also reduce the yeast's vigour slightly (for a tighter final crumb structure in the rolls). Simply, pour the 100ml (3.5fl oz) milk into a jug and heat in the microwave for 20 secs, until slightly warm. Add the tsp sugar and yeast to the jug, stir, then set aside for 15 minutes.
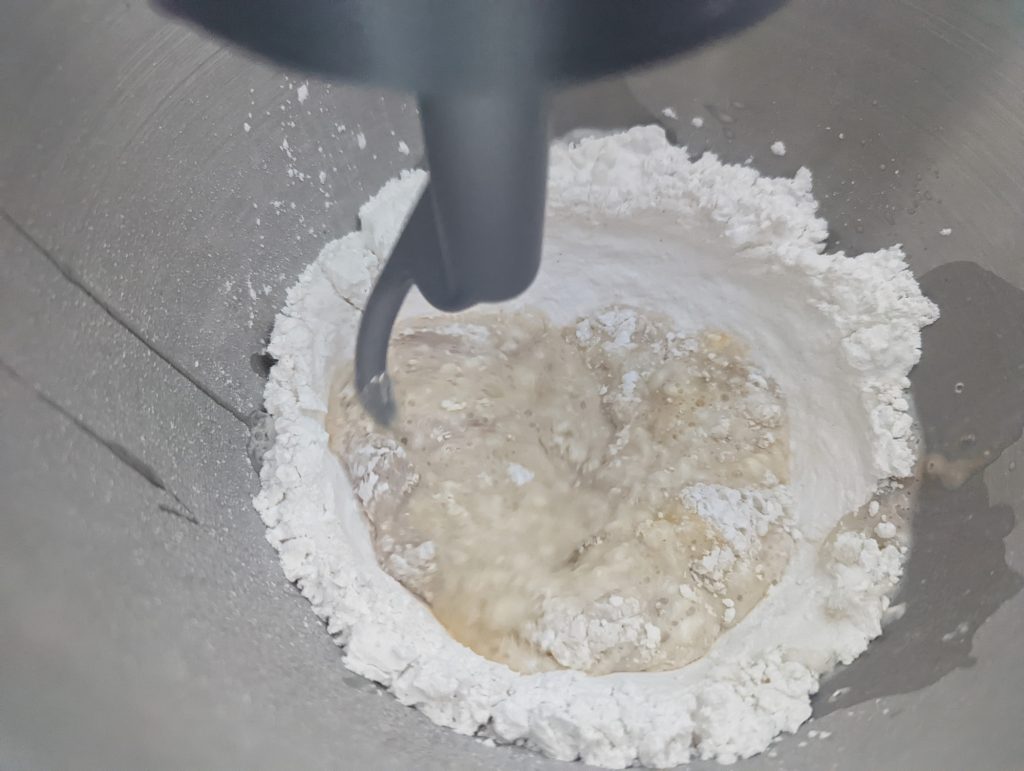
Now prepare your dry ingredients. I really recommend using a stand mixer with dough hook if you have one. If not, prepare those arm muscles for some serious stirring! Tip the flour, 20g (0.8oz) sugar, salt and baking powder into the bowl and stir well to combine.
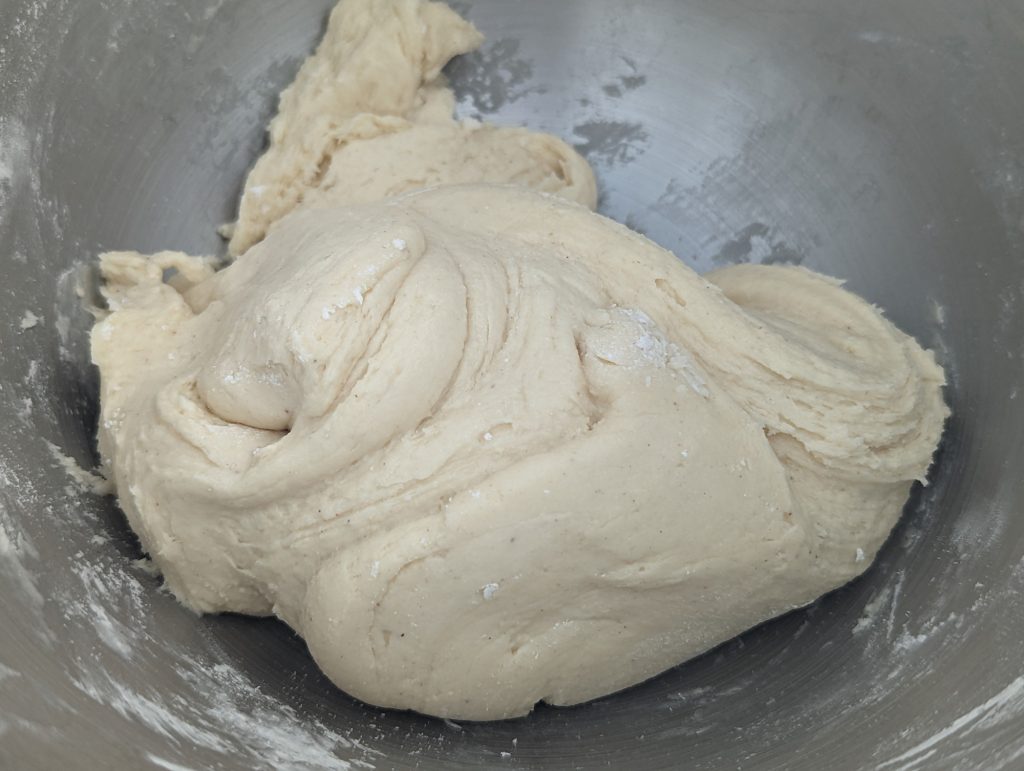
Now back to the yeast mixture, which by now should have a layer of foam on the surface (see image below - if not, your yeast is inactive and you'll need to start again with fresh yeast). Pour the contents of the jug into your stand mixer, along with the two eggs, and mix for about 3 minutes until you have a smooth dough.
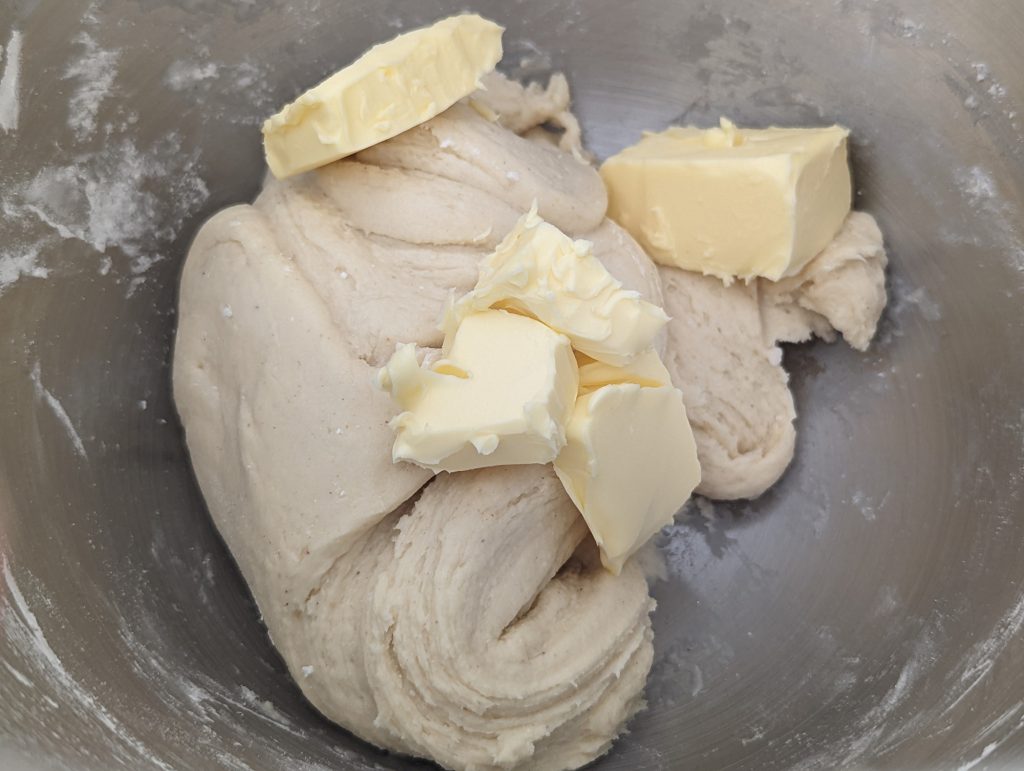
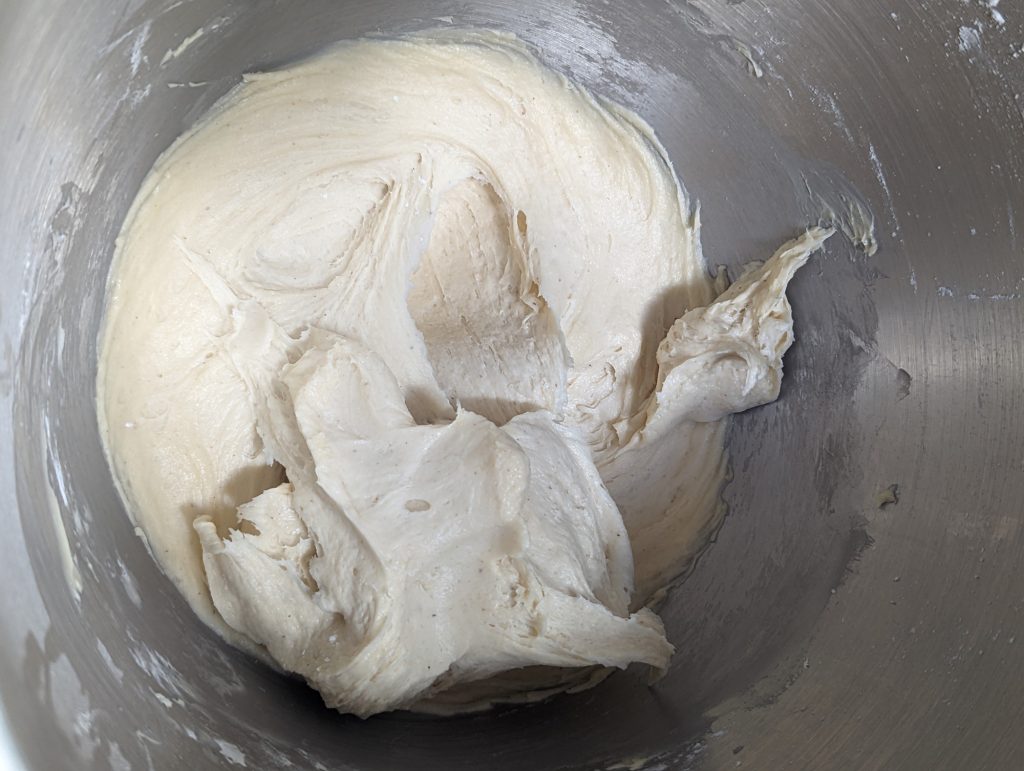
Cut the softened butter into small chunks and add to the mixer bowl. Mix for about 5 minutes, until the butter is completely incorporated into the dough. You should end up with a very soft dough, that feels slightly sticky but does not stick to your finger much when prodded.
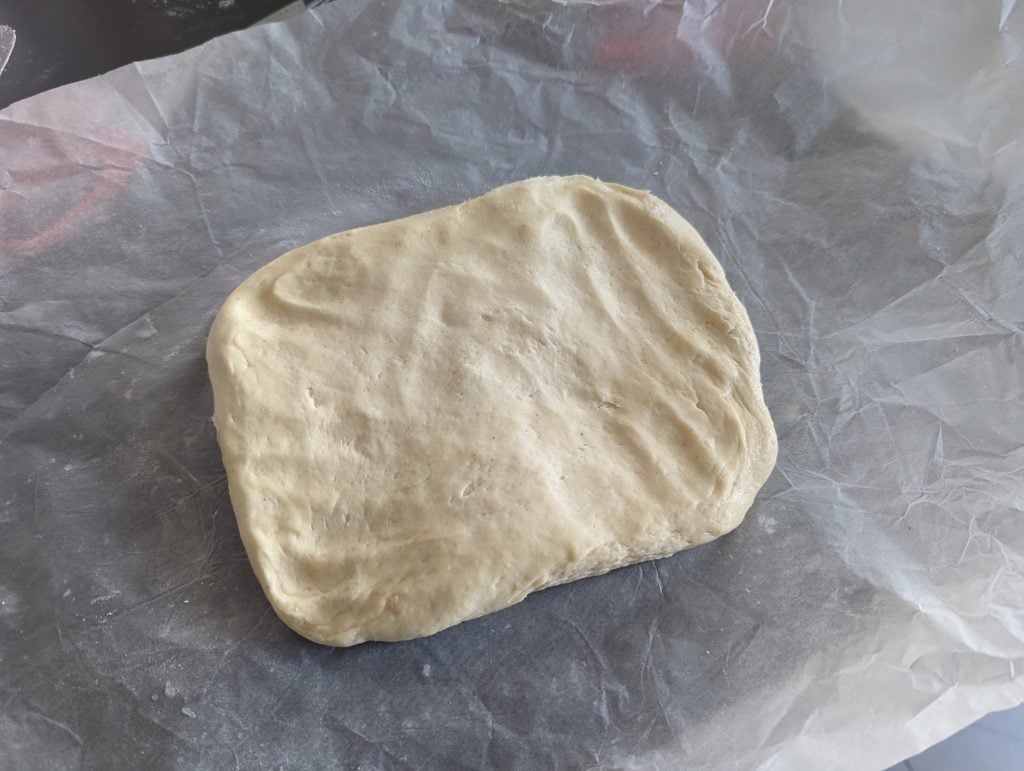
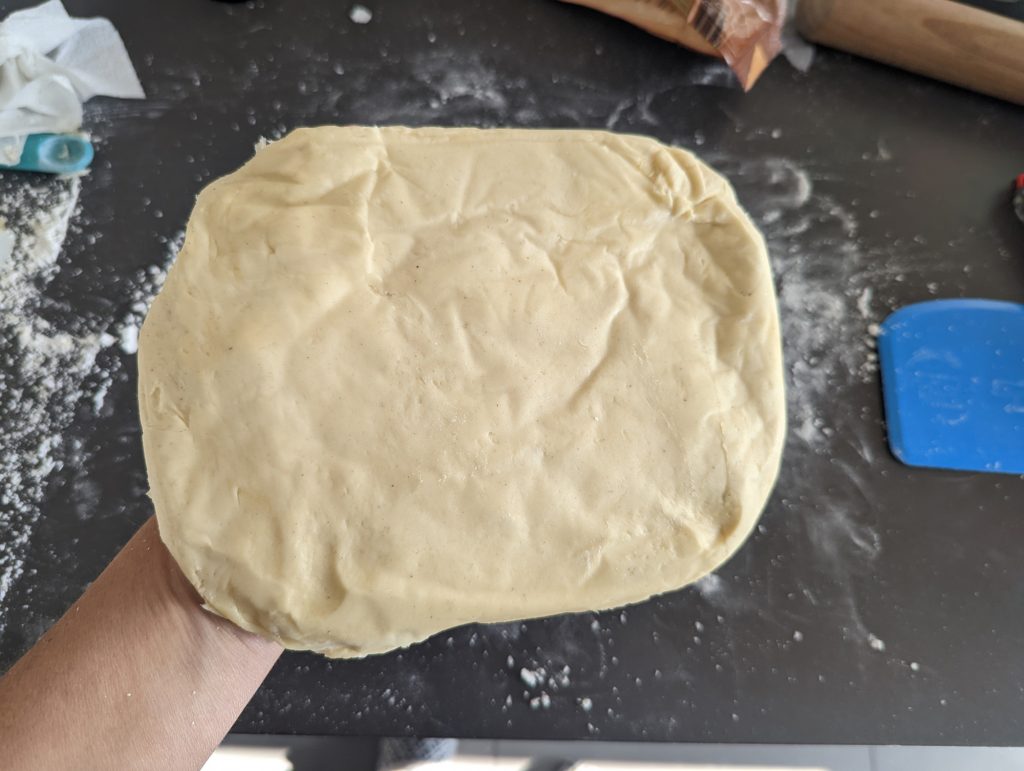
Take a large piece of non-stick baking paper (about 40cm/15 inches long) and place on your worktop. Using a dough scraper or spatula to scoop the soft dough onto the paper. Use your hands to shape it into a rectangle (you can dust slightly with flour if very sticky, but you should be okay without), about 2cm (0.75inch) thick. Then wrap completely in the baking paper and place in the fridge to chill for 30 minutes.
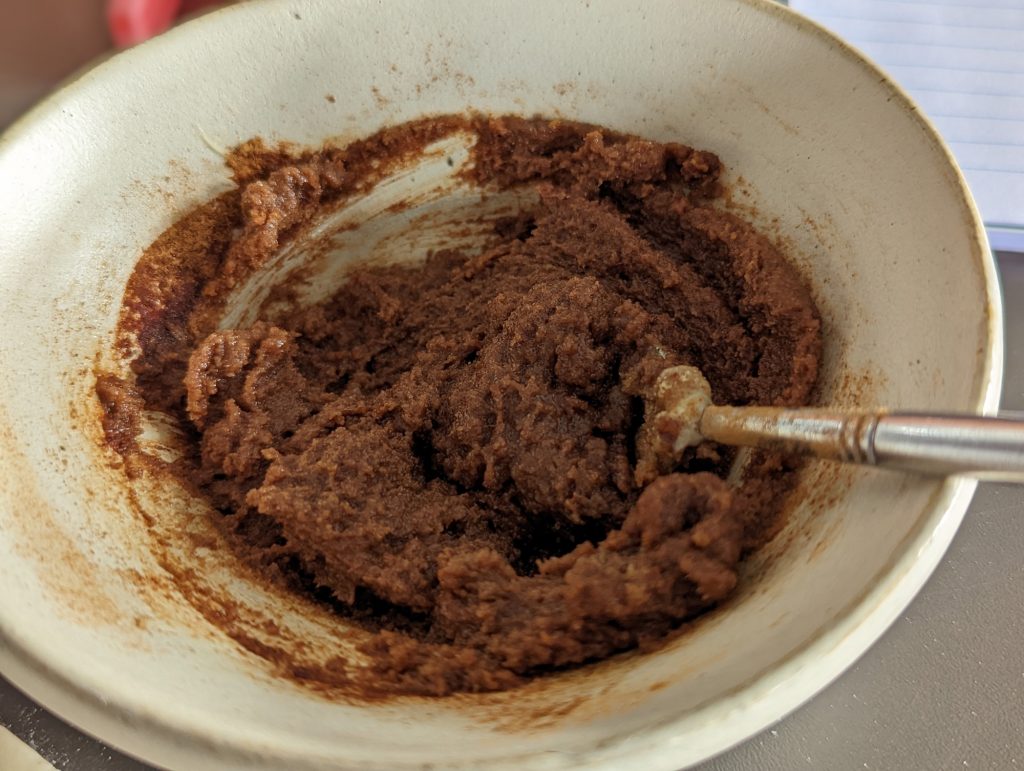
When chilling time is almost up, time to make the filling. Simply soften the butter until almost melting (I give it a quick blast in the microwave), then add the light brown sugar and cinnamon. Stir to create a thick paste. Set aside.
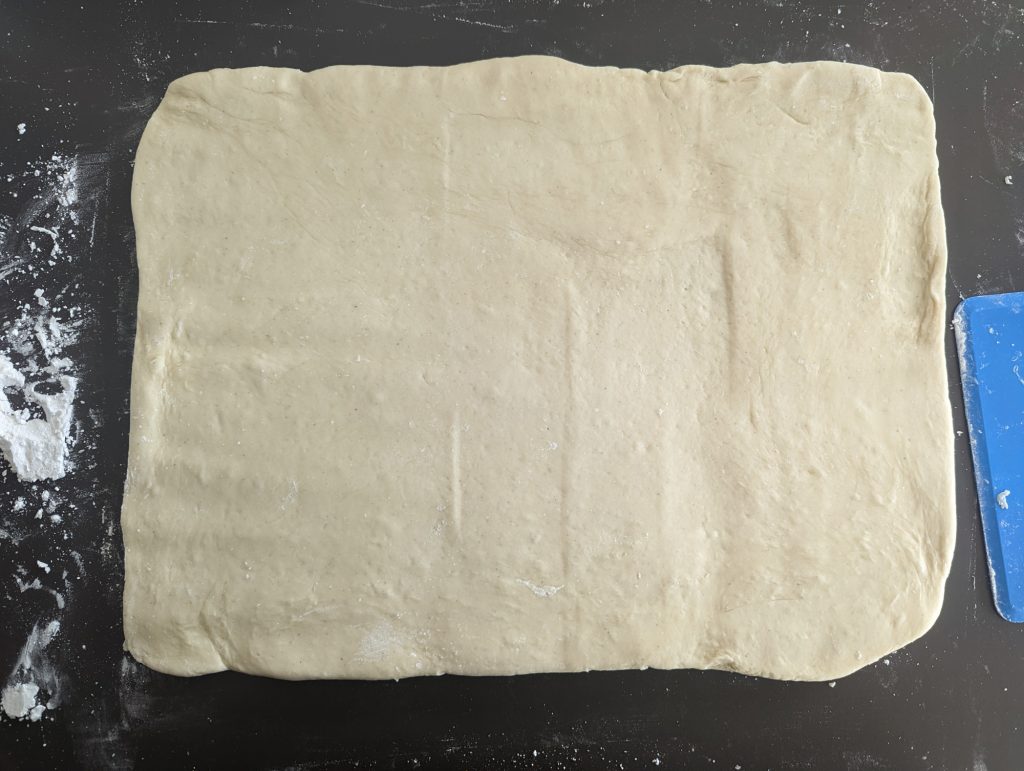
Now take your chilled dough out of the fridge and flour your worktop well. Use a rolling pin to roll the dough out into a large rectangle approx 25cm x 35cm (10x13 inch) in size.
Spread the filling all over the dough in a thin layer (see image below).
Now time to roll! Roll from the shorter edge, ensuring it is quite tight as you roll but not pressing it or compacting the dough. Until you have a nice cylindrical tube of dough (if you get any sticking to the worktop, just use a dough scraper to loosen as you go).
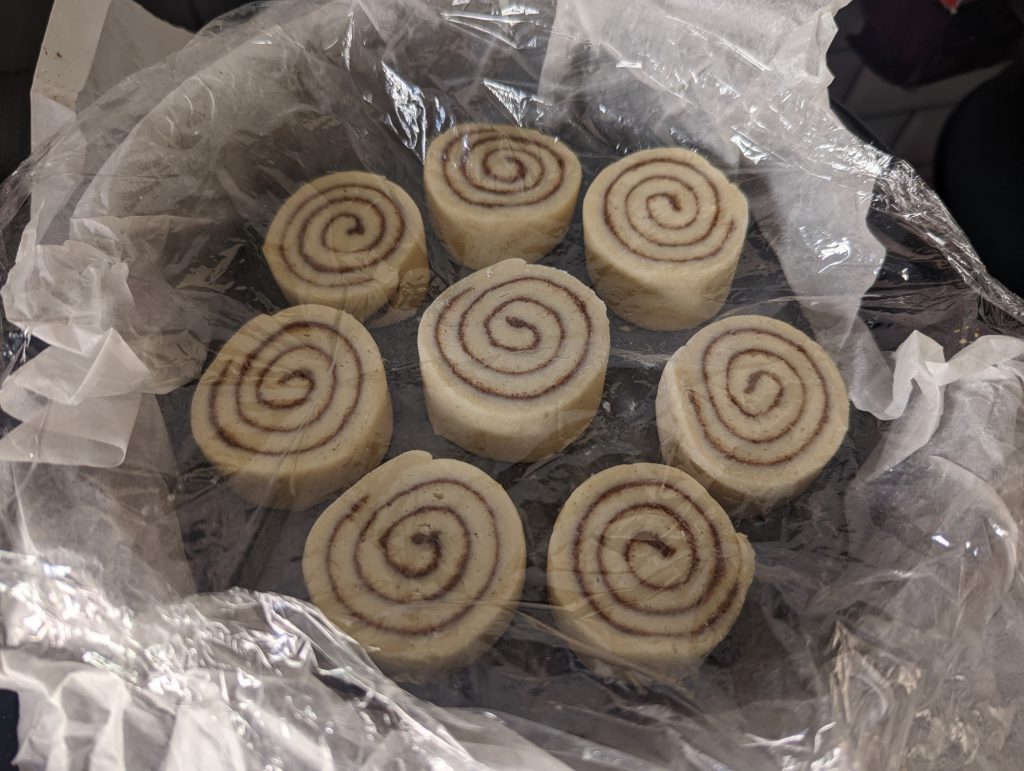
Line your baking tin (I use a 25cm/10 inch round tin - any shape or size is fine really, just ensure you allow a lot of space for the rolls to grow during proving and baking) with the greaseproof paper the dough was wrapped in. I simply shove the paper rather unceremoniously into the tin, ensuring the base and sides are covered, then tuck around the sides!
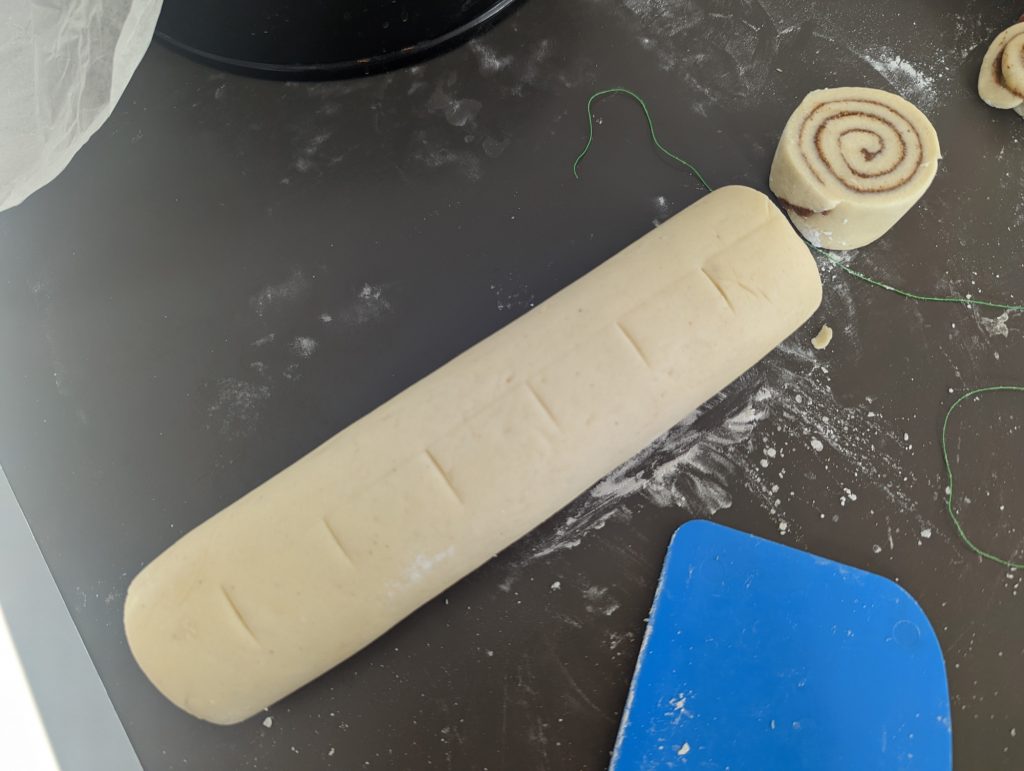
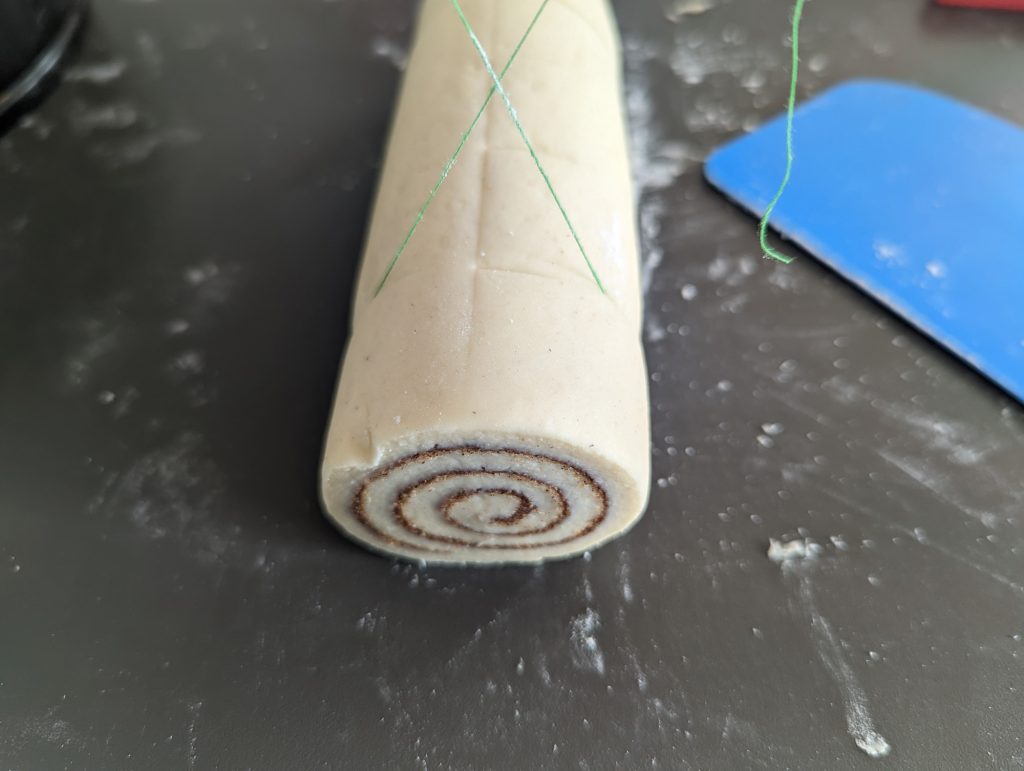
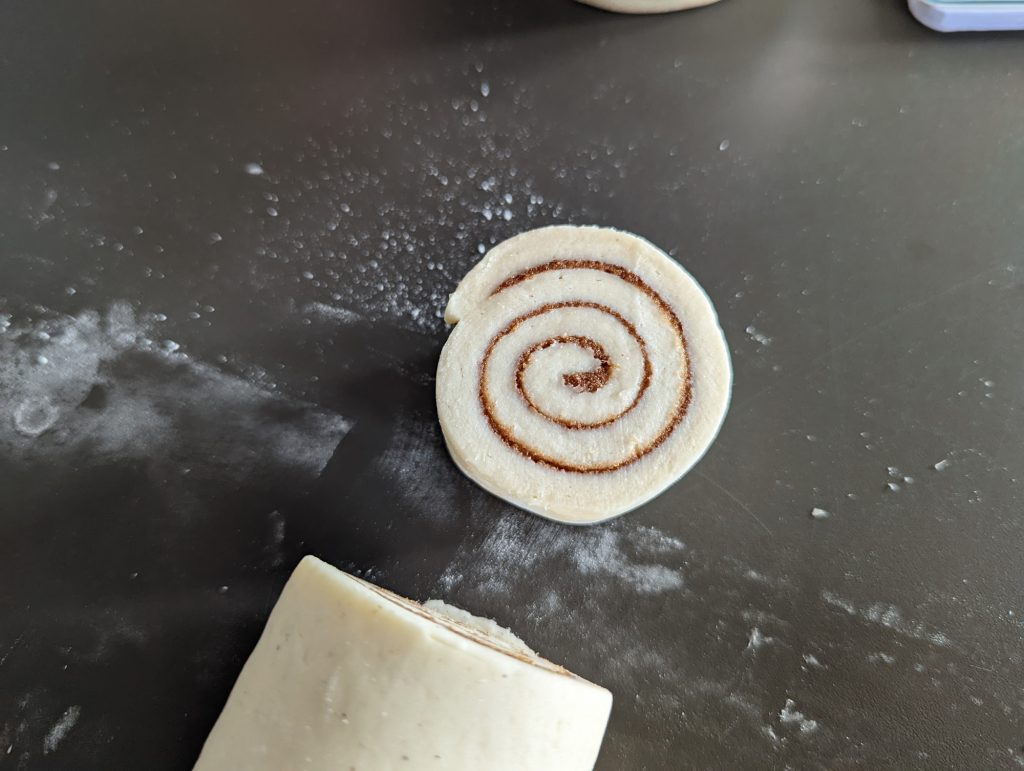
Time to slice into rolls - I use cotton thread to do this. First, make a small mark every 3cm (1.2inch) or so (assuming your dough is about 25cm/10 inch long) to show you where to cut - aim for 8 cinnamon rolls. Simply slide the thread under the dough to the point you want to cut the roll - then lift the sides around the dough and cross the strands above the dough . Pull the strands in opposite directions (to form a V shape) and allow them to cut through the dough (see image below). You can use a knife too, but it squashes the shape a bit and the thread method is so easy.
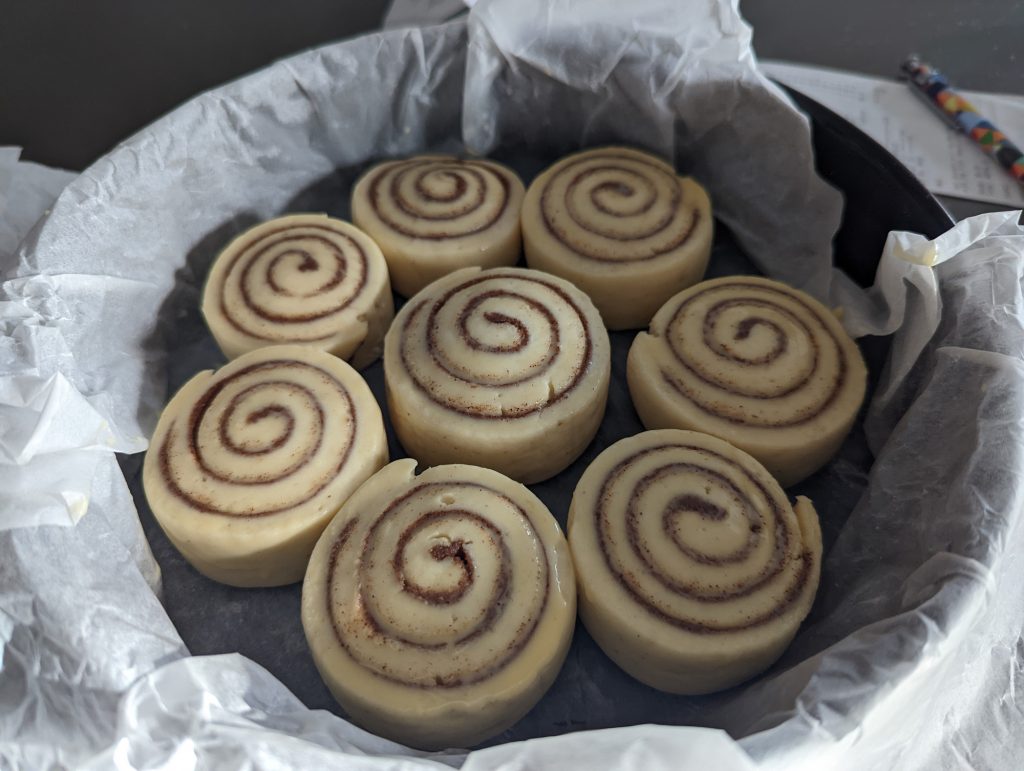
Place your rolls into the baking tin, spacing them well (they will at least double in size), cover with a piece of cling film and set in a warm place to prove for 1 hour.
When proving time has almost elapsed, preheat your oven to 175C (fan)/350F. The rolls should have puffed up nicely (about 40% increase in size). Time to bake!
Remove the cling film and bake for 20 minutes at 175C (350F), on the lower shelf of the oven.
While baking, you can make the frosting. Mix the cream cheese in a bowl until smooth, then add the sifted icing sugar and vanilla bean paste. Mix until smooth, then thin it slightly by adding the milk.
Once baked, slather the rolls with the cream cheese frosting (while hot) and enjoy immediately as a delicious treat! They are irresistible!
Notes
If you have an leftovers, they'll be quite nice and soft for a few hours after baking, but by the next day will need a little 30 seconds in the microwave to refresh and soften them.
Activating the yeastMaking the doughWet and dry ingredients combinedAdding the butterWith butter incorporatedShape and wrap to chillAfter chilling – easy to handleRoll to 25cm x 35cmMake the fillingSpread the fillingRoll, mark and sliceEasy thread slicing techniquePerfect sliced rolls!ProvingNicely puffed after provingHappy golden scrolls after bakingAdd frosting and enjoy!
For more heavenly gluten free bakes, why not try some of my other recipes while you are here: