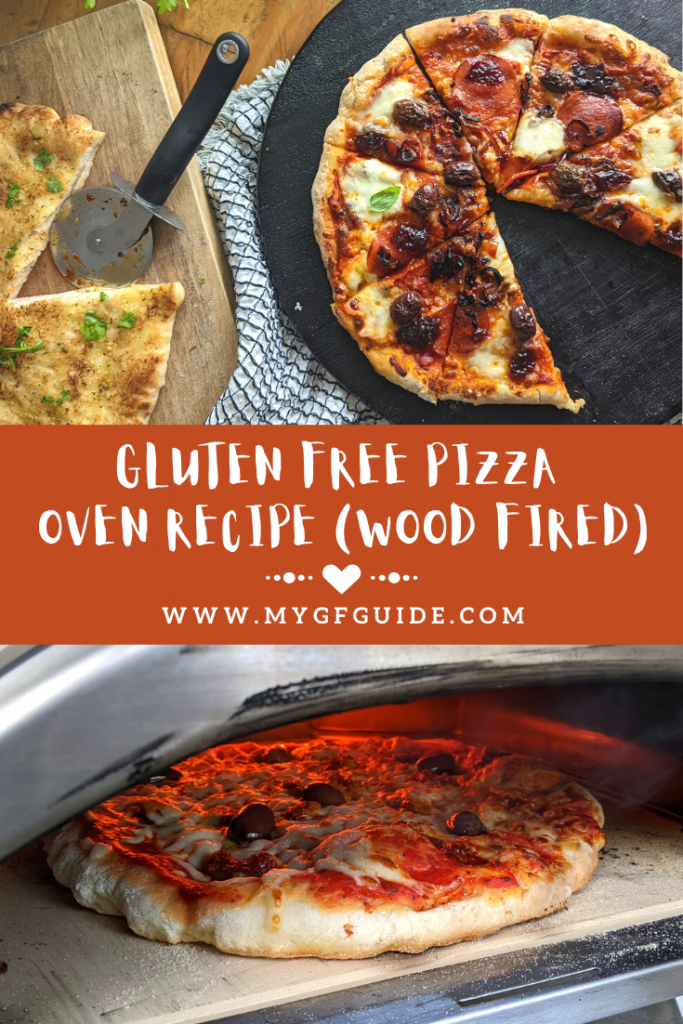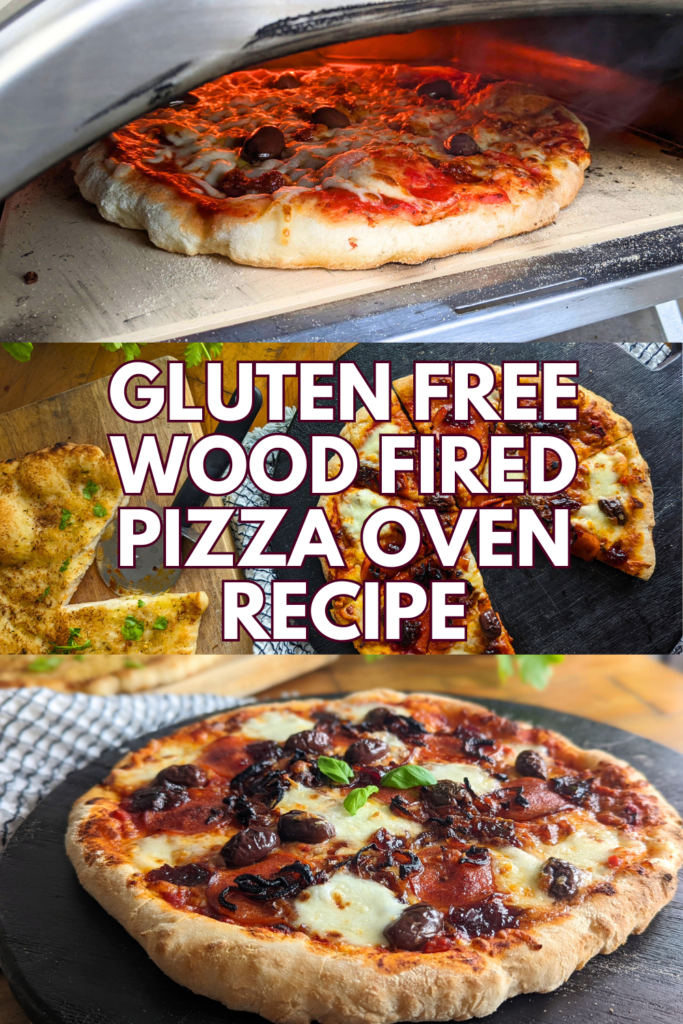
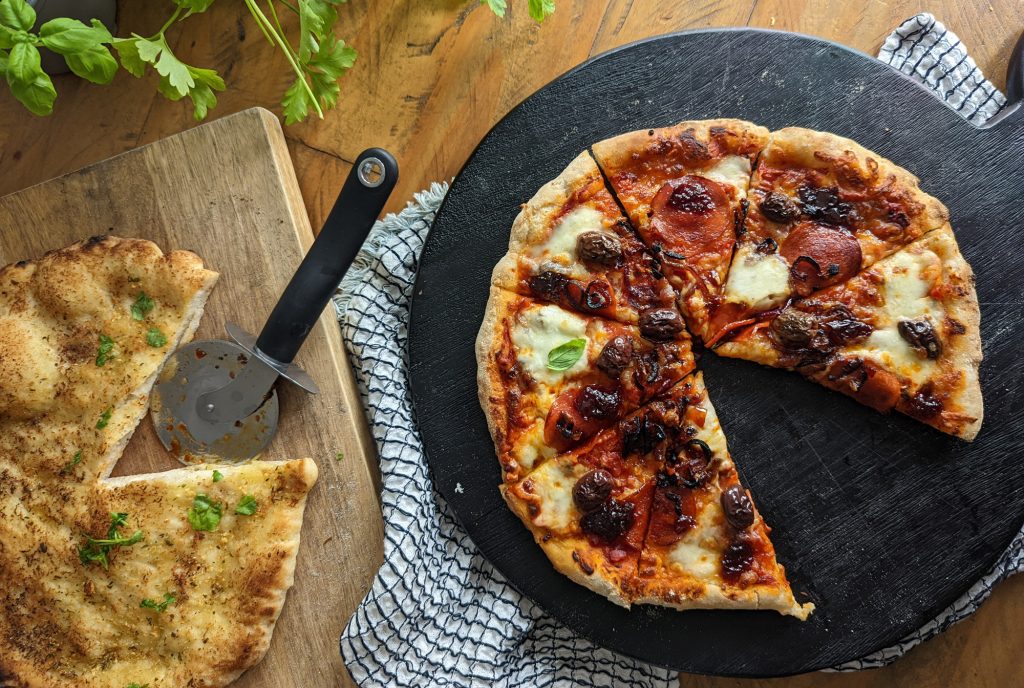
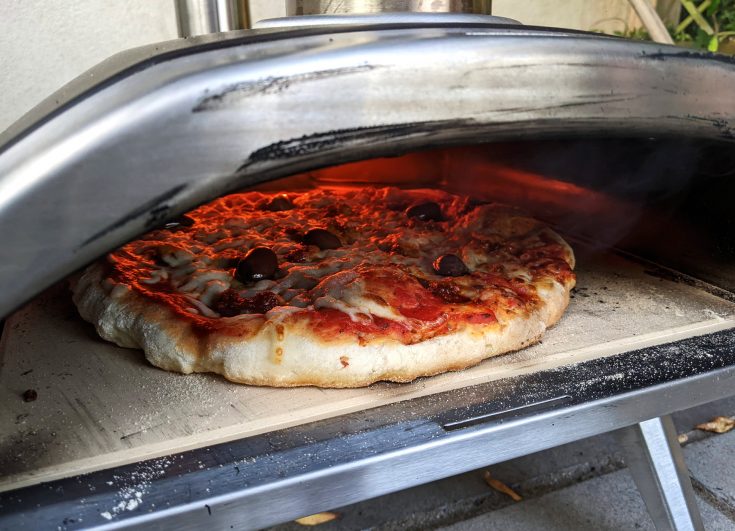
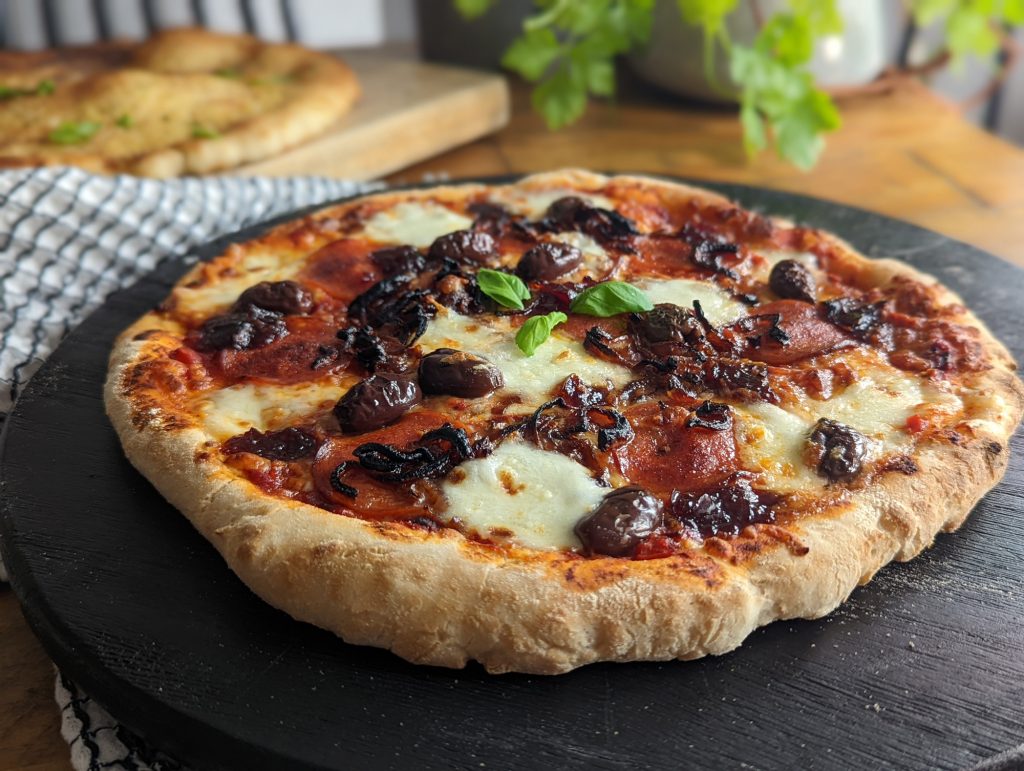
This week I made the best gluten free pizza of my life using my Ooni Pizza Oven! It was all puffy crusts, amazing soft yet pliable base, all round deliciousness. Better, in fact, than some of the pizzas I had on my recent trip to Italy (and those pizzas were goooood). I am in love.
And due to popular demand I decided to write a little recipe post. All about my experience of cooking gluten free pizza in a wood fired oven.
If you don’t have a pizza oven and want to make pizza in a conventional oven, don’t fret! I’ve a wonderful gluten free pizza recipe you can use, which I worked hard on to get just right. You could also give this recipe a try in your oven, although it won’t quite get the same puff you get from the heat of a pizza oven.
As for the rest of you, who already own or are thinking about getting a pizza oven, read on.
Which Pizza Oven Did You Use?
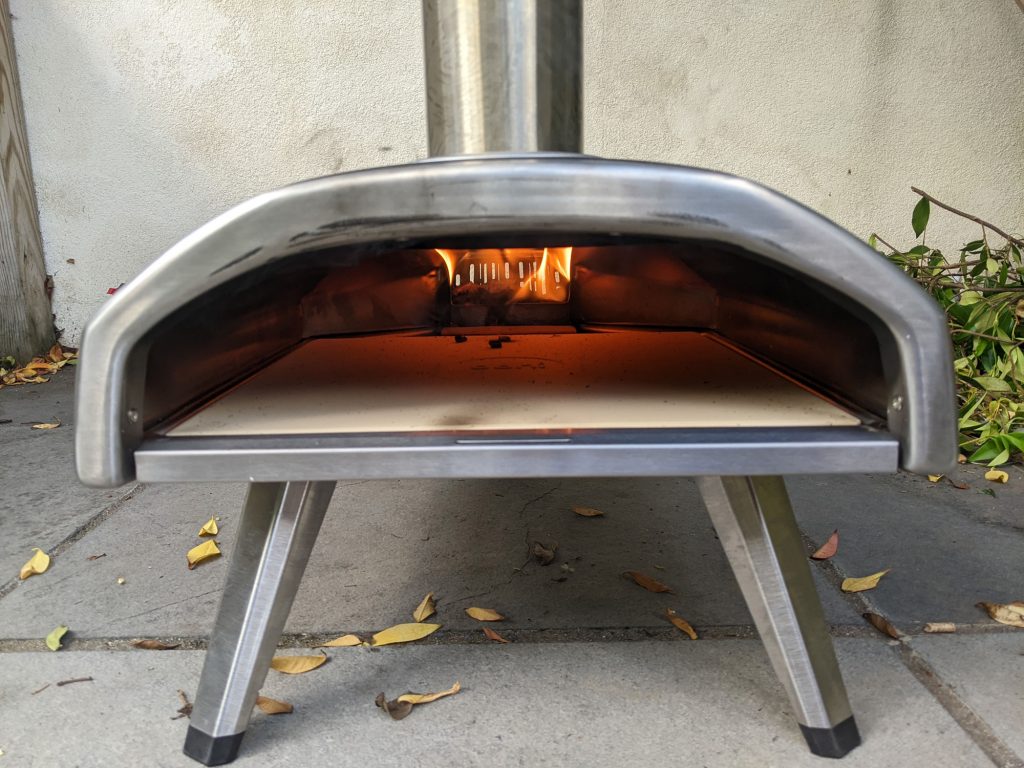
I have an Ooni Fyra 12 Wood Pellet Pizza Oven, which my husband bought me for my birthday last year. It took me a shamefully long time to get it out of the box! I love it already.
Once I fired it up and started using it though, I went a bit pizza mad and made them constantly for two days. All sorts of topping variations, garlic pizza bread too, and all trying slightly adjusted base recipes.
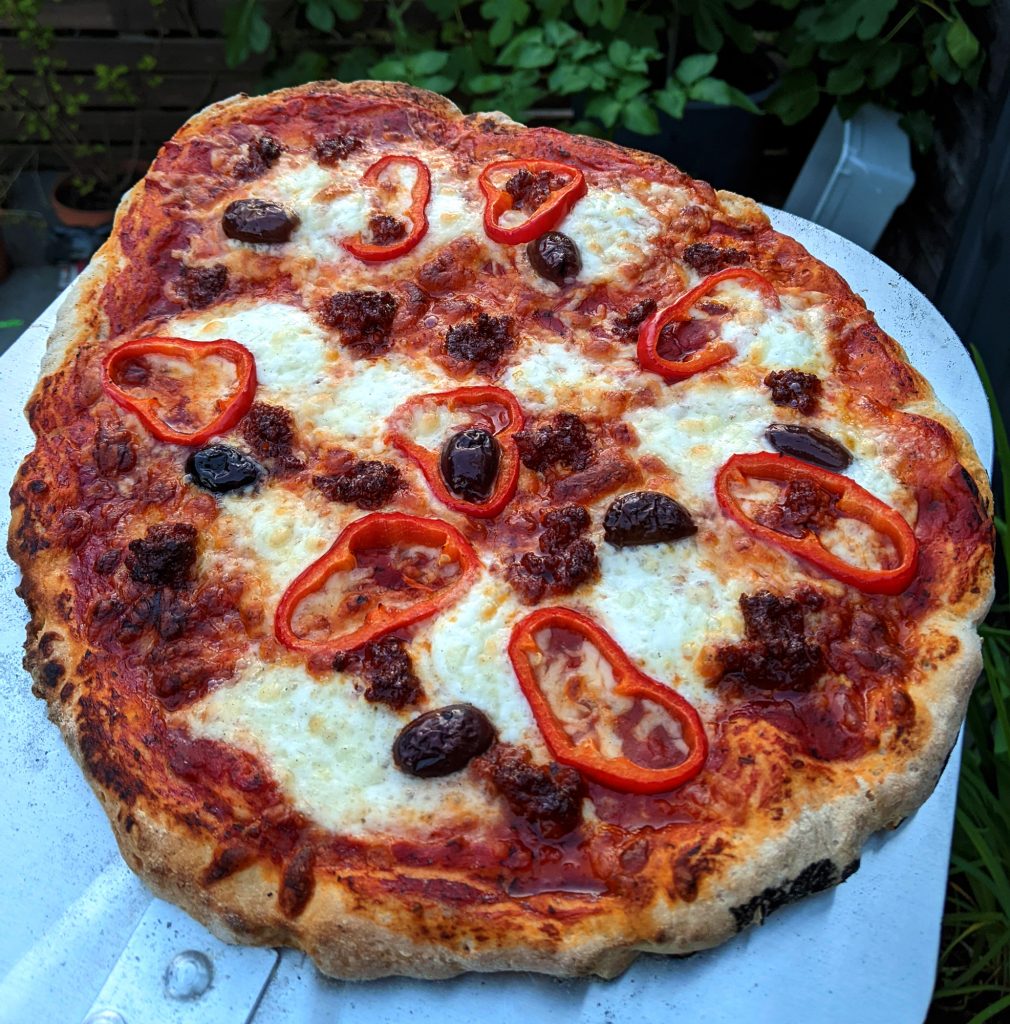
The end result – pizza that even my gluten eating friends were loving. Saying they would never guess it were gluten free!
Tell More More About this Gluten Free Wood Fired Pizza Recipe, Laura!
Well, I quickly found my oven pizza base was not robust enough for the pizza oven…a burnt cowpat is probably the best thing to compare it too (sadly no pictures as I was laughing too much).
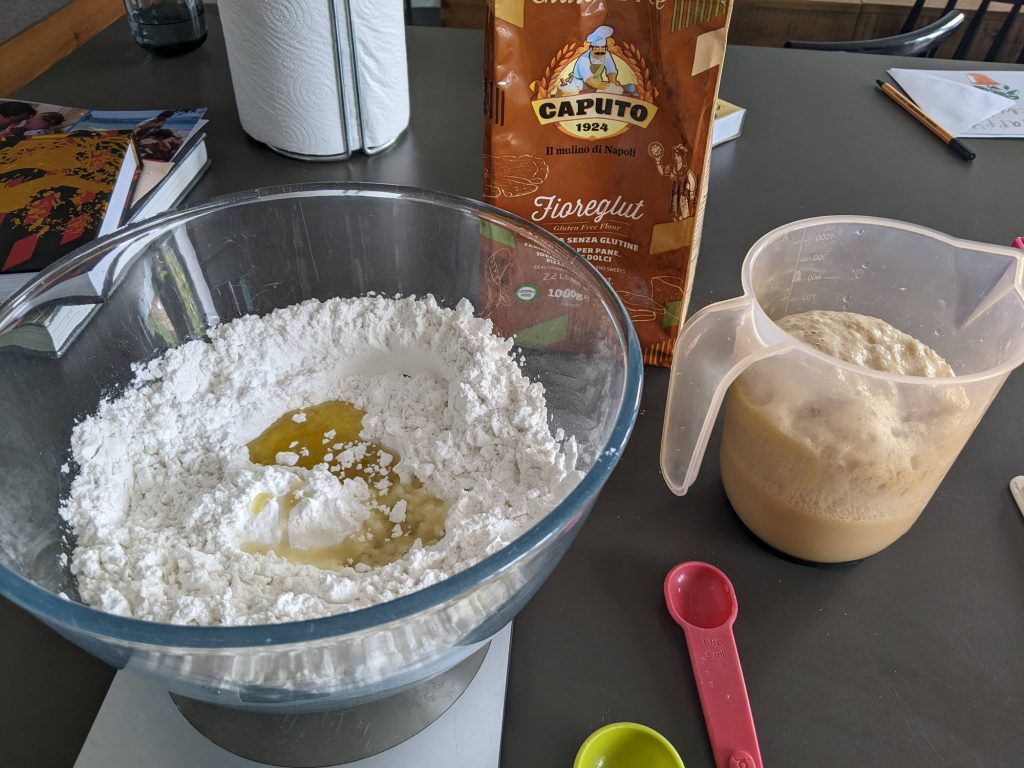
However, LOTS of people had recommended Caputo gluten free flour to me the last couple of years, so I decided to see what the fuss was all about. As soon as I started using it I could see why. It is fantastic.
There’s already a gluten free pizza recipe on the Caputo packet, plus Ooni have their own online. However, they weren’t quite right for me and made pizzas too big for the size of my oven (unless I left the dough very thick).
Plus the packet recipe is a bit vague, so I thought as really exact gluten free wood fired pizza oven recipe would be helpful to share. I tweaked flour and water ratios, played with proving times, and I think I’ve hit upon a winning combo.
Where Can I Buy Mulino Caputo Gluten Free Flour?
You can buy it online, and its available from multiple retailers. I bought mine from a website called Fifo in the end, as it was the best price.
Plus it was sold out on my fave foodie website Souschef. You can buy from loads of other places too, including Amazon and Gluten Free Grocer.
Keep an eye out in speciality Italian delis too, as these local shops sometimes stock it.
It’s expensive flour, but with my recipe you can get 5 pizzas from one bag, which works out as excellent value. Especially considering the quality of the pizza dough and how filling it is.
Please note it contains deglutenated wheat starch, which is completely safe for coeliacs, but NOT for wheat allergy sufferers. If you have a wheat allergy please try my oven pizza recipe instead – it’s wheat free and awesome!
Other Tips
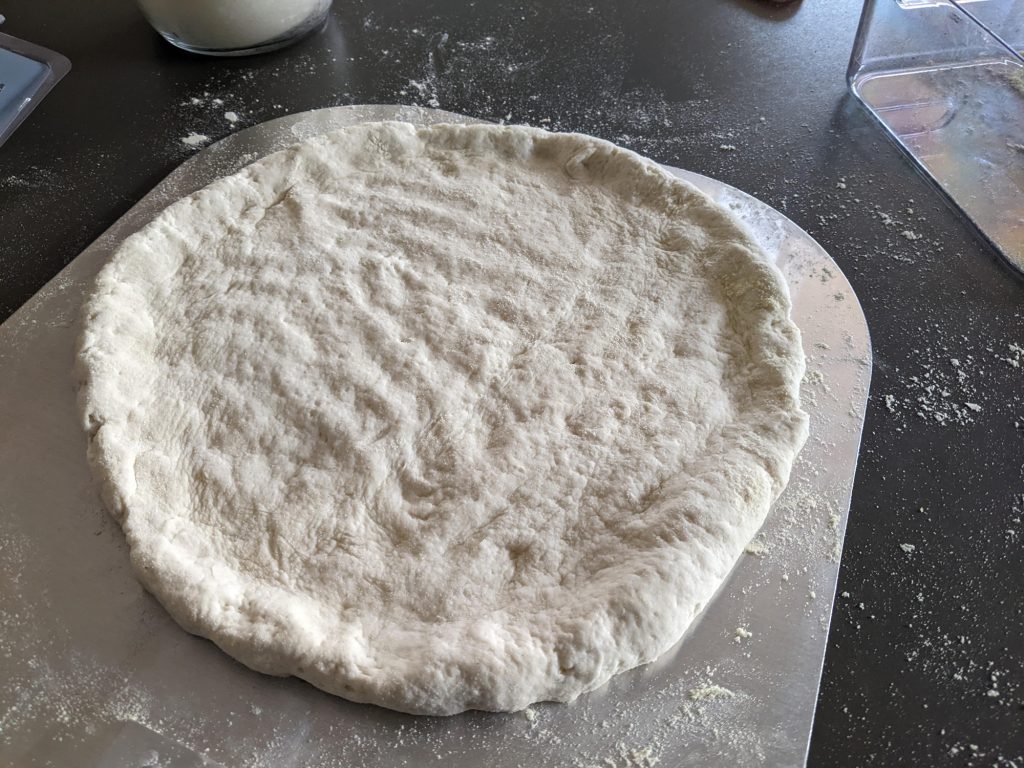
A key source of annoyance for people, was finding their gluten free pizza getting stuck to the pizza peel. My solution for this – lots of flour! This will help it glide off the peel and into the pizza oven.
I used corn meal, which is like a very fine ground polenta. It has a tasty flavour and doesn’t burn as quickly as regular gluten free plain flour. Note corn meal is NOT the same as corn flour.
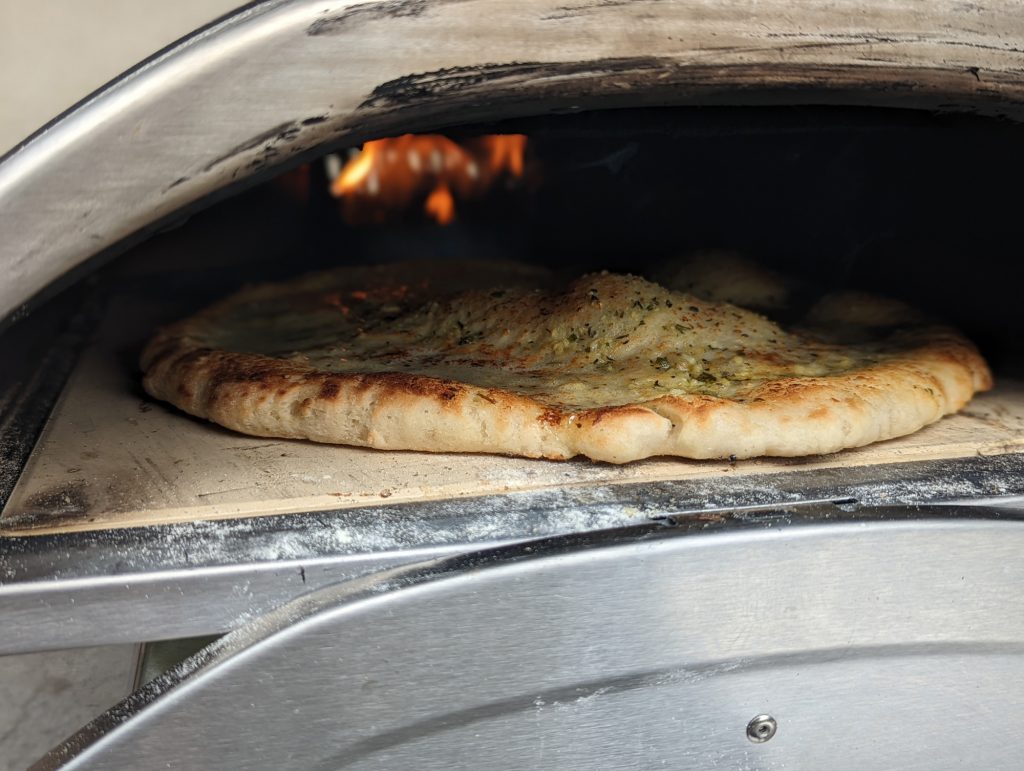
One last tip, you can also use this dough to make amazing garlic pizza bread! Simply top with garlic butter and then bake.

My Gluten Free Pizza Experiments Will Continue!
I’m still in the early stages of my Ooni journey, so I’ll be adding to the blog post as and when I make improvements. I’m soooooooooo sooooooo happy with the recipe as it stands, but things can always get better :).
Proving and hydration times can vary and be flexible to suit you, so I will try as many out as I can to confirm what does and doesn’t work.
Can I Prove for More/Less Time? Do I Have to Refrigerate the Dough?
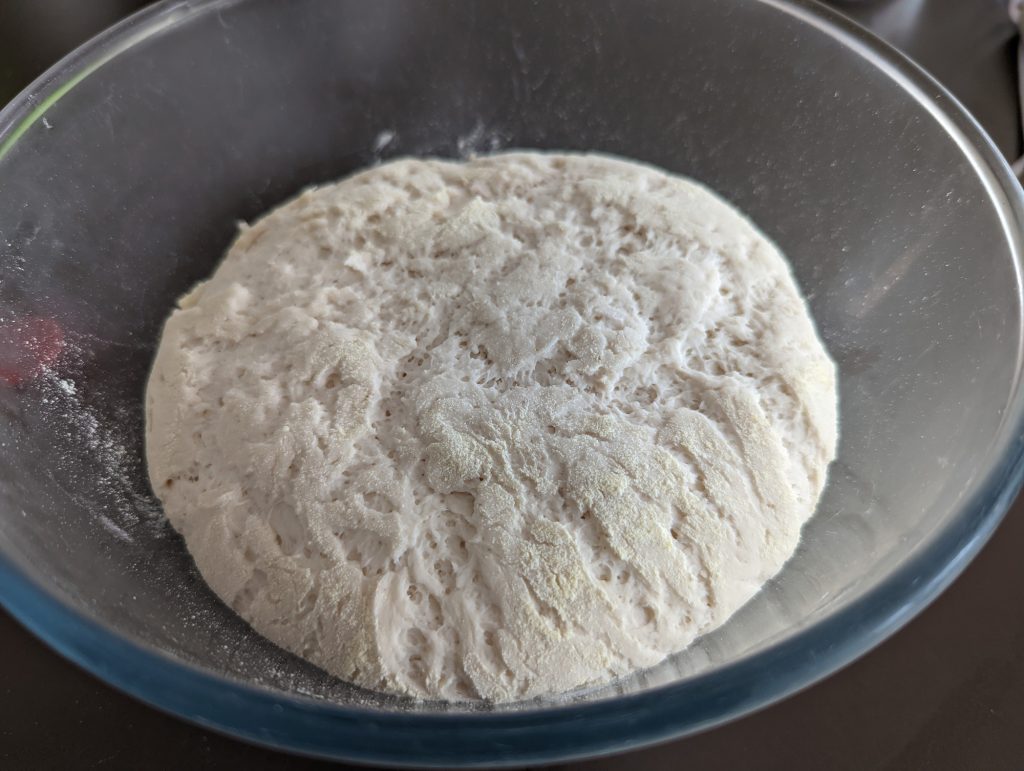
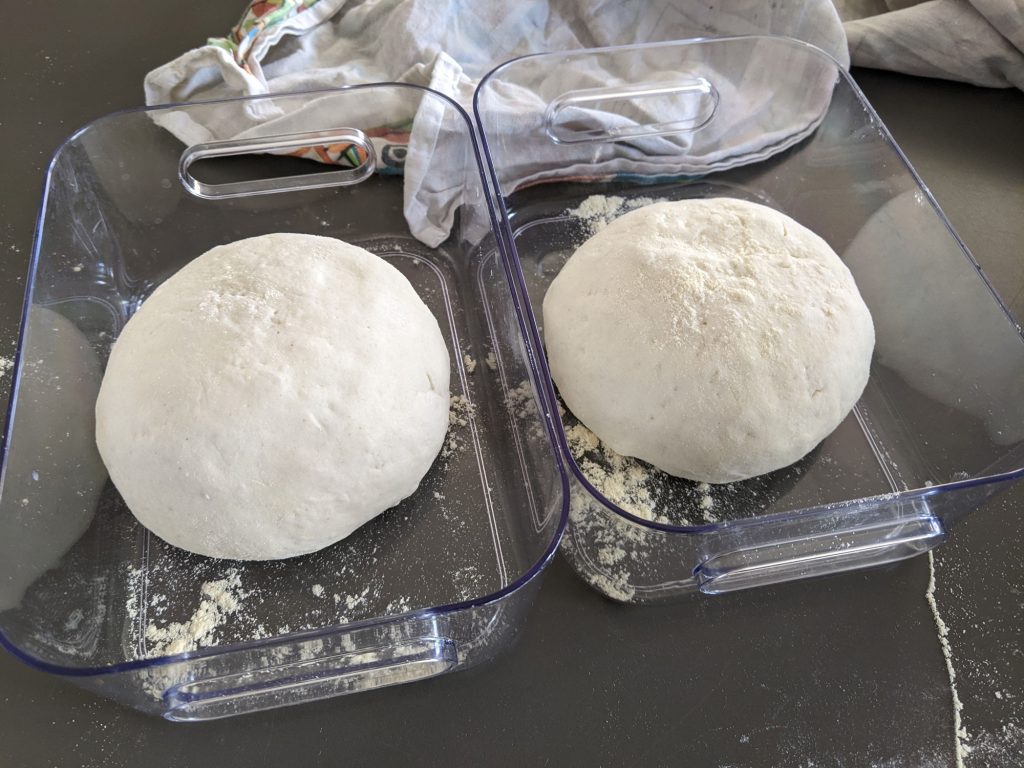
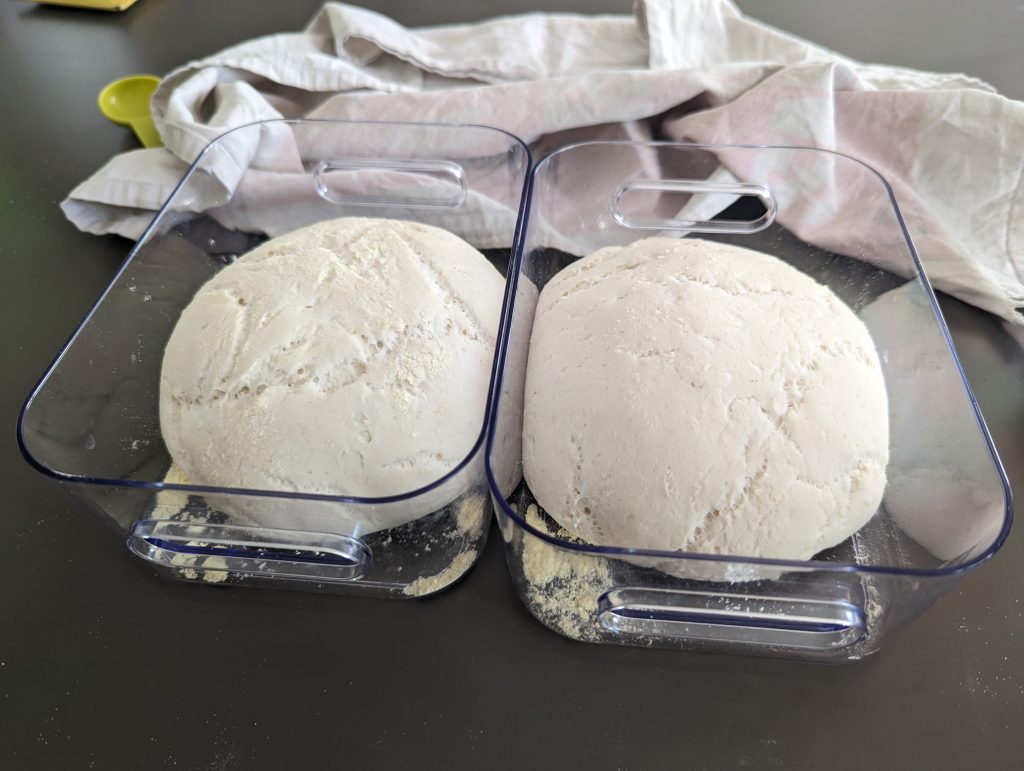
I think there’s complete flexibility here. My best pizzas involved a couple of hours of chilling (and the bonus of this is that you can prep the dough in advance, then keep until needed), but a warm prove also worked fine.
Do I Need to Prove the Dough Twice?
Again, my best results involved a double prove, but a single prove should be fine too. So long as it properly doubles in size.
My Ooni is Gas Fired, Can I Still Use This Recipe?
Yes it should work exactly the same. However, I’ve not tried cooking in a gas fired pizza oven personally.
Wood Fired Gluten Free Pizza Oven Recipe (Makes 1 Pizza)
*Please note, this recipe is not suitable for wheat allergy sufferers as the Fioreglut flour contains gluten free wheat starch (fine for coeliacs – see Coeliac UK if you’d like to read more). If you have a wheat allergy, please try my oven pizza recipe instead.*
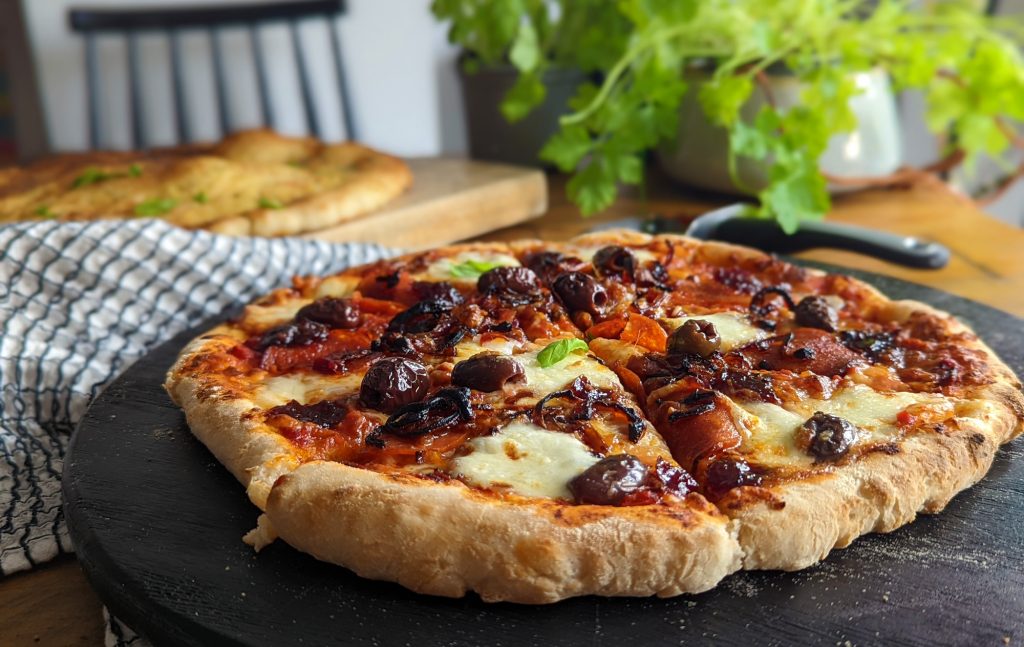
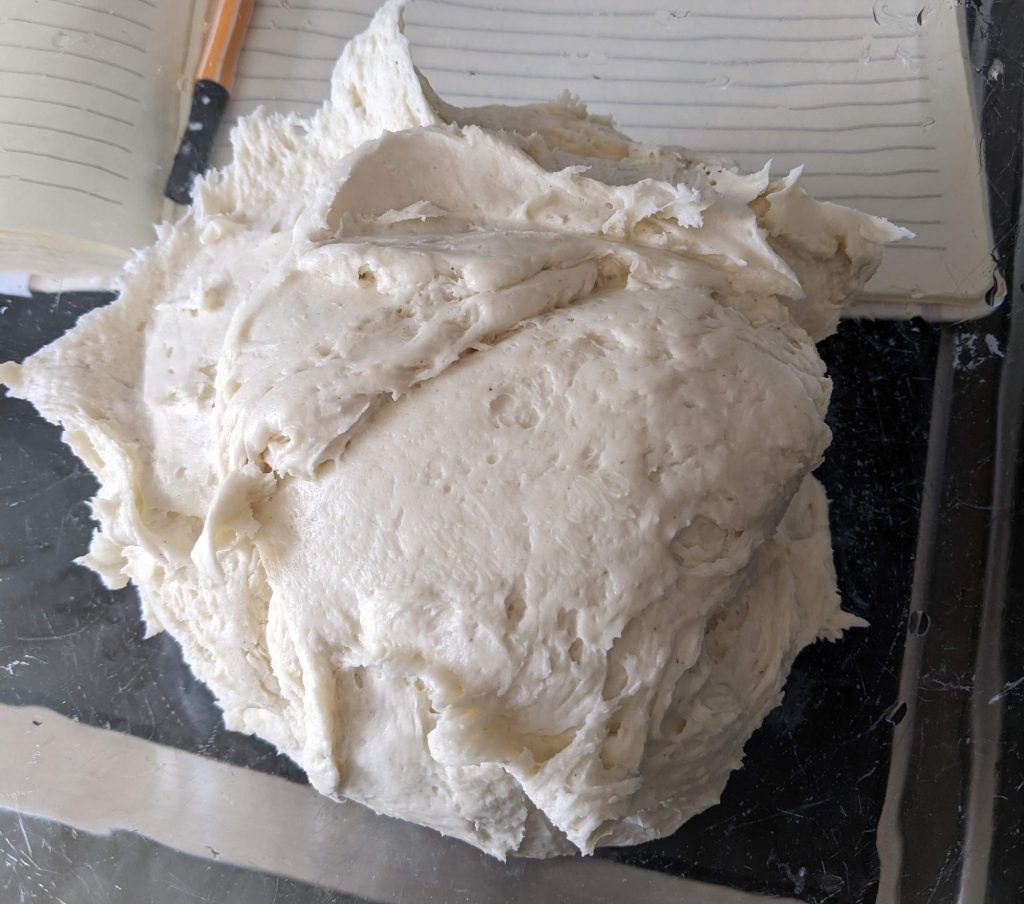
Right, let’s crack on with the recipe! My recipe makes one pizza, so you can easy double, triple, quadruple it if you want to make more. For multiple pizzas, simply make in one bowl, then split the dough into individual portions for the second prove. I always make at least two at a time, as you’ll see from the images below.
You will find some handy pictures underneath the recipe. For any help along the way or if you have questions, please do message me on social media (@myglutenfreeguide) or email me at laura@mygfguide.com.
If you do enjoy this gluten free pizza oven recipe, please leave a review on the recipe card below. It makes a world of difference to me :). And you can also share photos of your home creations in my Cooking Club on Facebook.
Enjoy! Laura xxx
Gluten Free Pizza Oven Recipe
Make perfect gluten free pizza in your pizza oven. With proper puffy crusts and a wonderful base, you'll be doing a little happy dance when you eat it! Developed and tested using an Ooni wood fired pizza oven.
Ingredients
- 6g dried active yeast
- 1 tsp caster sugar
- 150ml warm water
- 1.5 tbsp olive oil
- 1.5 tsp fine salt
- 200g Mulino Caputo Fioreglut gluten free flour
- Extra flour for dusting - I use gluten free corn meal (gf plain flour or rice flour also fine)
- our choice of pizza sauce and toppings - reduced tomato passata makes a good sauce, as does pesto, then for cheese I use both/either fresh mozzarella or grated mozzarella.
Instructions

I hope you enjoy this gluten free pizza oven recipe! I’m such an Ooni convert I plan on eating a lottttt of pizza this year.
For some tasty treats to follow your pizza-fest, why not try one of these gluten free recipes:
Happy Cooking! Laura xxx
*This article contains some affiliate links, meaning no additional cost to you. They enable me to keep running www.mygfguide.com as a free website that is open to all :).