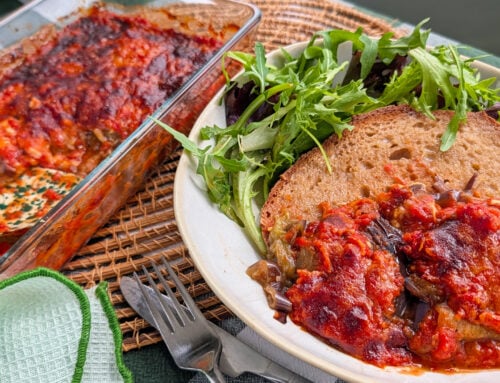
Making gorgeous bakes like these gluten free chocolate & banana buns is such a wonderful treat. The type of food we don’t often get to have when following a gluten free diet.
These buns are soft and squishy, with mashed banana running through the dough, with a glorious swirl of hazelnut chocolate spread and chocolate chip topping. Oh so good.
These are best enjoyed while still warm from the oven. However, they do stay quite soft once cooled. If you’ve any leftovers the following day, you can refresh them in the microwave (I’ve been enjoying them after a 30-60 second refresh in the microwave).

What Ingredients Do I Need For These Gluten Free Chocolate & Banana Buns?
You will need milk, plain gluten free flour (I use the FREEE by Doves Farm blend), tapioca starch, mashed bananas, dried active yeast, caster sugar, psyllium husk, salt, egg, baking powder and butter.
Then the chocolate spread of your choice for the filling – I use the Bonne Maman Hazelnut Chocolate Spread, as it is palm oil free.
Finally chocolate chips and a little sugar glaze (simply caster sugar and water) for the topping.

Where Do I Get Tapioca Strach and Psyllium Husk?
If you do not have tapioca starch you can buy it online or find it in health food shops, and even Ocado sell it. I buy it from Shipton Mill. It’s a wonderful gluten free flour to have in your storecupboard and I use it in many of my bread recipes.
As for psyllium husk, this is our magic ingredient for this recipe and it really essential – do not skip it. It is a naturally-dervived fibre and it helps to give flexibility to gluten free bread, acting as a binder and improving the final texture of your bake.
Whole psyllium husk is widely available online and from health food stores. I buy this variety of psyllium husk, rather than the powered variety as that acts slightly differently (and can turn your bakes a purple hue!).

Gluten Free Chocolate & Banana Buns Recipe
Okay let’s get to the recipe! It will make 10 chocolate and banana buns, and they are best enjoyed fresh from the oven. If they aren’t all immediately scoffed, save them in an airtight container and warm them to refresh.
You will find some step by step photos underneath the recipe, to give you a visual guide. For any other help along the way or if you have questions, please do message me on social media (@myglutenfreeguide) or email me at laura@mygfguide.com.
If you enjoy these gluten free chocolate & banana buns, please leave a review on the recipe card below. It makes a world of difference to me :). And you can also share photos of your home creations in my Cooking Club on Facebook.
Laura xxx

Gluten Free Chocolate & Banana Buns
Lovely soft banana and chocolate buns - swirled like cinnamon rolls. Gluten free and a wonderful bake to enjoy.
Ingredients
- 320ml semi-skimmed or whole milk
- 7g dried active yeast
- 1 tsp + 60g caster sugar
- 20g psyllium husk
- 480g plain gluten free flour (I used FREEE by Doves Farm)
- 100g tapioca starch
- 0.5 tsp fine salt
- 2 tsp baking powder
- 160g mashed ripe banana (approx 1.5 bananas, but please weigh)
- 1 large egg
- 60g unsalted butter, softened
- 250g hazelnut chocolate spread (I used Bonne Maman)
- 100g milk chocolate chips
- To glaze: 1 tbsp caster sugar + 1 tbsp water
Instructions
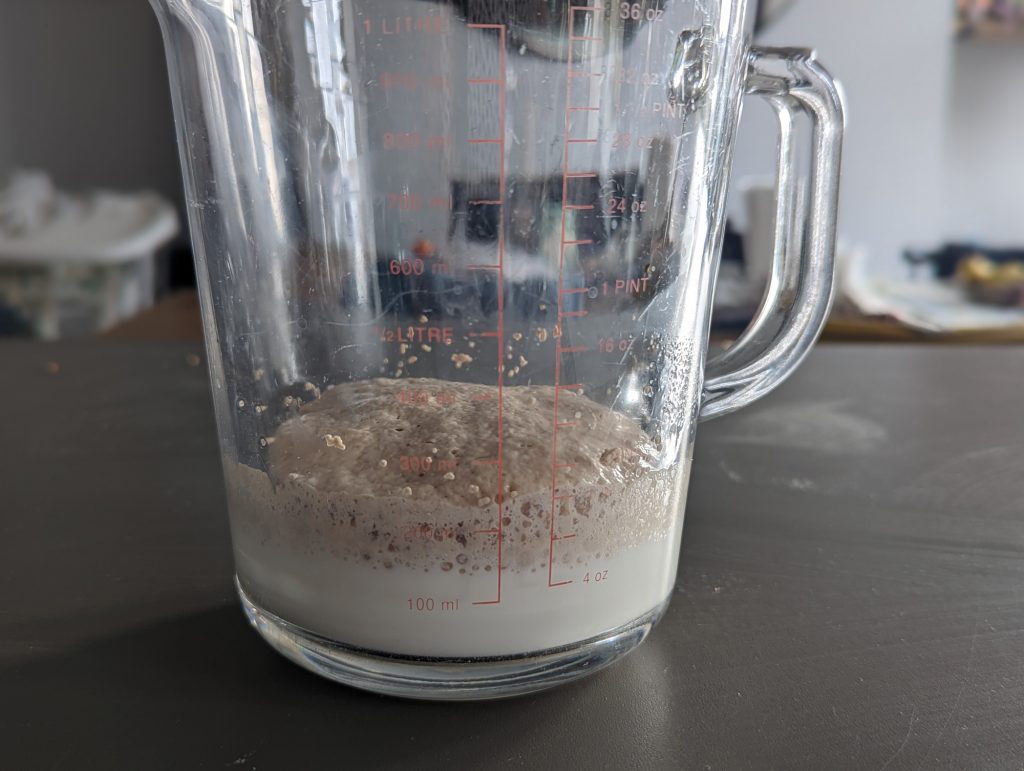
- First we'll start by activating the yeast. This handy step will ensure we know our yeast is definitely active. Simply, pour the milk into a jug and heat in the microwave for 30-40 seconds, until slightly warm. Add the tsp sugar and yeast to the jug, stir, then set aside for 10 minutes. After this time it should have a layer of foam on the surface (if not, your yeast is inactive and you'll need to start again with fresh yeast).
- Tip the psyllium husk into the jug with the yeast and stir through - leave to sit for 10 minutes, stirring halfway through. It will thicken the liquid into a gel.
- Meanwhile, prepare your dry ingredients. I really recommend using a stand mixer with dough hook if you have one. If not, prepare those arm muscles for some serious stirring! Tip the plain flour, tapioca starch, 60g caster sugar, salt and baking powder into the bowl and stir well to combine.
- Pour the contents of the jug into your stand mixer, along with the egg and mashed banana, and mix for about 3 minutes until you have a smooth dough.
- Cut the softened butter into small chunks and add to the mixer bowl. Mix for about 5 minutes, until the butter is completely incorporated into the dough. You should end up with a very soft, slightly sticky dough.
- Take a large piece of non-stick baking paper (about 40cm/15 inches long) and place on your worktop. Rub it with a little oil (sunflower/rapeseed/olive) to stop the douhg from sticking to it then use a dough scraper or spatula to scoop the soft dough onto the paper. Use lightly oiled hands to shape it into a rectangle, about 2cm (0.75inch) thick. Then wrap completely in the baking paper and place in the fridge to chill for 30 minutes.
- Take your chilled dough out of the fridge and lightly oil your worktop. Use a rolling pin to roll the dough out into a large rectangle approx 30cm x 40cm in size.
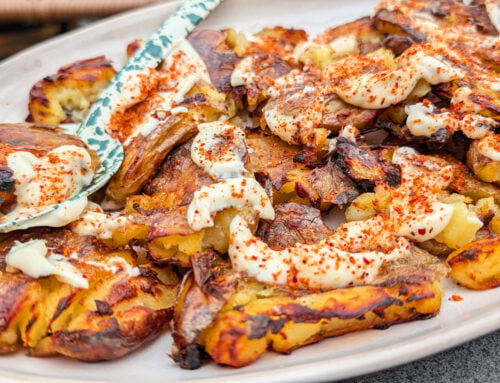
- Spread the chocolate spread all over the dough in a thin layer (see image below), leaving a 2 cm gap at one of the shorter sides. And scatter two thirds of the chocolate chips over the chocolate spread. Now time to roll! Roll from the shorter edge (the side where the chocolate spread goes right up to the edge), ensuring it is quite tight as you roll but not pressing it or compacting the dough. Until you have a nice cylindrical tube of dough (if you get any sticking to the worktop, just use a dough scraper to loosen as you go).
- Line your a large roasting tin or a baking tray with sides (any shape or size is fine really, just ensure you allow a lot of space for the rolls to grow during proving and baking) with the greaseproof paper the dough was wrapped in. I simply shove the paper rather unceremoniously into the tin, ensuring the base and sides are covered, then tuck around the sides!
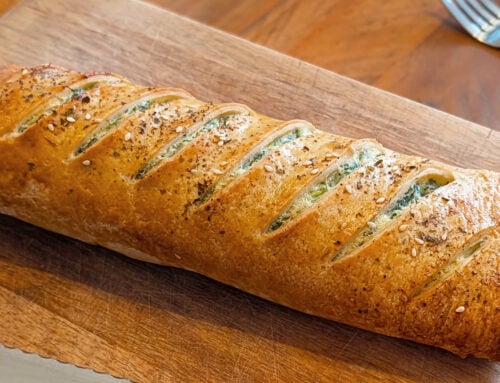
- Time to slice into rolls - I use cotton thread to do this. First, make a small mark every 3cm or so (assuming your dough is about 30cm long) to show you where to cut - aim for 810 buns rolls. Simply slide the thread under the dough to the point you want to cut the bun - then lift the sides around the dough and cross the strands above the dough . Pull the strands in opposite directions (to form a V shape) and allow them to cut through the dough. You can use a knife too, but it squashes the shape a bit and the thread method is so easy.
- Place your rolls into the baking tin, spacing them well (they will almost double in size), cover with a piece of cling film and set in a warm place to prove for 1 hour, or until they've increased in size by 50%.
- Once proved, it's time to bake! Remove the cling film and bake for 25 minutes at 180C, on the lower shelf of the oven. Then remove from the oven, brush with the glaze (the tbsp sugar and water mixed together) scatter with the remaining chocolate chips and enjoy!
Notes
Any leftover rolls can be frozen for a later time, or simply refreshed in the microwave the next day - about 1 minute per roll (do them one at a time). They are best on the day of baking but I have enjoyed eating them up to 3 days later, refreshed.


For more heavenly gluten free bakes, why not try some of my other recipes while you are here:
Happy baking! Laura xxx